How Do I ... Create Redirects for Pages People May Have Bookmarked
If you have migrated a site from the old CMS (Percussion) to the new (Adobe Experience Manager, AEM) in Ensemble, then you've seen some changes to how things are done with what people would be familiar with as folders and files and how they relate to web URLs. Anything in the file structure of the new CMS is both a file and a folder so the need for multiple index.html file is no longer needed. We have kept the traditional index.html for the main home page of each site, but index files are no longer needed anywhere else. This presents both an opportunity and a challenge. The opportunity is to streamline the URL and file system of our served web content by not needing that extra file in every folder, and a challenge for those that have bookmarked pages in our content that we do not want to break (you could break away from the process described in this article, but you would want to create custom error pages that would explain the change, and that the user re-bookmark the page they were going to once they reach the new URL for it).
NOTE: This process can be done with any item. Some sites used a duplicate name instead of index.html, e.g., /discussion/discussion.html. Since the last discussion.html is no longer needed but may be bookmarked, it's a good idea to retain that item and convert it to a redirect.
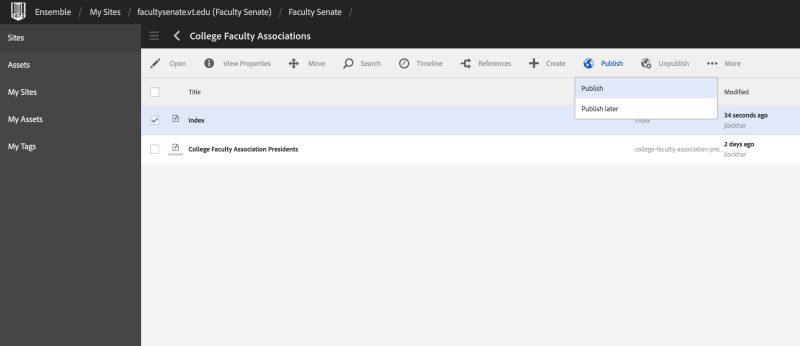
1. While in the list view, move the item to the top of the folder listing with the arrows at the far right of the window, inline with the file name and info
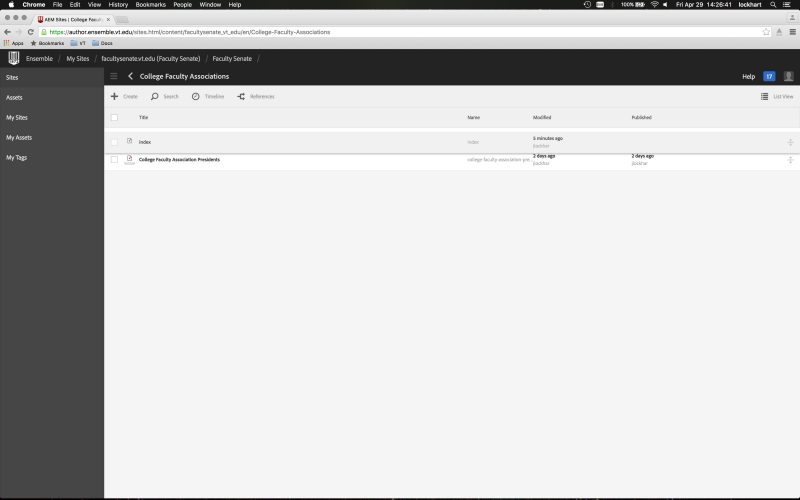
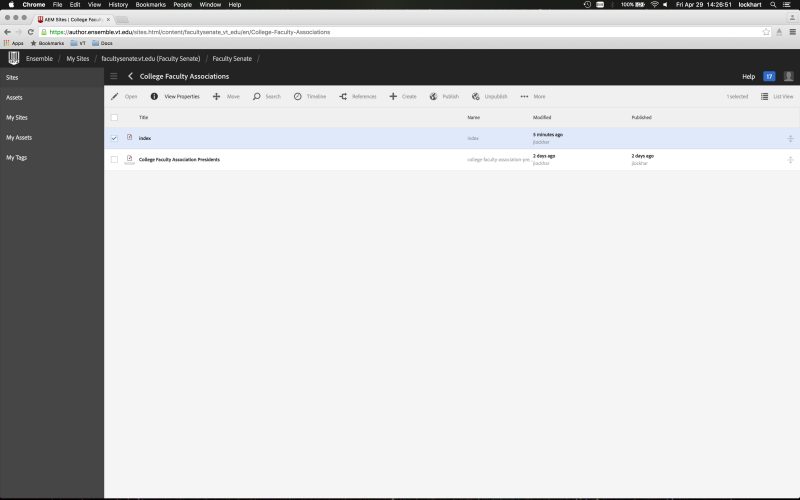
2. Select the item
3. Click the View Properties button at the top of the window
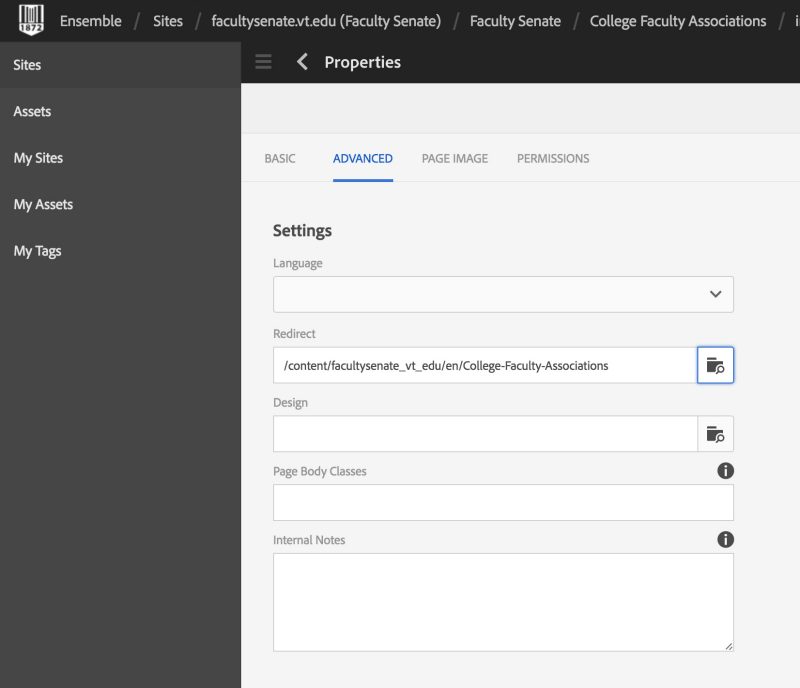
4. Click the Edit button in the left side of the window
5. Click the Advanced tab
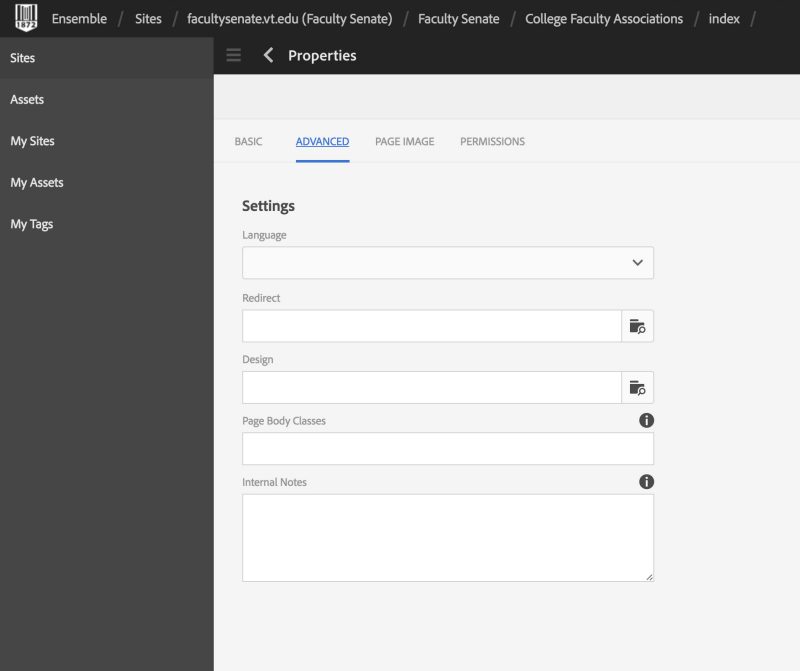
6. There is a field called Redirect
7. Click the folder/magnifying glass icon on the right side of the Redirect field
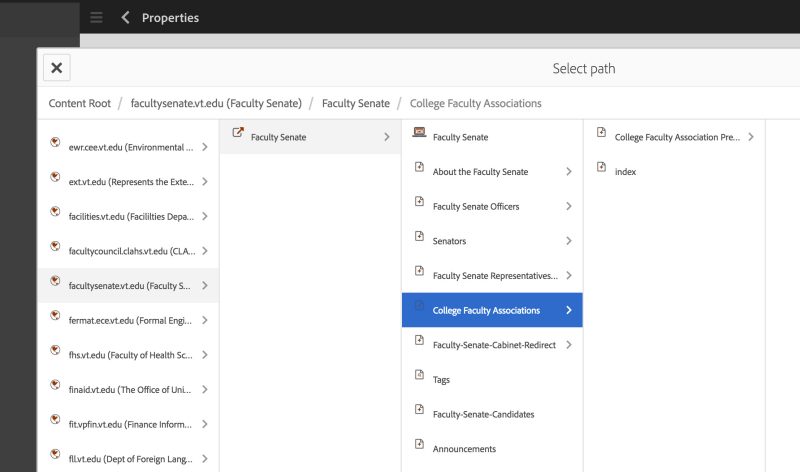
8. Choose the folder above this item as the destination for the redirect
9. Click the check mark to save
10. Click Done, at the top-right of the window
11. Publish the item to enable the redirect