

VTMag2 Template Documentation
This document supports the VT-Mag2 magazine template in the AEM Ensemble CMS system. This document uses "sitename" in various descriptions and instructions as a placeholder for your CMS site name. Please be careful if you are copying and pasting from this guide that you will need to replace "sitename" with your site domain name or relative CMS name.
NOTE: This documentaiton assumes nothing, so all steps including logging into the CMS authoring environment are included in each task. If you are already logged in, you can skip ahead of that step and any other that would put you into the proper folder for each task. Users more familiar with the CMS may be able to just use the imagery to guide them through the tasks.
Site level needs
Before you apply the design to the /magazine page of your site you will need to do the following things:
1. Log into https://author.ensemble.vt.edu
2. Click the checkbox next to the site name for the site you want to add a magazine to from the My Sites page
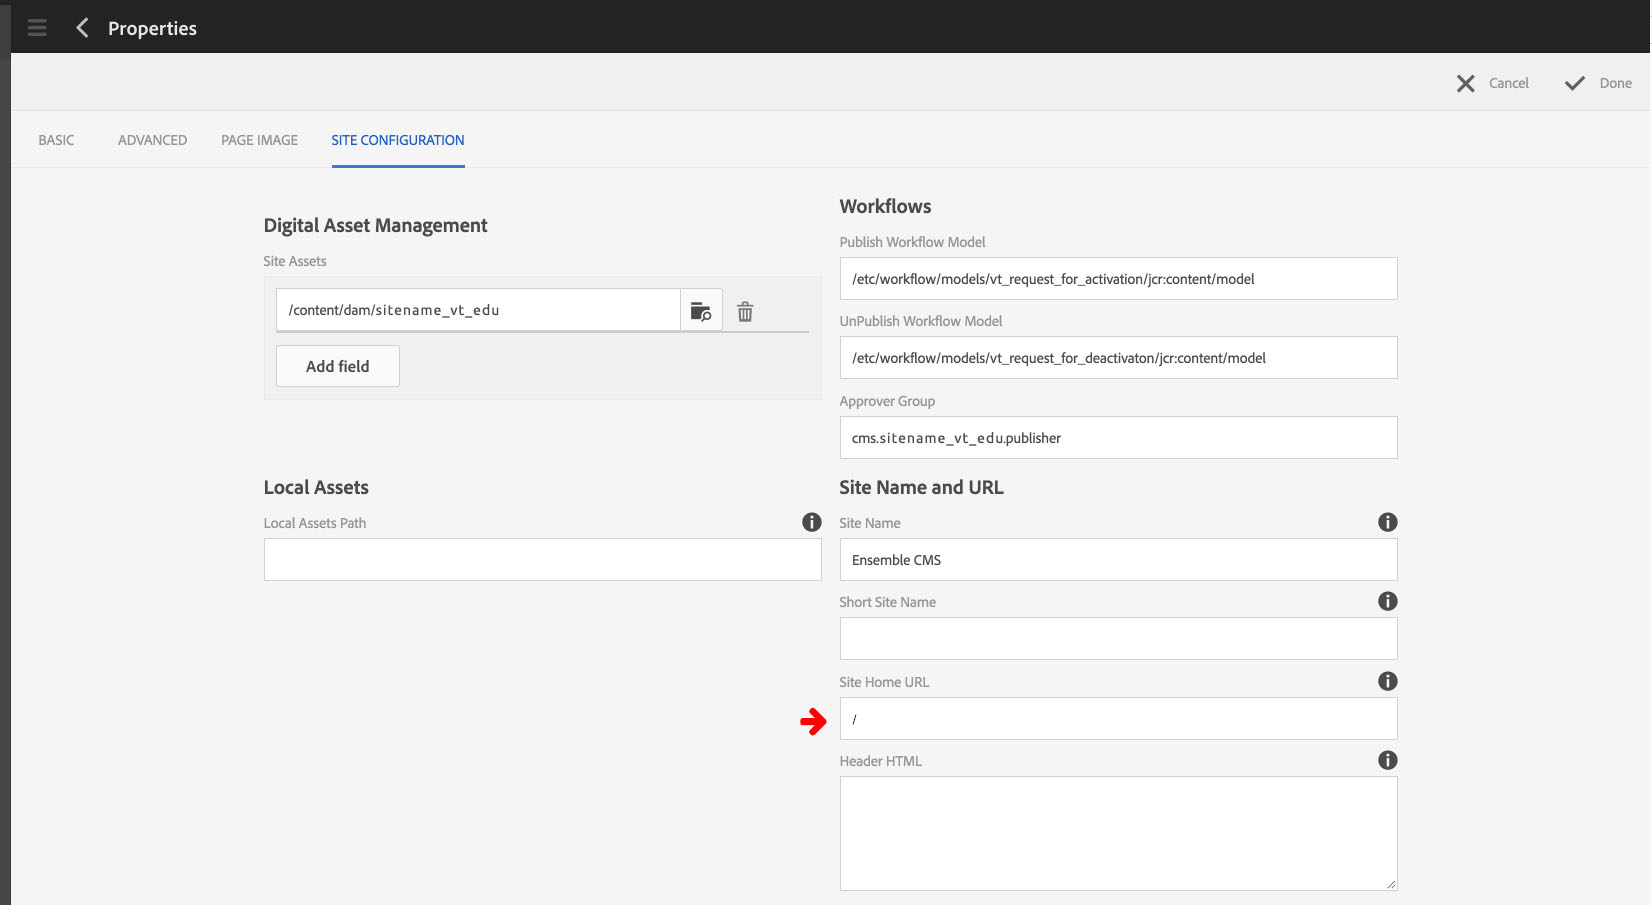
3. Click the "View Properties" button in the toolbar
4. Click in the "Site Home URL field" and type a forward slash, /
6. Click the "Done" button in the top-right of the window
7. Click "My Sites" link in the left-hand menu
8. Click the checkbox next to the site name for the site you just modified
9. Click the "Publish" button in the toolbar
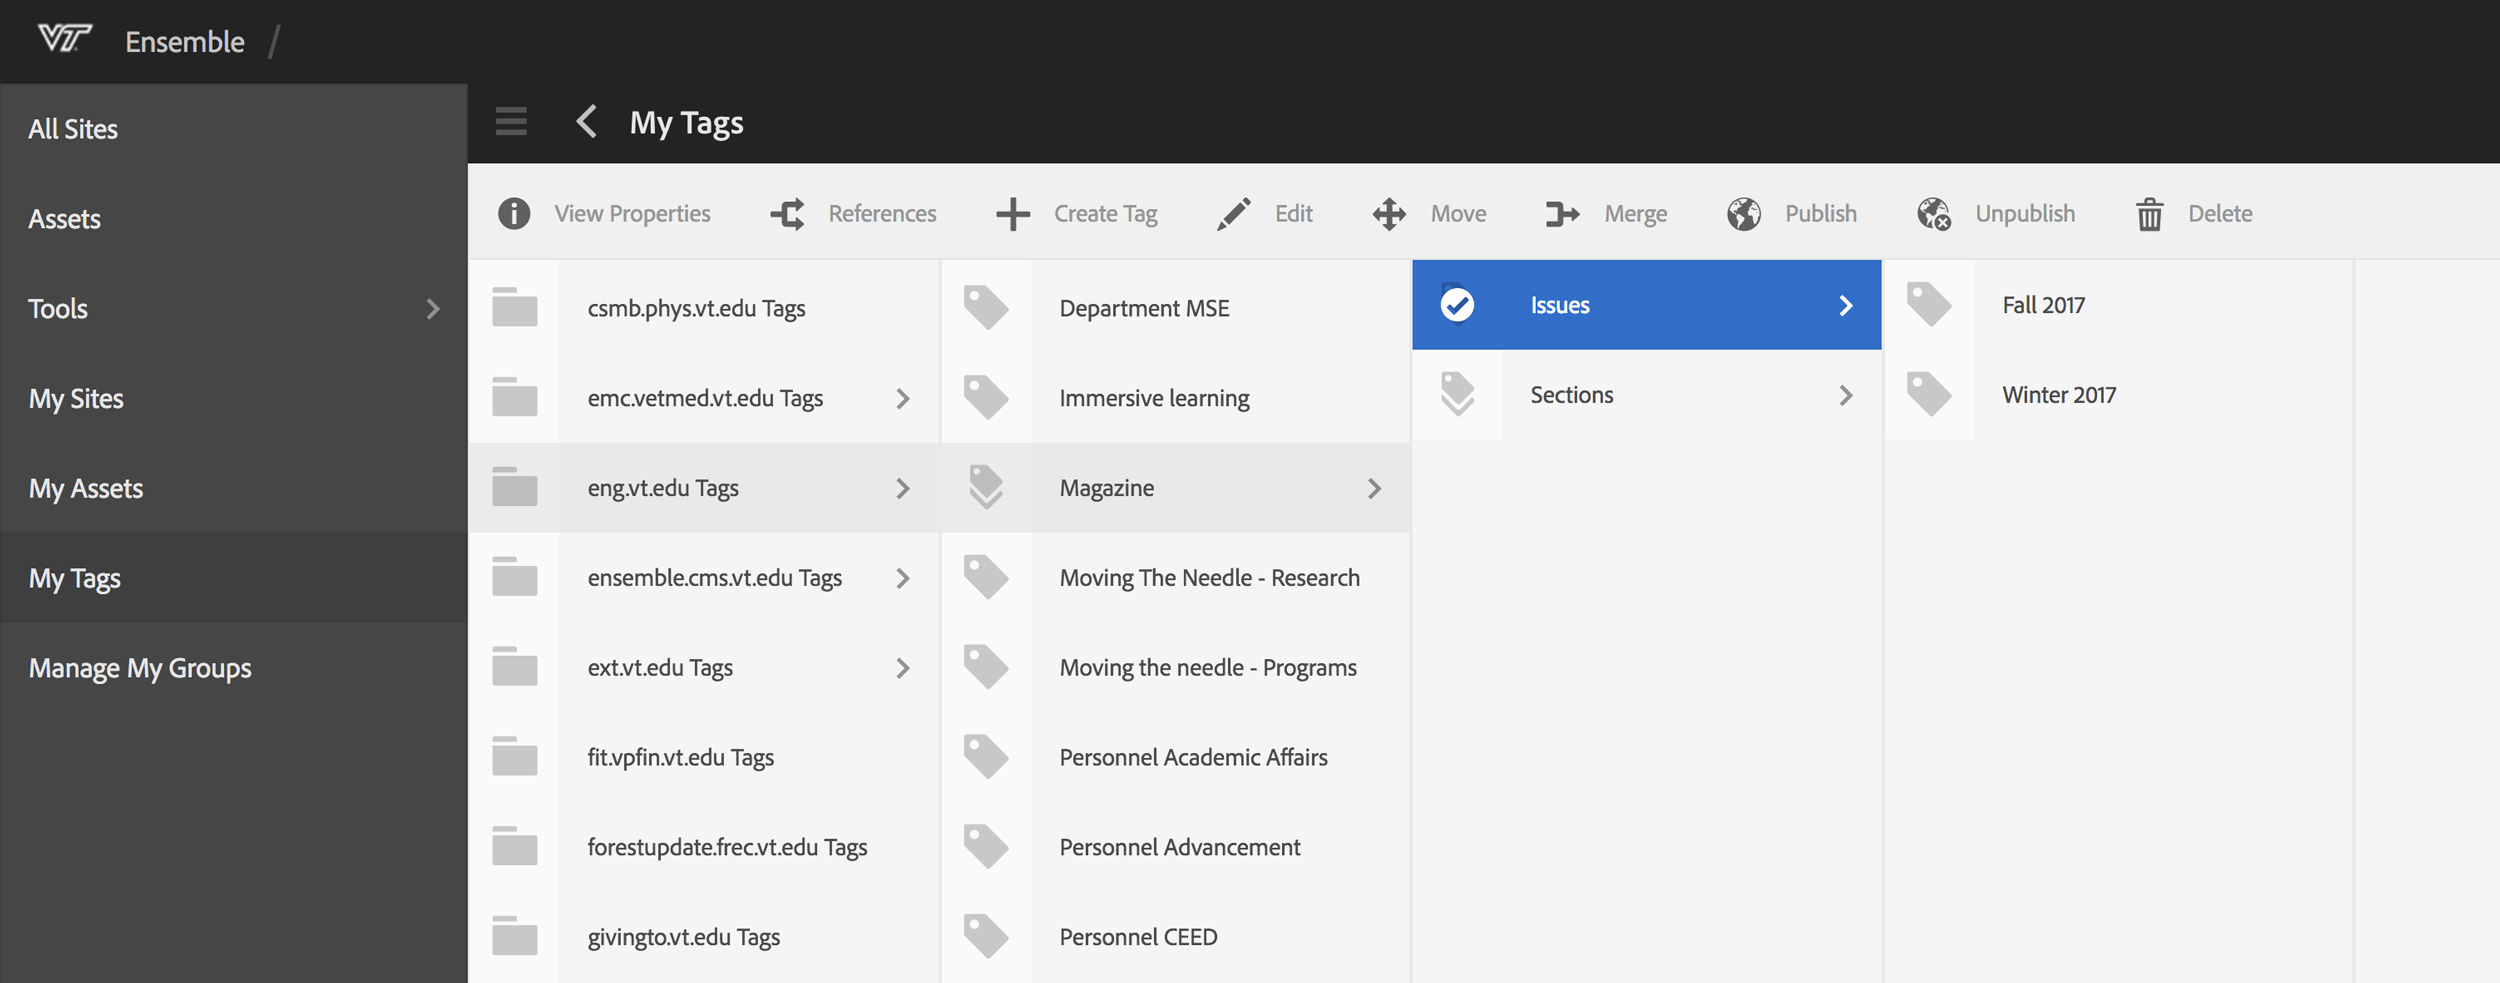
Create the magazine tags using the following structure; make sure the names (not titles) of the tags use dashes wherever there is a space in the title, and that the names are lowercase.
a. Magazine
i. Issues
1. Issue title, e.g., Winter 2017
2. Issue title
3. ...
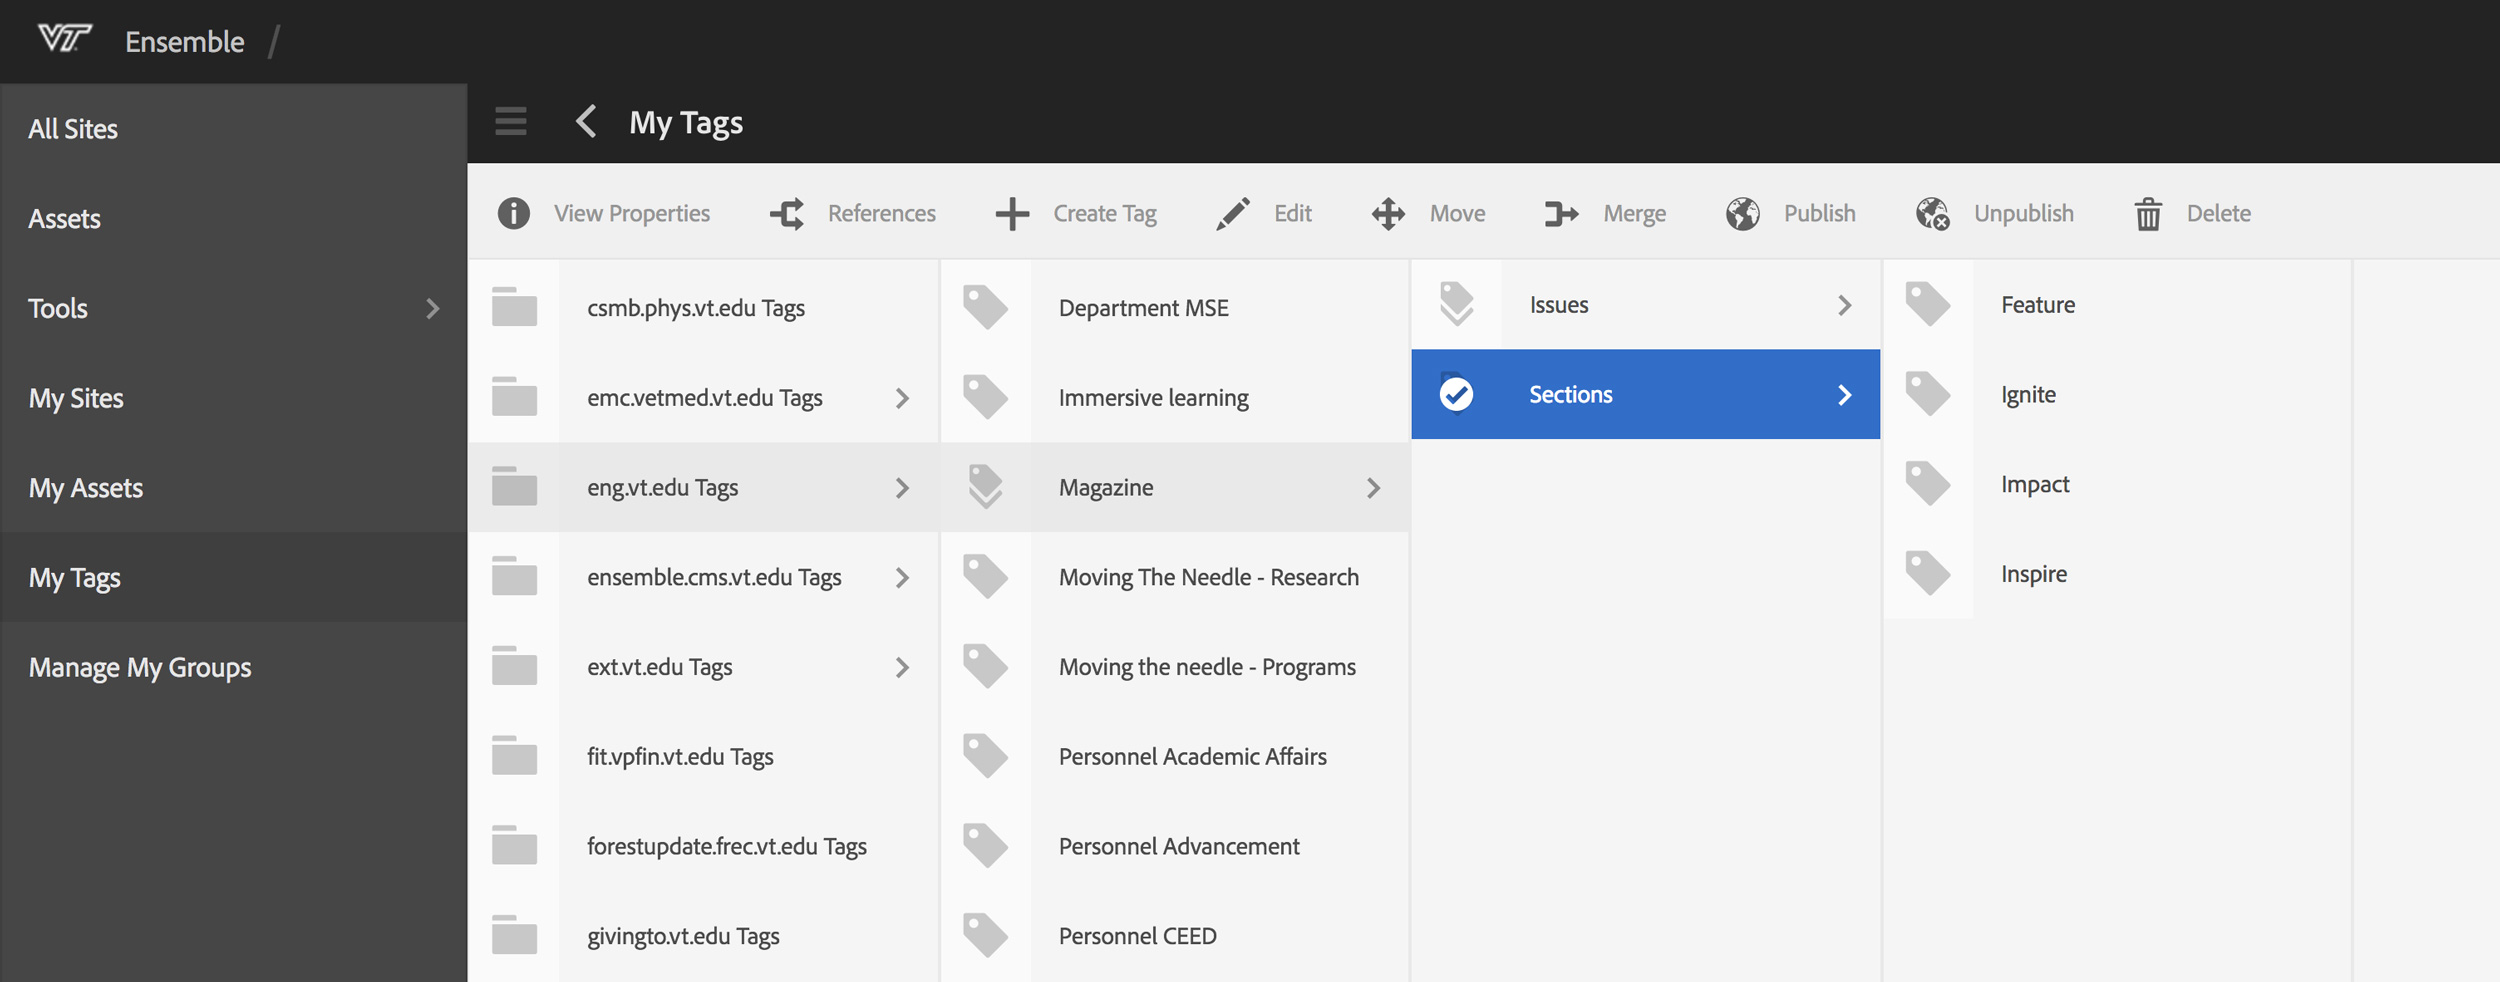
ii. Sections
1. Section title, e.g., Impact
2. Section title
3. ...
1. Log into https://author.ensemble.vt.edu
2. Click "My Tags" in the left-hand menu
3. Click the site name for the site where you will be creating a magazine
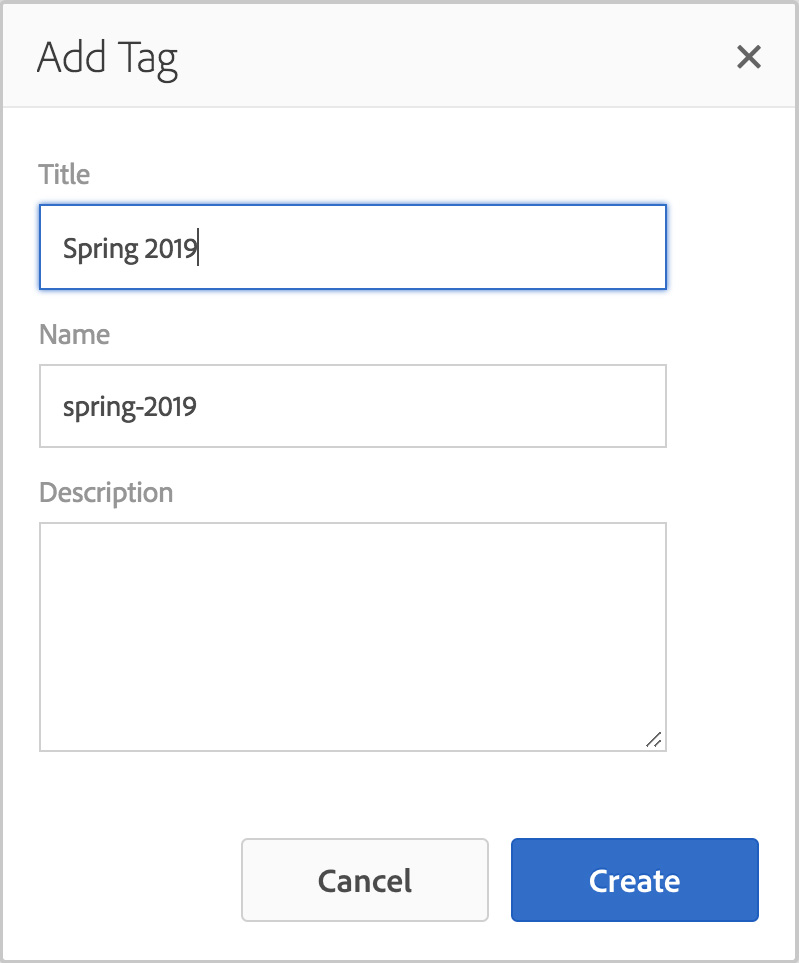
4. Click the "Create Tag" button in the toolbar
5. Click in the "Title" field and type the mixed case, space separated tag title, e.g., Winter 2017
NOTE - the lowercase, dash separated name will be created automatically
6. Click the "Create" button at the bottom of the dialog
7. Repeat steps 3 - 6 for each tag needed and in the format described above
Publish tags from the lowest level up to the Magazine tag itself. Start with the Section tags, then the Section tag itself. Do the Issues tags and the Issue tag itself, then finish by publishing the Magazine tag.
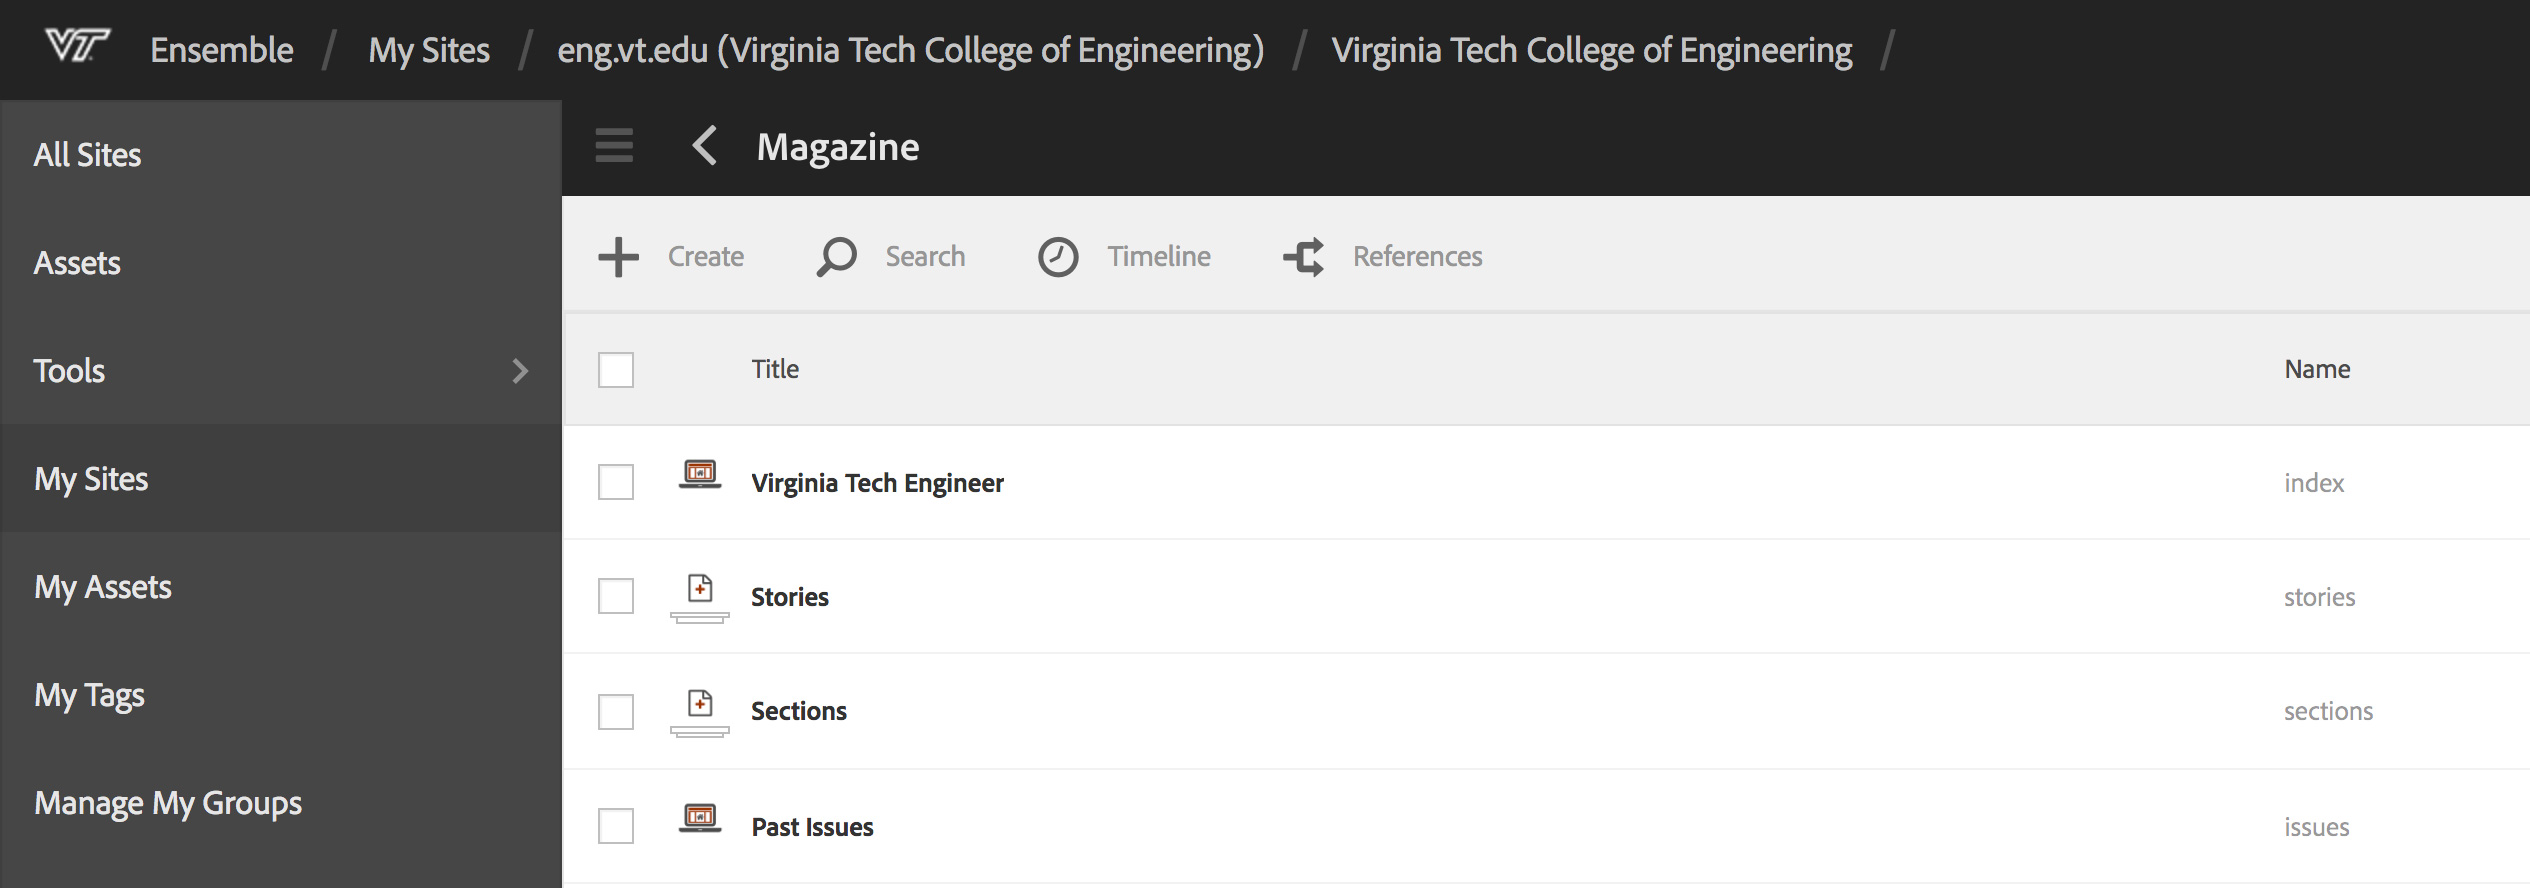
You will need to create the exact page structure outlined below in order for the template to work properly. The Issues and Sections sub-pages will need to match the tag structure in order for those pages to act as landing pages for their tags when the tag is clicked on.
1. Log into https://author.ensemble.vt.edu
2. Click on the site name for the site you want to add a magazine to from the My Sites page
3. Click on the title for the "en" page to get to the parent page level of the site
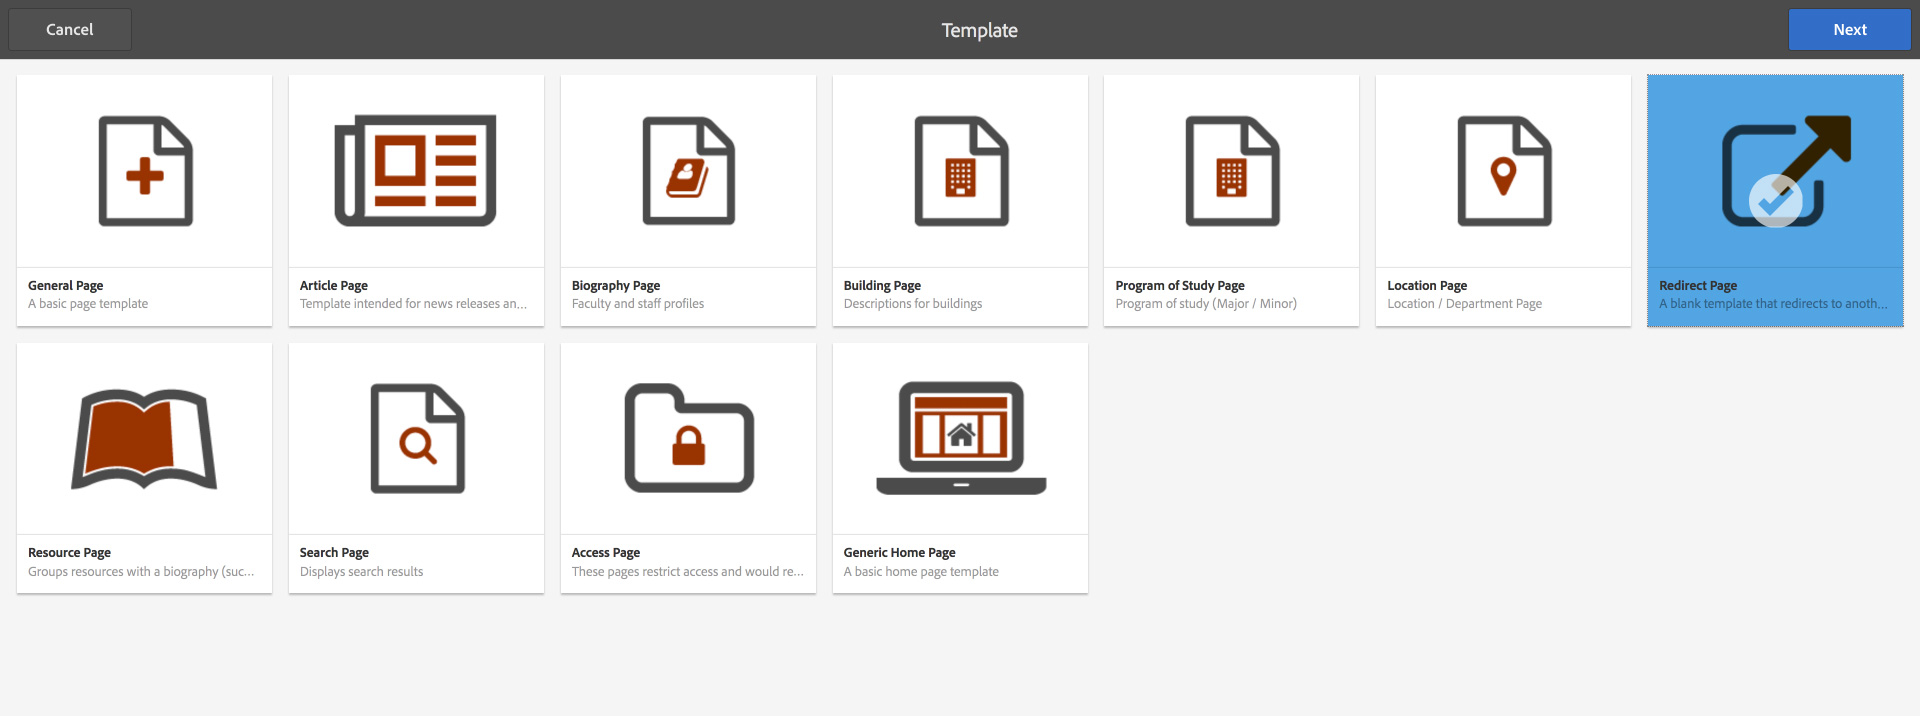
4. Click the "Create" button in the toolbar
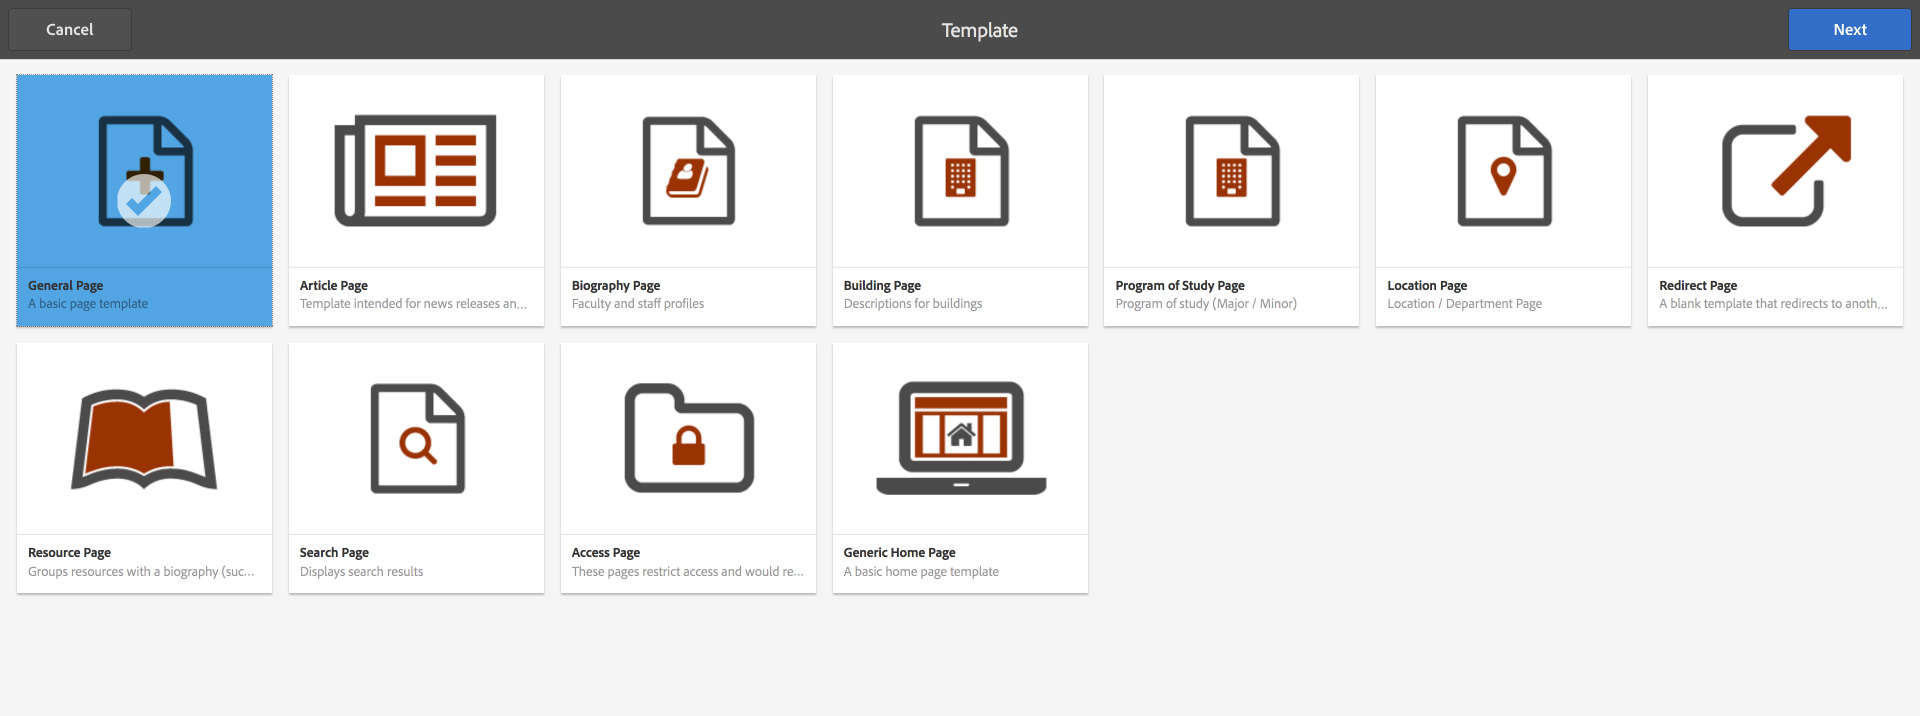
5. Click on the "Redirect Page" template
6. Click the "Next" button in the top-right of the window
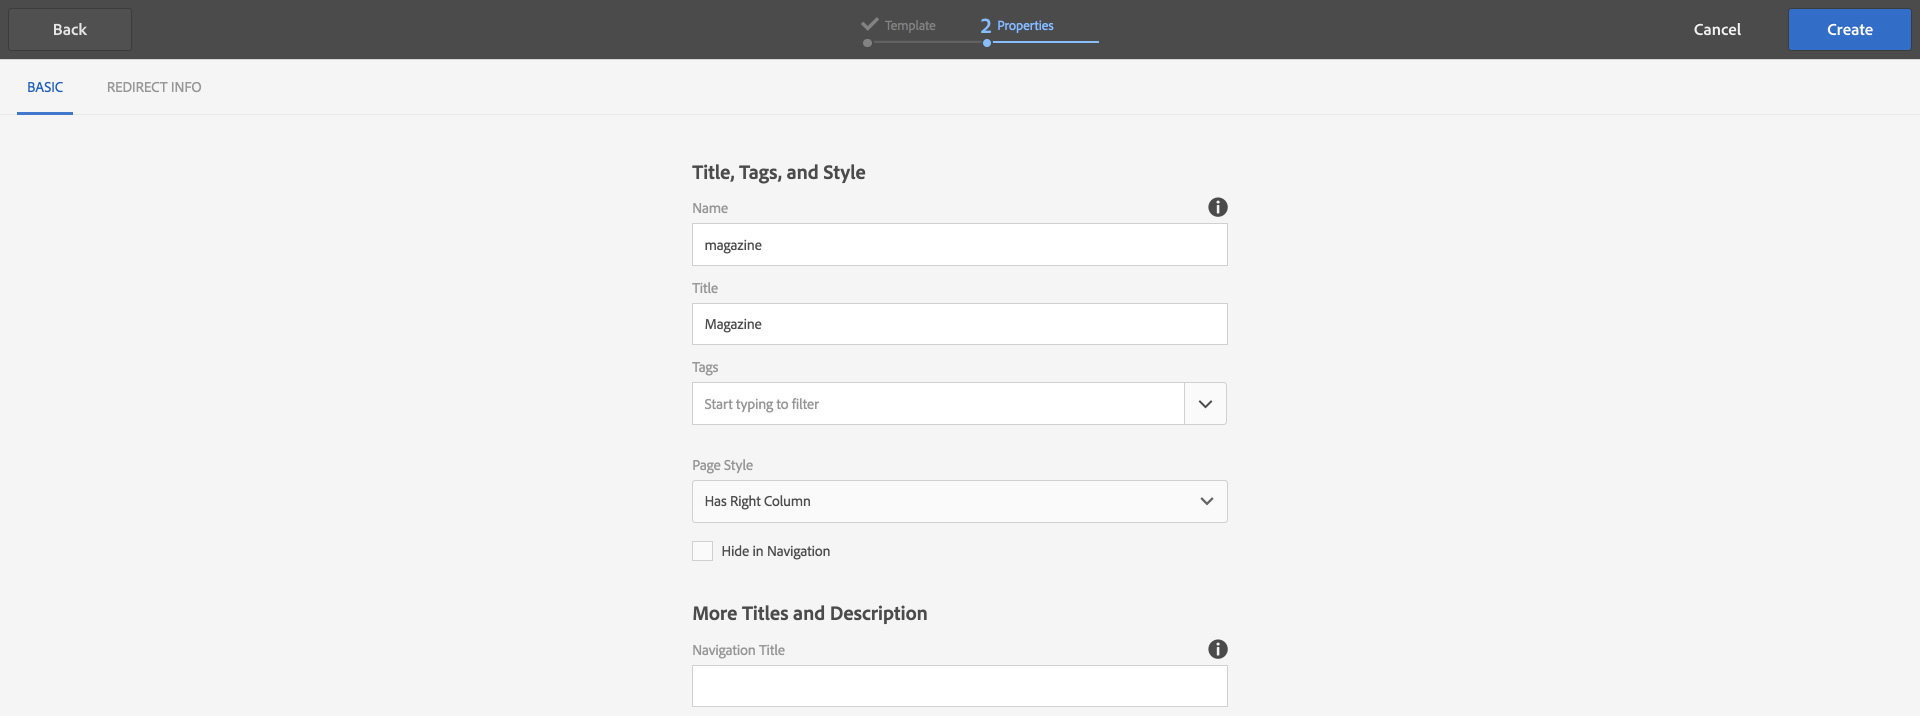
7. Click in the "Name" field and type: magazine (all lowercase)
8. Click in the "Title" field and type: Magazine (captial "M"), this will be the title that appears in the site navigation as well
9. Click the "Create" button in the top-right of the window
10. Click the "Done" button in the Page Created dialog
1. Log into https://author.ensemble.vt.edu
2. Click on the site name for the site you want to add a magazine to from the My Sites page
3. Click on the title for the "en" page to get to the parent page level of the site
4. Click on the title for the "Magazine" page
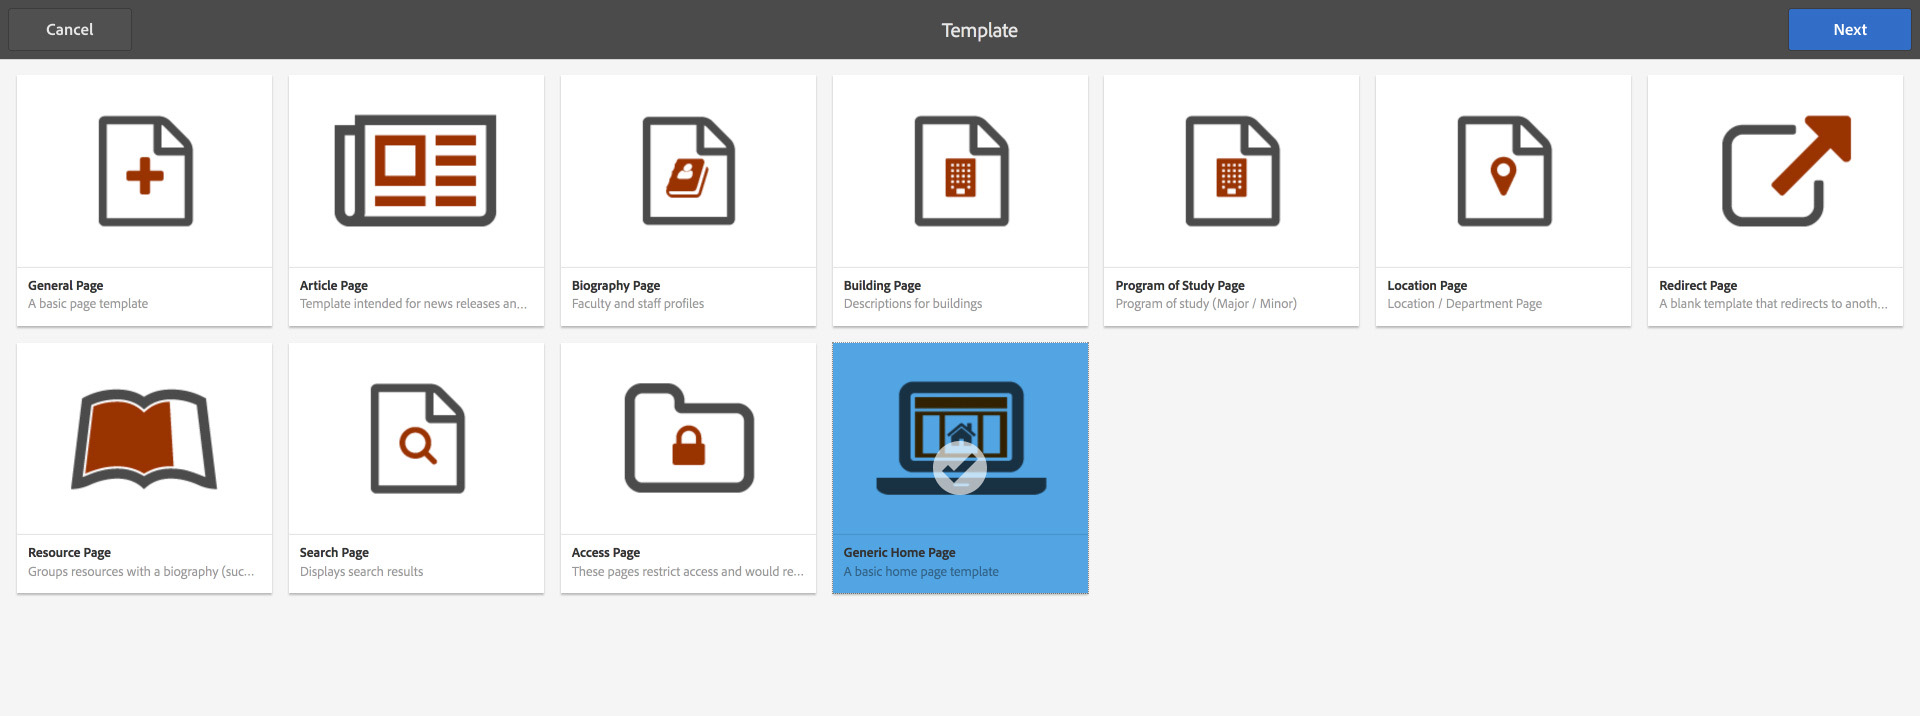
5. Click the "Create" button in the toolbar
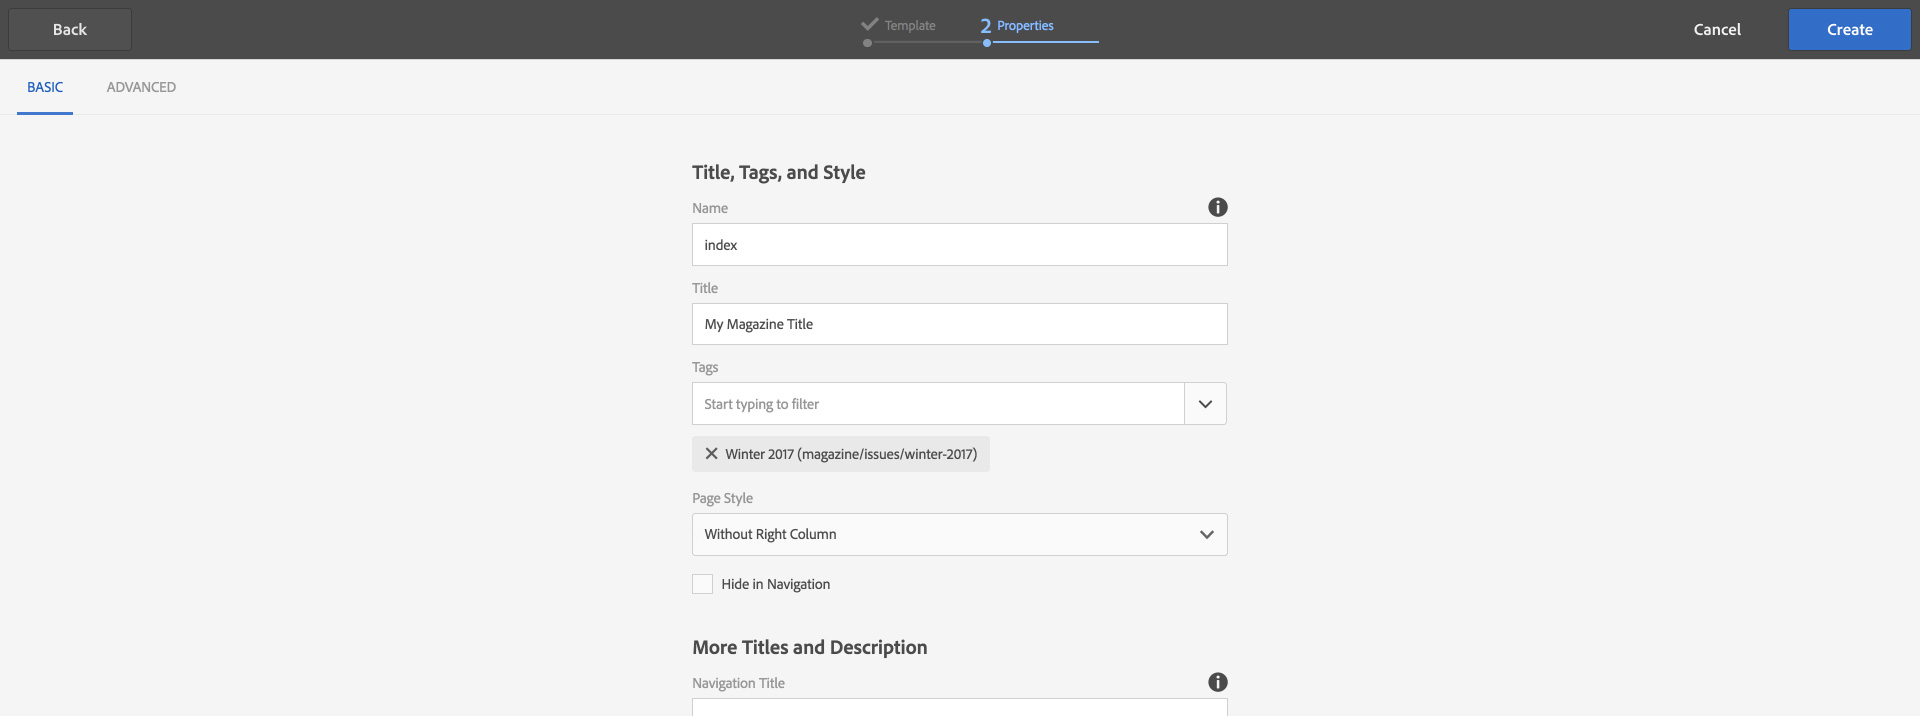
6. Click on the "Generic Home Page" template
7. Click the "Next" button in the top-right of the window
8. Click in the "Name" field and type: index (all lowercase)
9. Click in the "Title" field and type the magazine title, this is not displayed to the web user
10. Click in the "Tags" field and type the issue tag for this magazine, e.g., Winter 2017
11. Click on the matching tag in the list below the "Tags" field
12. Set the "Page Style" pulldown to: Without Right Column
13. Click the "Create" button in the top-right of the window
14. Click the "Done" button in the Page Created dialog

1. Log into https://author.ensemble.vt.edu
2. Click on the site name for the site you want to add a magazine to from the My Sites page
3. Click on the title for the "en" page to get to the parent page level of the site
4. Click on the title for the "Magazine" page
5. Click the "Create" button in the toolbar
6. Click on the "General Page" template
7. Click the "Next" button in the top-right of the window
8. Click in the "Name" field and type: stories (all lowercase)
9. Click in the "Title" field and type: Stories (capitalized first "S")
10. Set the "Page Style" pulldown to: Without Right Column
11. Click the "Create" button in the top-right of the window
12. Click the "Done" button in the Page Created dialog
1. Log into https://author.ensemble.vt.edu
2. Click on the site name for the site you want to add a magazine to from the My Sites page
3. Click on the title for the "en" page to get to the parent page level of the site
4. Click on the title for the "Magazine" page
5. Click on the title for the "Stories" page
6. Click the "Create" button in the toolbar
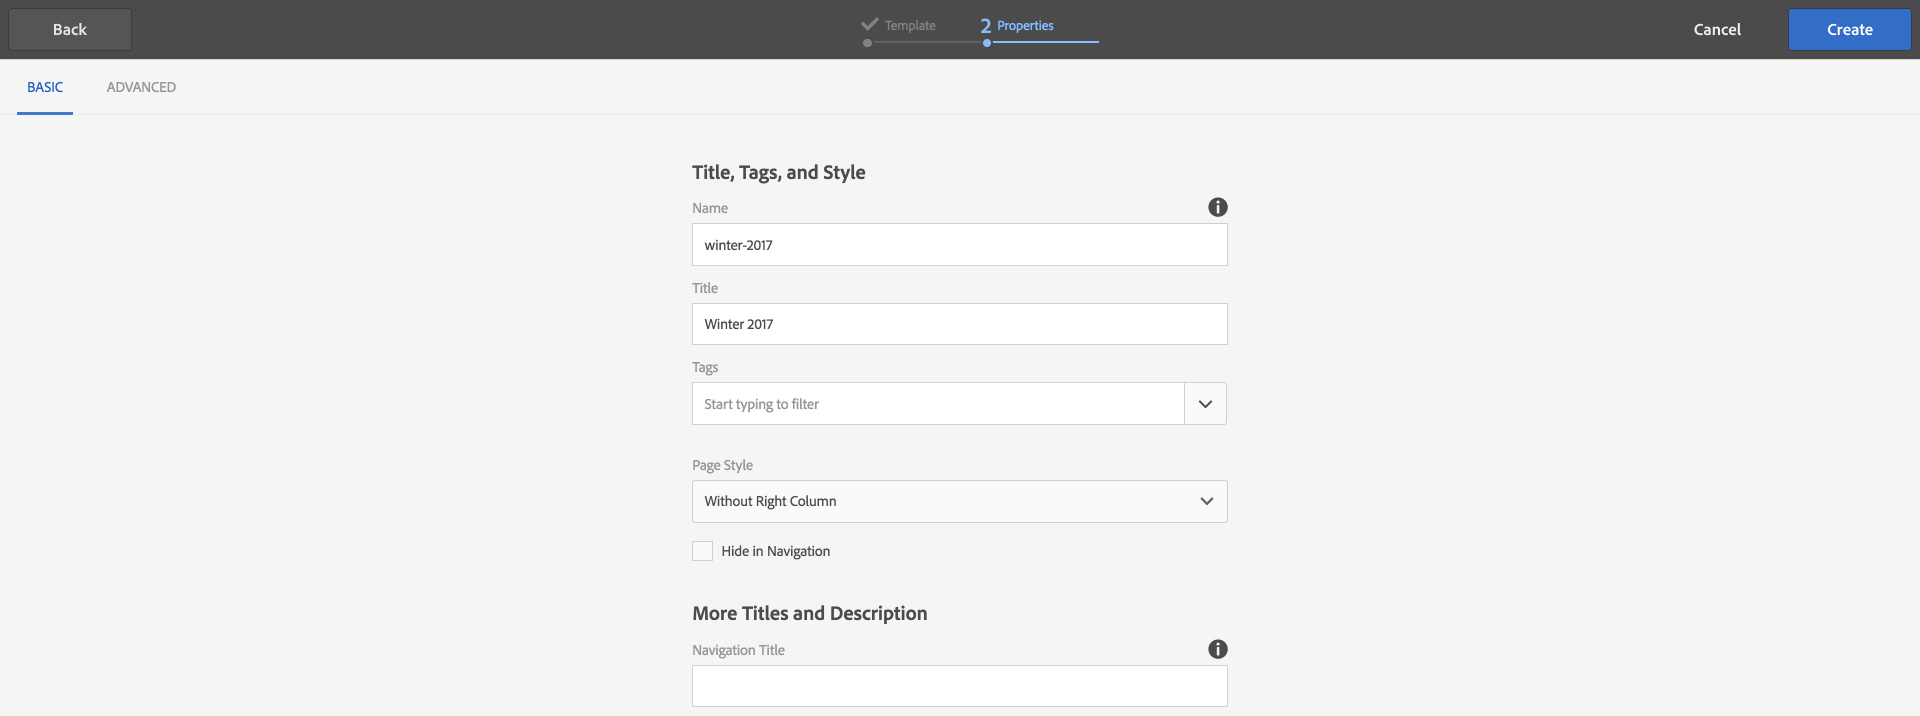
7. Click on the "General Page" template
8. Click the "Next" button in the top-right of the window
9. Click in the "Name" field and type the lowercase, dash seperated tag name for this issue, e.g., winter-2017
10. Click in the "Title" field and type the mixed case, space seperated name for this issue, e.g., Winter 2017
11. Set the "Page Style" pulldown to: Without Right Column
12. Click the "Create" button in the top-right of the window
13. Click the "Done" button in the Page Created dialog

1. Log into https://author.ensemble.vt.edu
2. Click on the site name for the site you want to add a magazine to from the My Sites page
3. Click on the title for the "en" page to get to the parent page level of the site
4. Click on the title for the "Magazine" page
5. Click the "Create" button in the toolbar
6. Click on the "General Page" template
7. Click the "Next" button in the top-right of the window
8. Click in the "Name" field and type: issues (all lowercase)
9. Click in the "Title" field and type: Issues (capital "I")
10. Set the "Page Style" pulldown to: Without Right Column
11. Click the "Create" button in the top-right of the window
12. Click the "Done" button in the Page Created dialog

1. Log into https://author.ensemble.vt.edu
2. Click on the site name for the site you want to add a magazine to from the My Sites page
3. Click on the title for the "en" page to get to the parent page level of the site
4. Click on the title for the "Magazine" page
5. Click the "Create" button in the toolbar
6. Click on the "General Page" template
7. Click the "Next" button in the top-right of the window
8. Click in the "Name" field and type: sections (all lowercase)
9. Click in the "Title" field and type: Sections (captilized first "S")
10. Set the "Page Style" pulldown to: Without Right Column
11. Click the "Create" button in the top-right of the window
12. Click the "Done button" in the Page Created dialog
1. Log into https://author.ensemble.vt.edu
2. Click on the site name for the site you want to add a magazine to from the My Sites page
3. Click on the title for the "en" page to get to the parent page level of the site
4. Click on the title for the "Magazine" page
5. Click on the title for the "Sections" page
6. Click the "Create" button in the toolbar
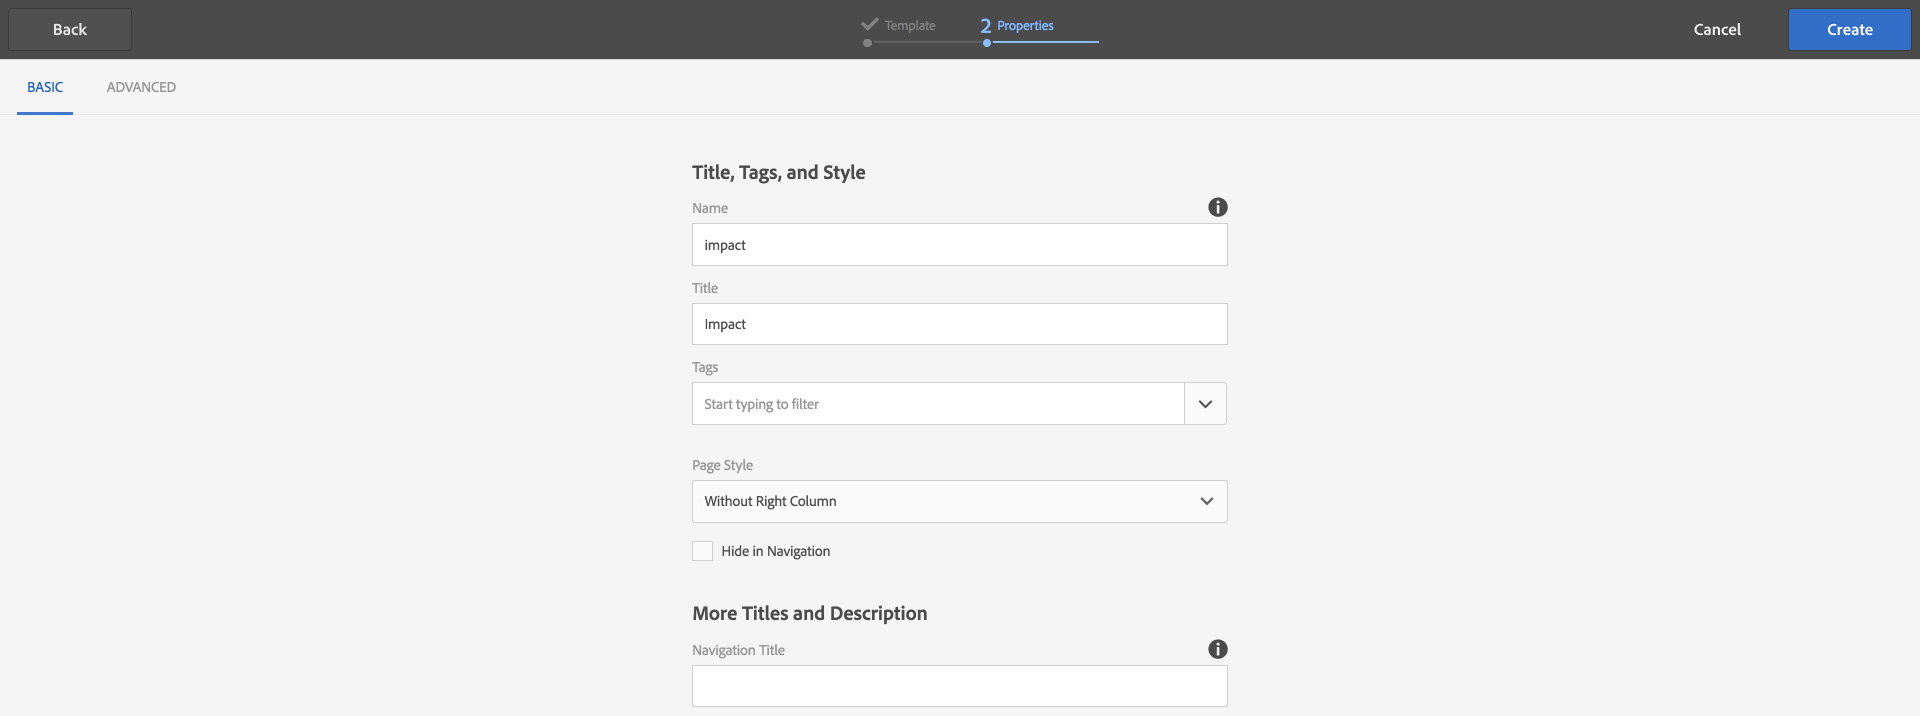
7. Click on the "General Page" template
8. Click the "Next" button, top-right of window
9. Click In the "Name" field and type the lowercase, dash seperated tag name for the section, e.g., impact
10. Click in the "Title" field and type the mixed case, space seperated name for the section, e.g., Impact
11. Set the "Page Style" pulldown to: Without Right Column
12. Click the "Create" button in the top-right of the window
13. Click the "Done" button in the Page Created dialog
1. Log into https://author.ensemble.vt.edu
2. Click on the site name for the site you want to add a magazine to from the My Sites page
3. Click on the title for the "en" page to get to the parent page level of the site
4. Click on the checkbox for the "Magazine" page
5. Click on the "View Properties" button in the toolbar
6. Click the "Edit button", top-left portion of the window
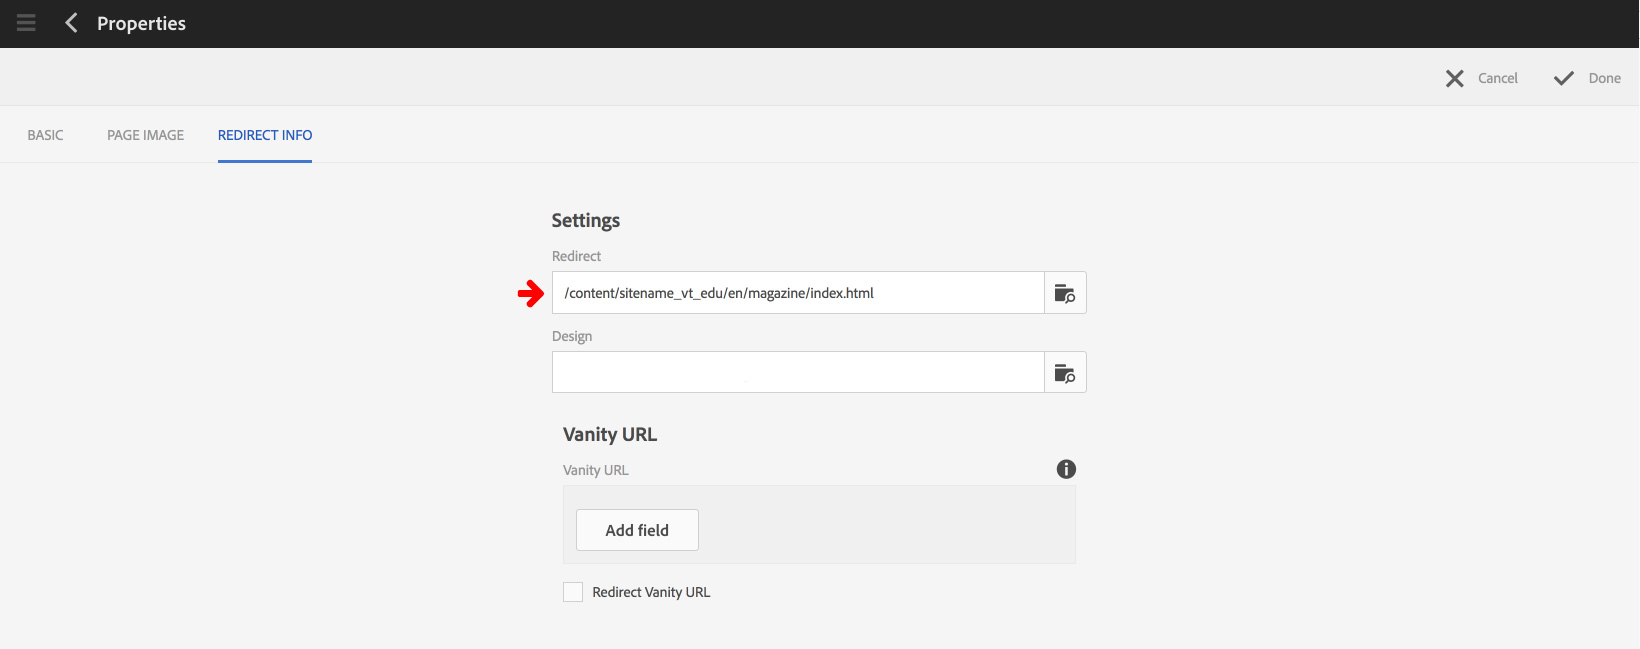
7. Click on the "Redirect Info" tab
8. Click in the "Redirect" field and type the path to your magazine index page (/content/sitename_vt_edu/en/magazine/index.html),
OR click the folder icon to the right of the field to navigate to the index page for the magazine
9. Proceed to the "Apply the VT-Mag2 design template" task in this section
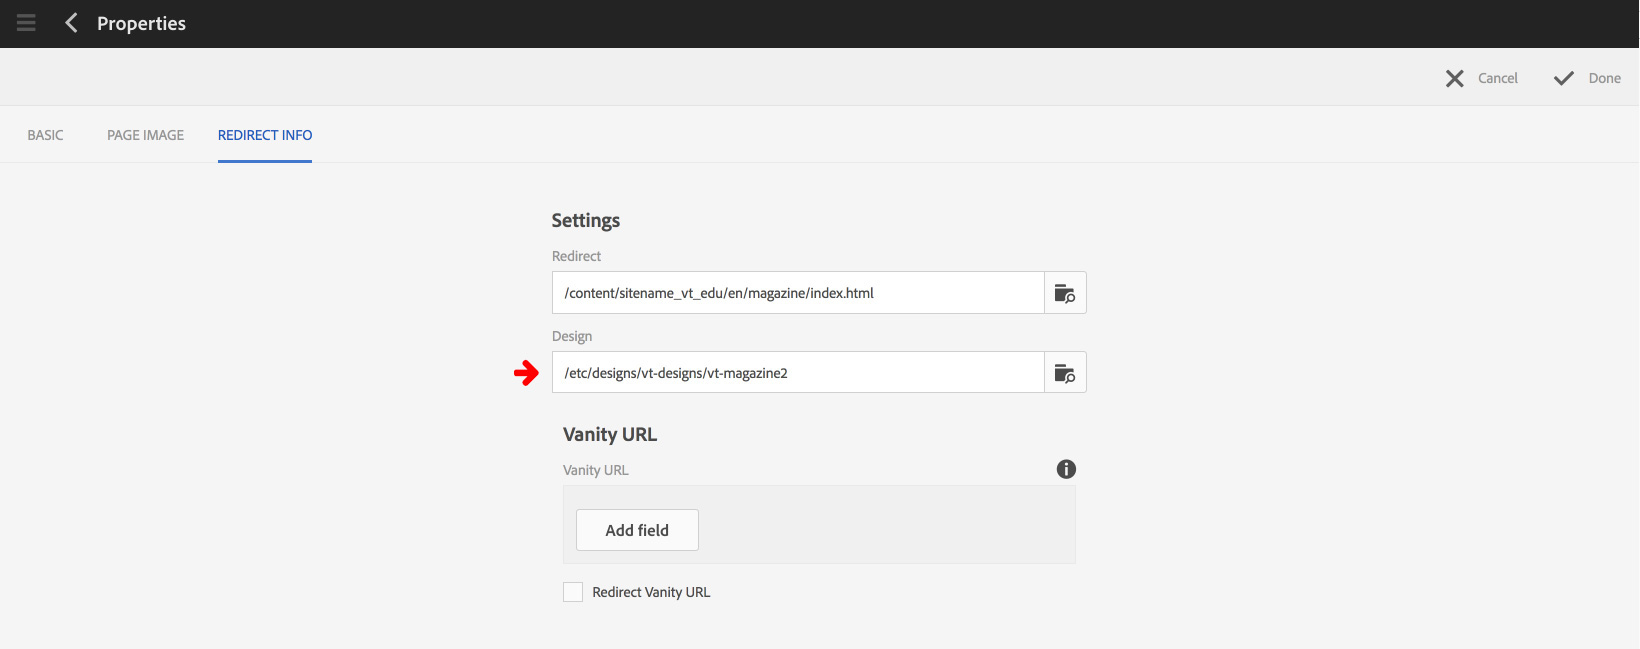
1. Click the browse icon to the right of the "Design" field
2. Click on the "VT-Mag2" design under the "vt-designs" column
3. Click the blue checkmark in the top-right of the browse dialog
4. Click the "Done" button in the top-right of the window
The structure needed for the template should now be complete. The next sections of the document will describe specific content and component needs and then the features and functions of the template along with how to implement them.
Content and component needs
There are specific content and component needs for this template to work properly.
1. Log into https://author.ensemble.vt.edu
2. Click on the site name for the site you want to add a magazine to from the My Sites page
3. Click on the title for the "en" page to get to the parent page level of the site
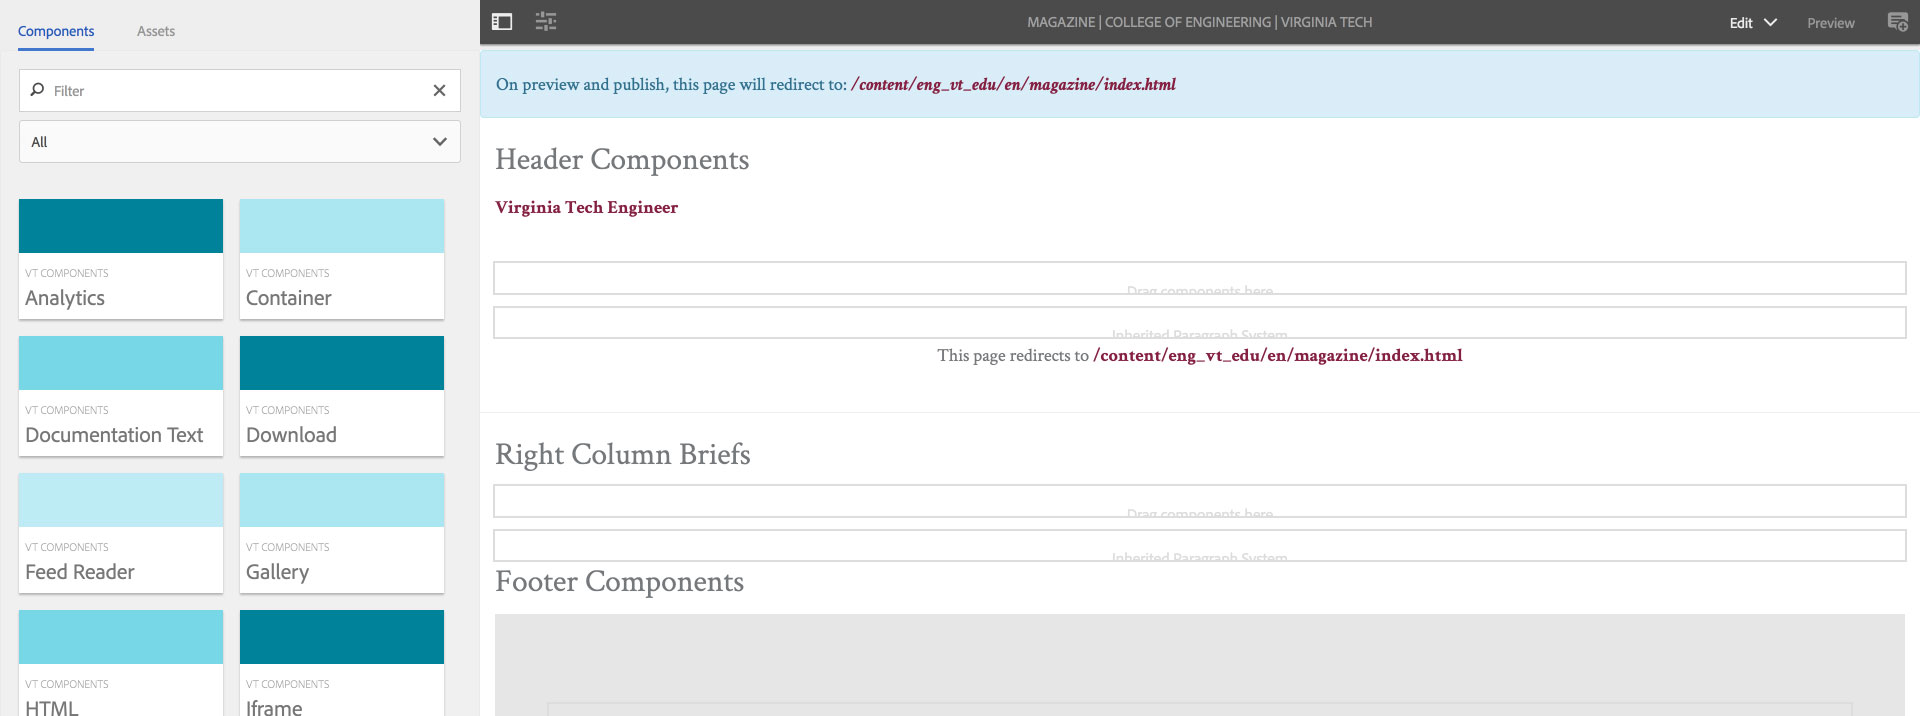
4. Click on the checkbox for the /magazine page
5. Click on the "Open" button in the toolbar
6. Drag and drop a "Text" component into the Header Components section of the page
7. Click on the Text component to display its toolbar
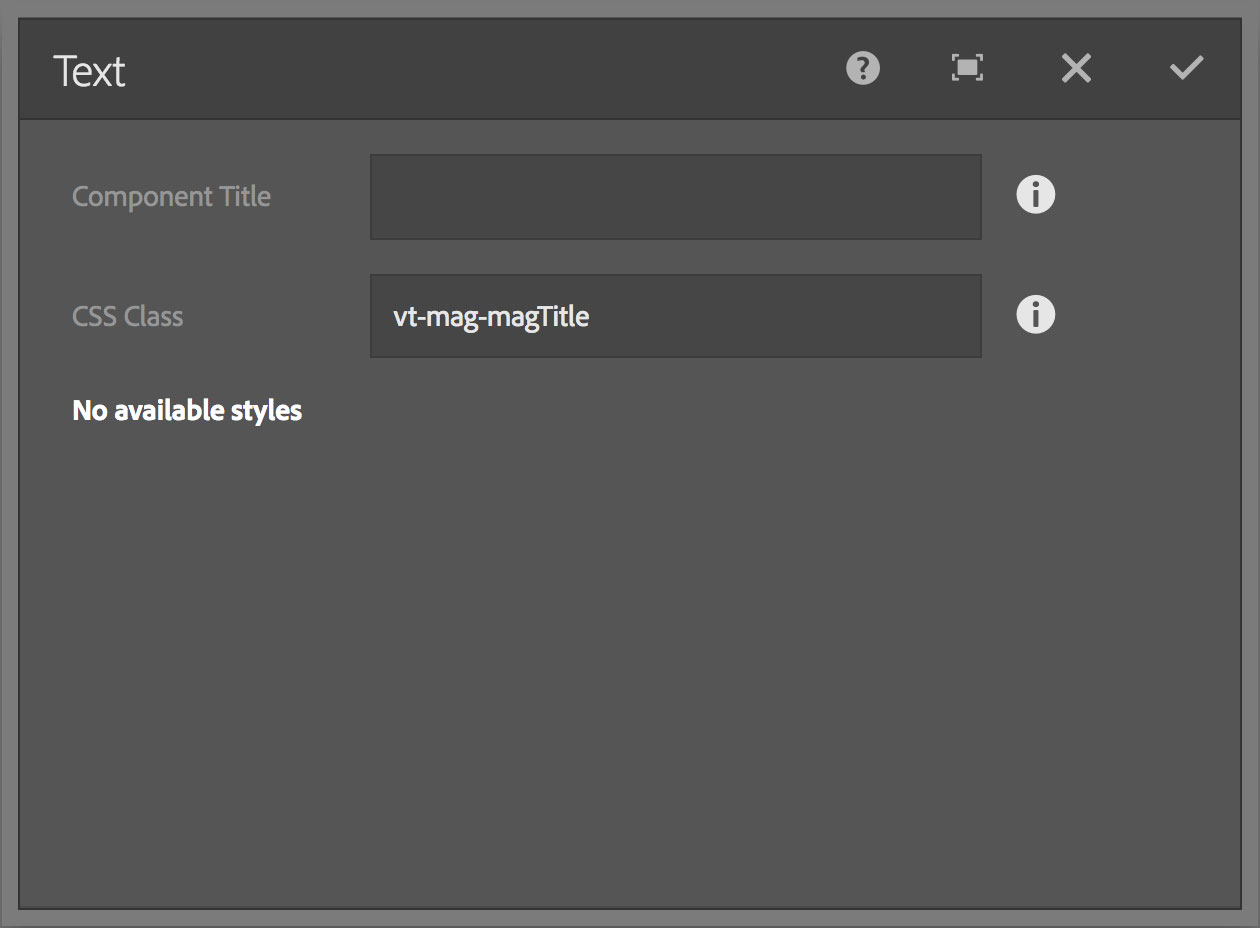
8. Click the wrench icon in the toolbar
9. Click in the "CSS Class" field and type: vt-mag-magTitle
10. Click the checkmark in the top-right of the dialog to accept the changes
11. Click on the Text component again to display its toolbar
12. Click the pencil icon in the toolbar to enter edit mode
13. Type the name of the magazine
14. Select the magazine name
15. Click the chain icon in the Text component toolbar
16. Type the full URL for the /magazine/index page into the link field, e.g., https://sitename.vt.edu/magazine/index.html
17. Click the blue checkmark in the link toolbar
18. Click the checkmark far right in the toolbar

1. Log into https://author.ensemble.vt.edu
2. Click on the site name for the site you want to add a magazine to from the My Sites page
3. Click on the title for the "en" page to get to the parent page level of the site
4. Click on the title for the "Magazine" page
5. Click the checkbox next to the "index" page
6. Click the "Open" button in the toolbar
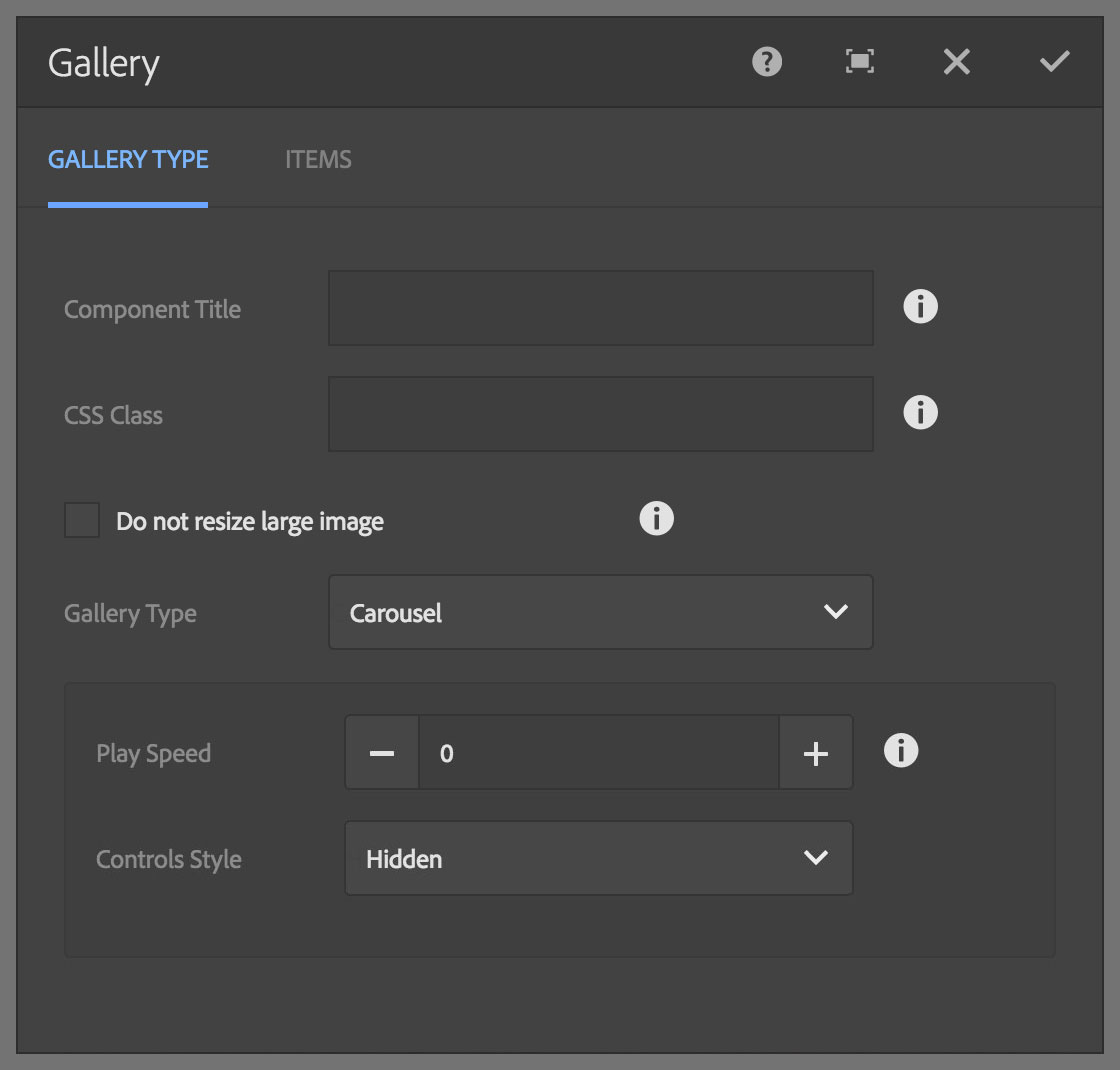
7. Click on the Gallery component embedded in the page to display its toolbar
8. Click the wrench icon in the toolbar
9. Set the "Gallery Type" pulldown to: Carousel
10. Set the "Play Speed" to: 0
11. Set the "Control Style" to: Hidden
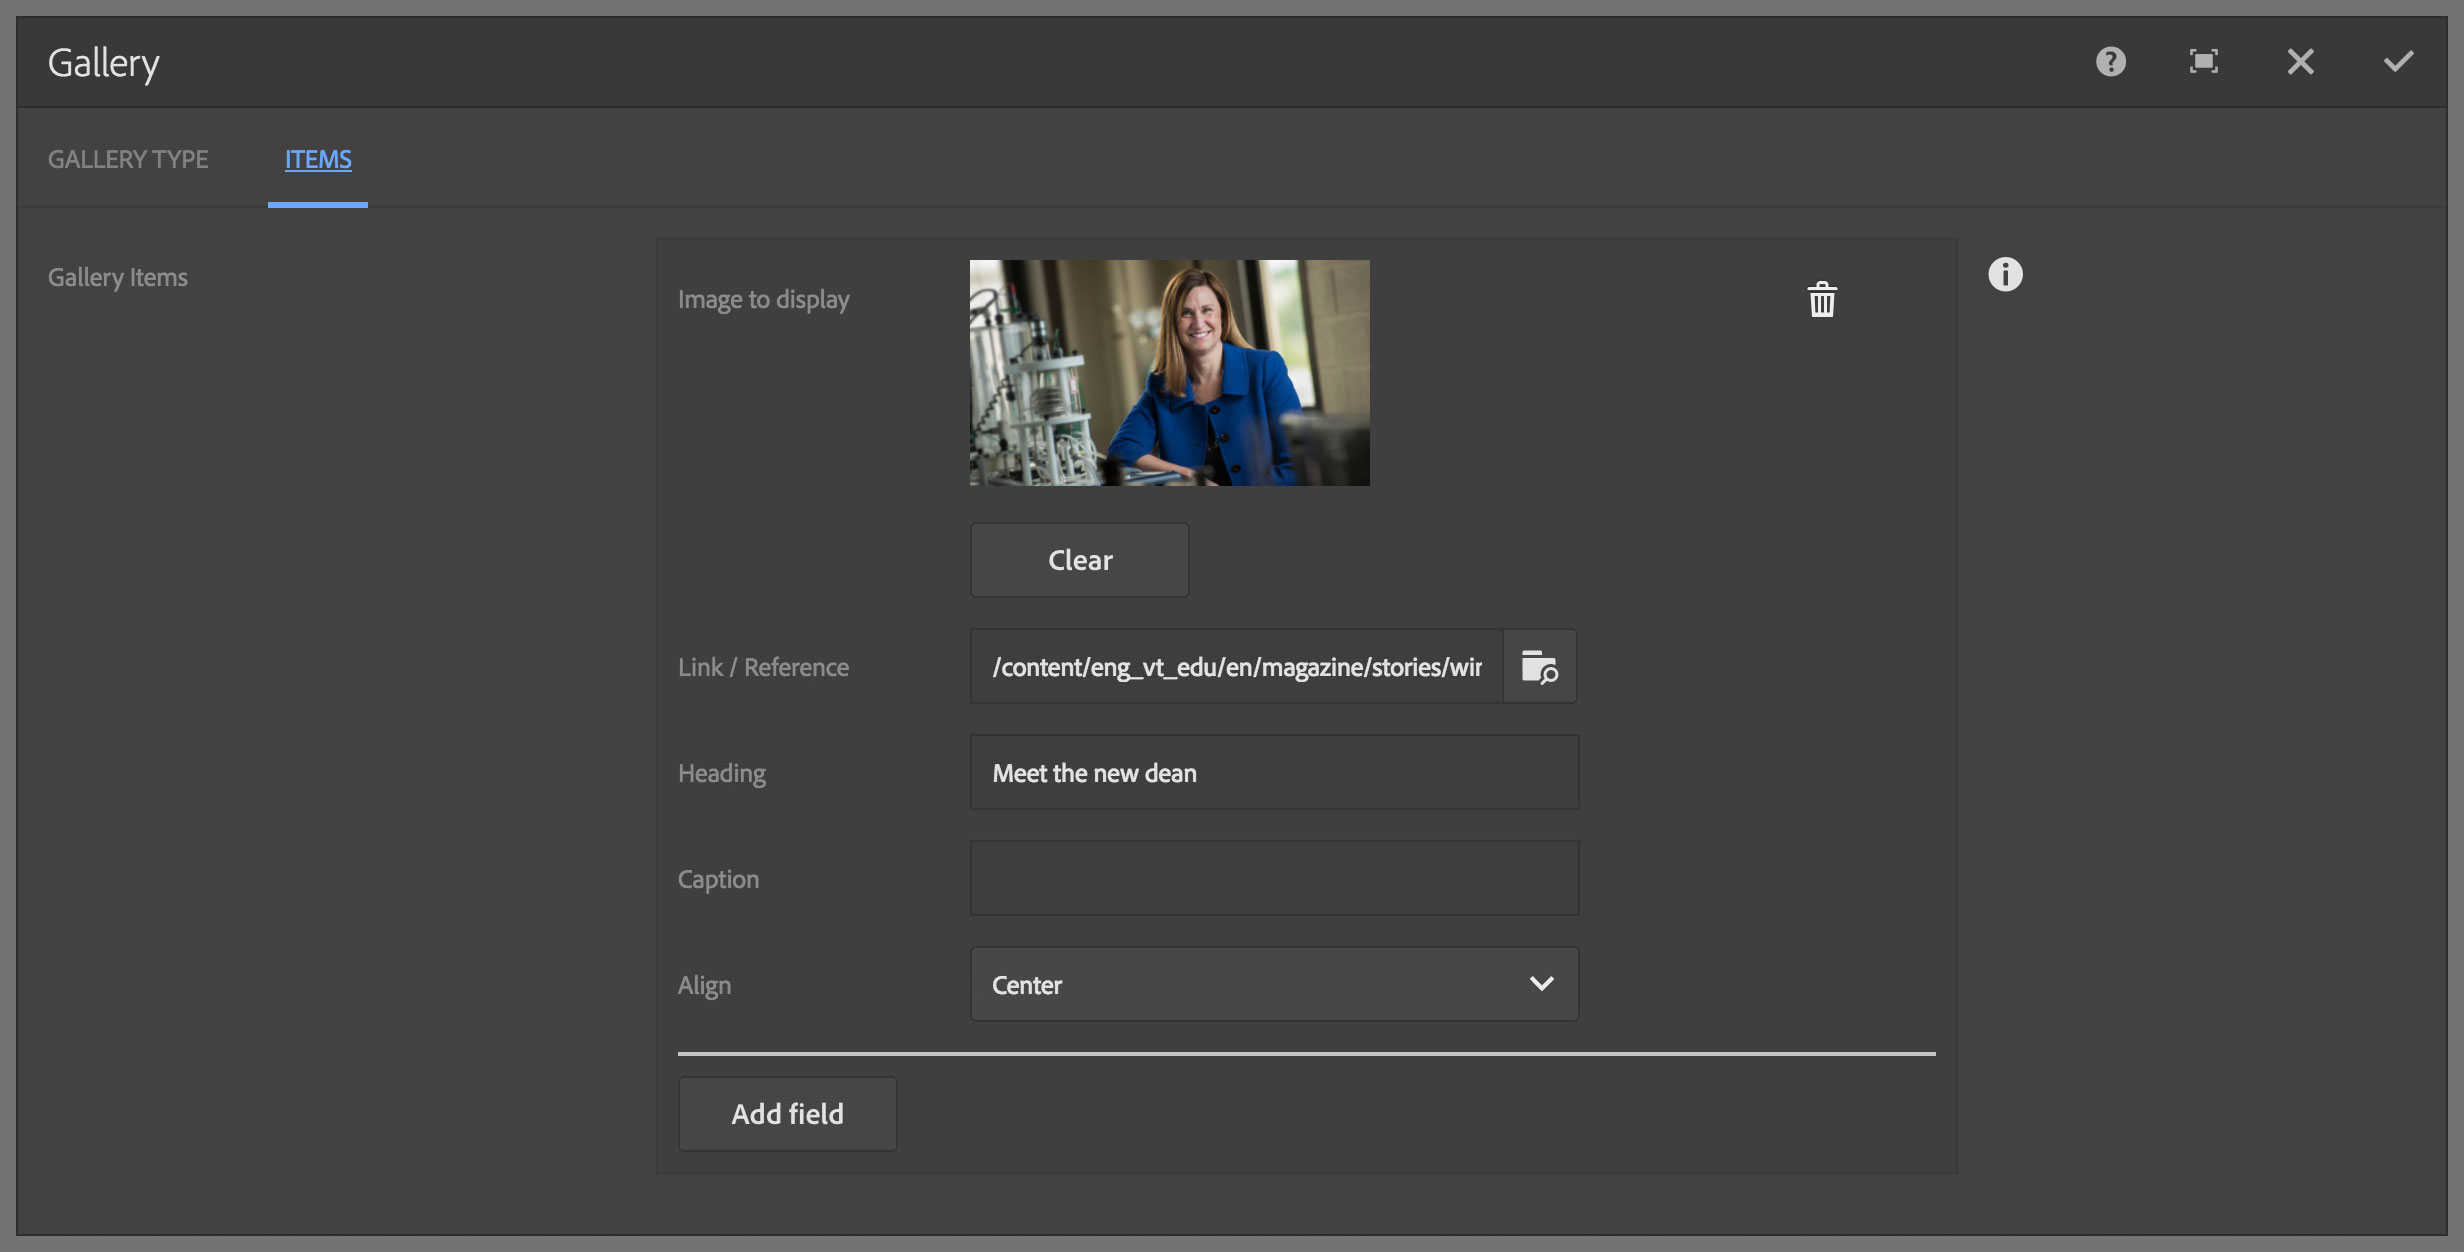
12. Click on the "Gallery Items" tab at the top of the dialog
13. Click the "Add field" button
14. Click on the "Assets" tab in the side panel
15. Drag and drop an image from the Assets panel into the "Image to display" area of the dialog
16. Click in the "Link / Reference" Field and type the path to your featured story page *, e.g., /content/sitename_vt_edu/en/magazine/stories/issue-folder/feature.html
17. Click in the "Heading" field and type the heading for the story
18. Click in the "Caption" field and type a caption for the story if there is one
19. Click the checkmark in the top-right of the dialog to accpet the changes
* You may not have created the story pages at this stage and will want to do that before linking the story.
1. Log into https://author.ensemble.vt.edu
2. Click on the site name for the site you want to add a magazine to from the My Sites page
3. Click on the title for the "en" page to get to the parent page level of the site
4. Click on the title for the "Magazine" page
5. Click the checkbox next to the "index" page
6. Click the "Open" button in the toolbar
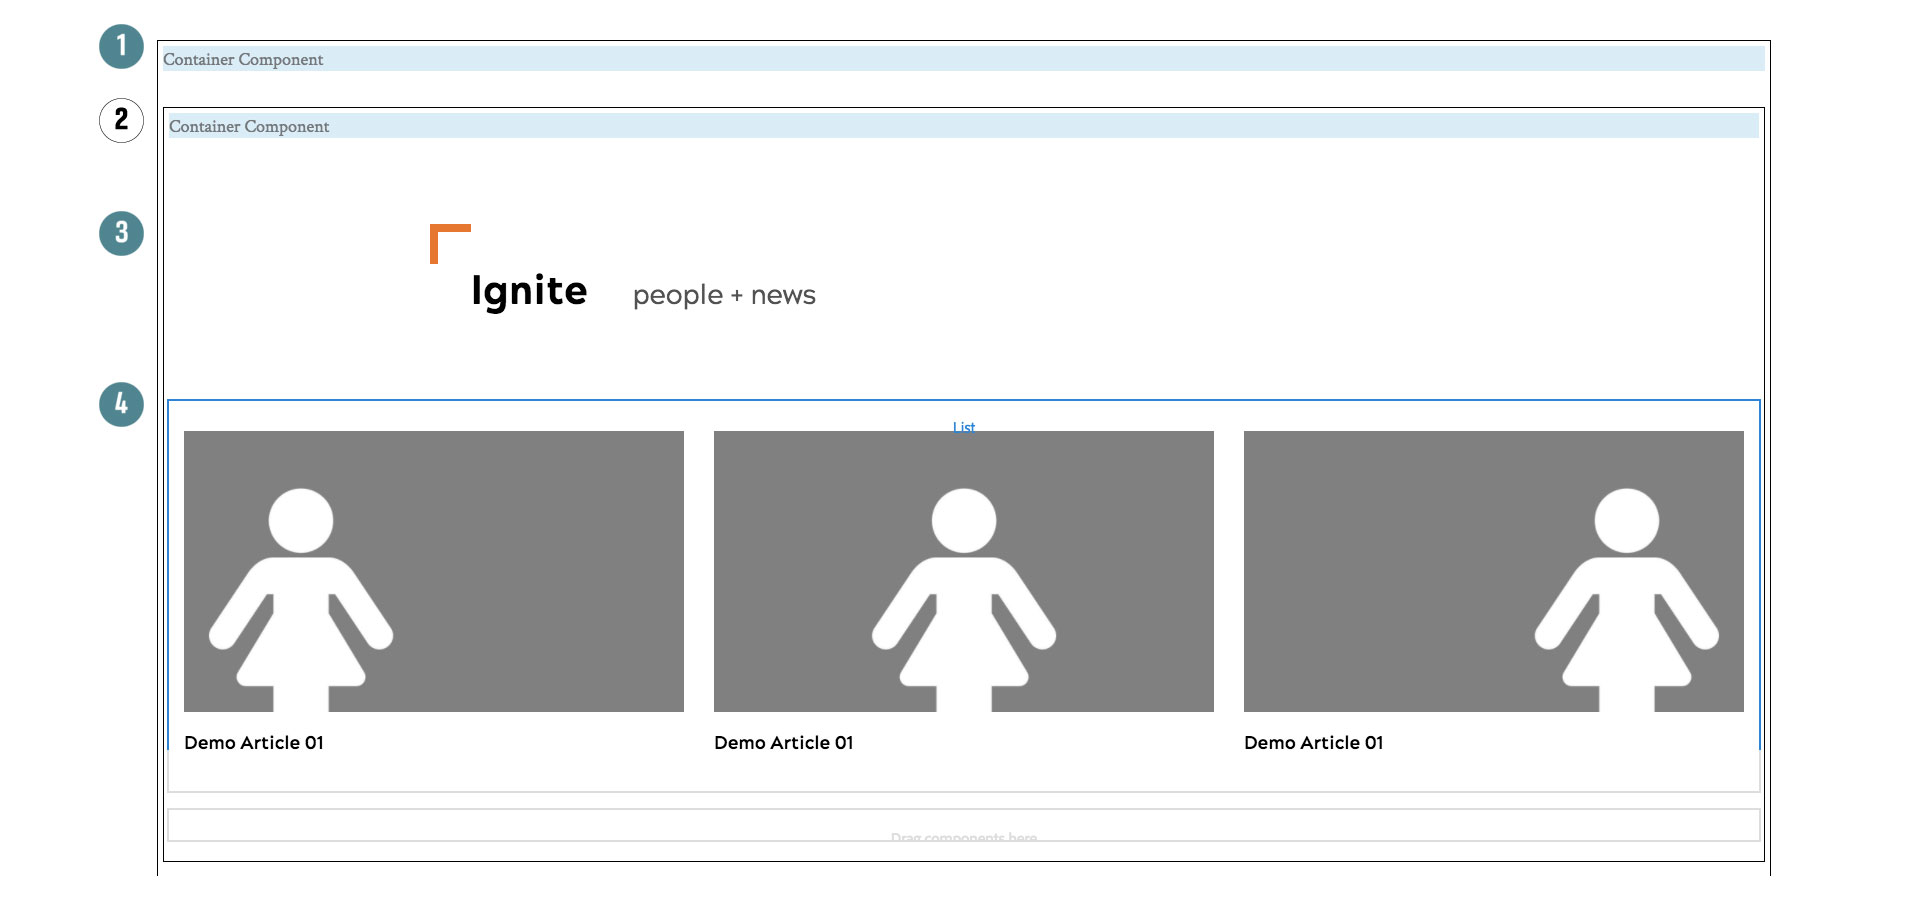
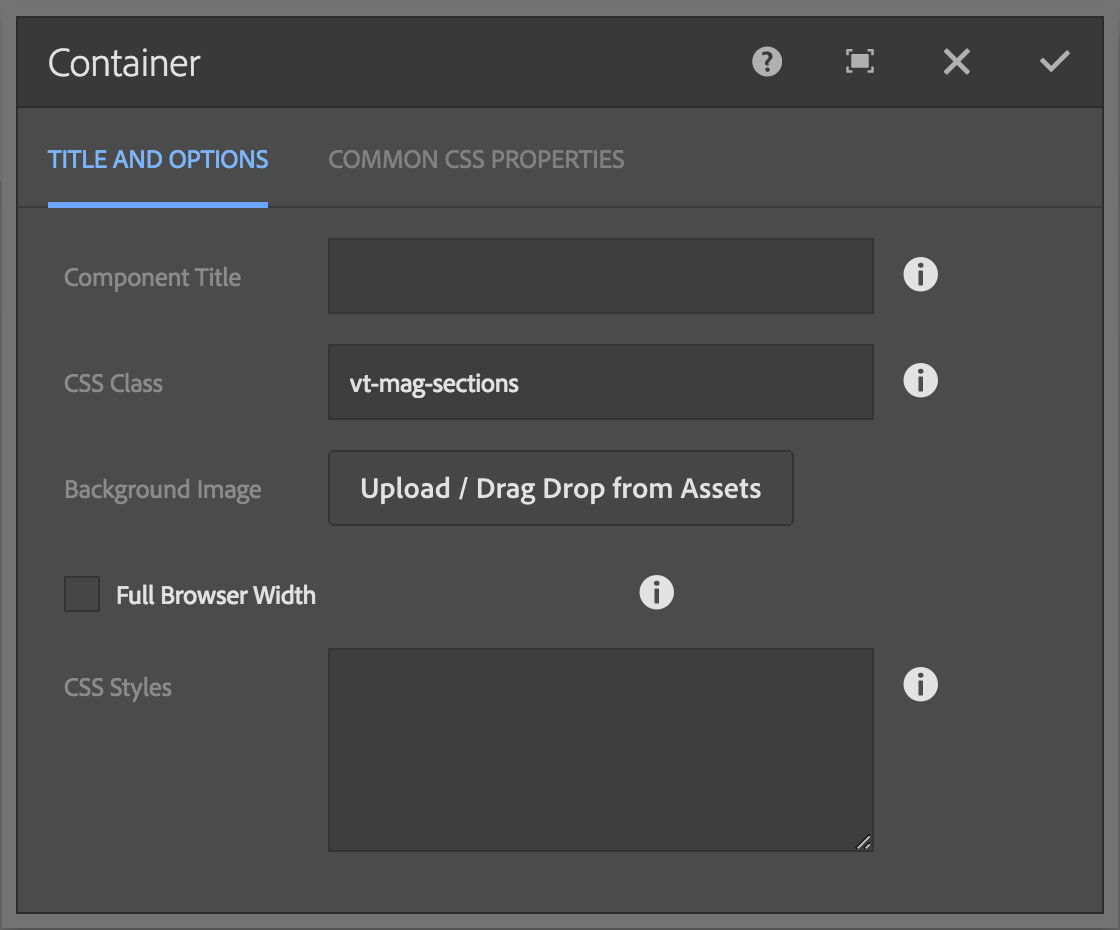
7. Drag and drop a "Container" component into the page body
8. Click on the container component to open its toolbar
9. Click the wrench icon in the toolbar
10. Click in the "CSS Class" field and then type: vt-mag-sections
11. Click the checkmark in the top-right of the dialog to accept the changes
12. Drag and drop another "Container" component inside the first container
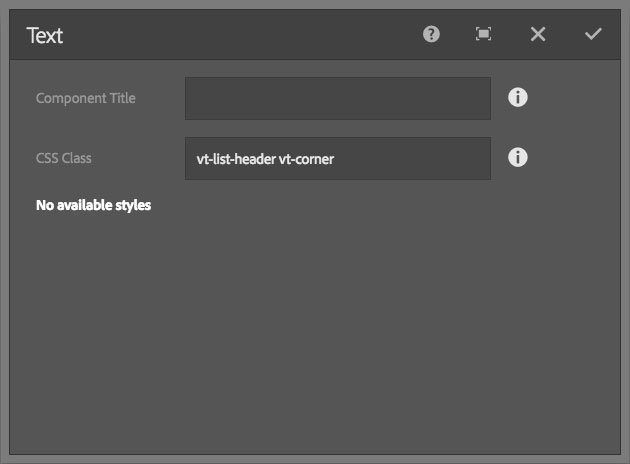
13. Drag and drop a "Text" component into the inner container
14. Click on the Text component to open its toolbar
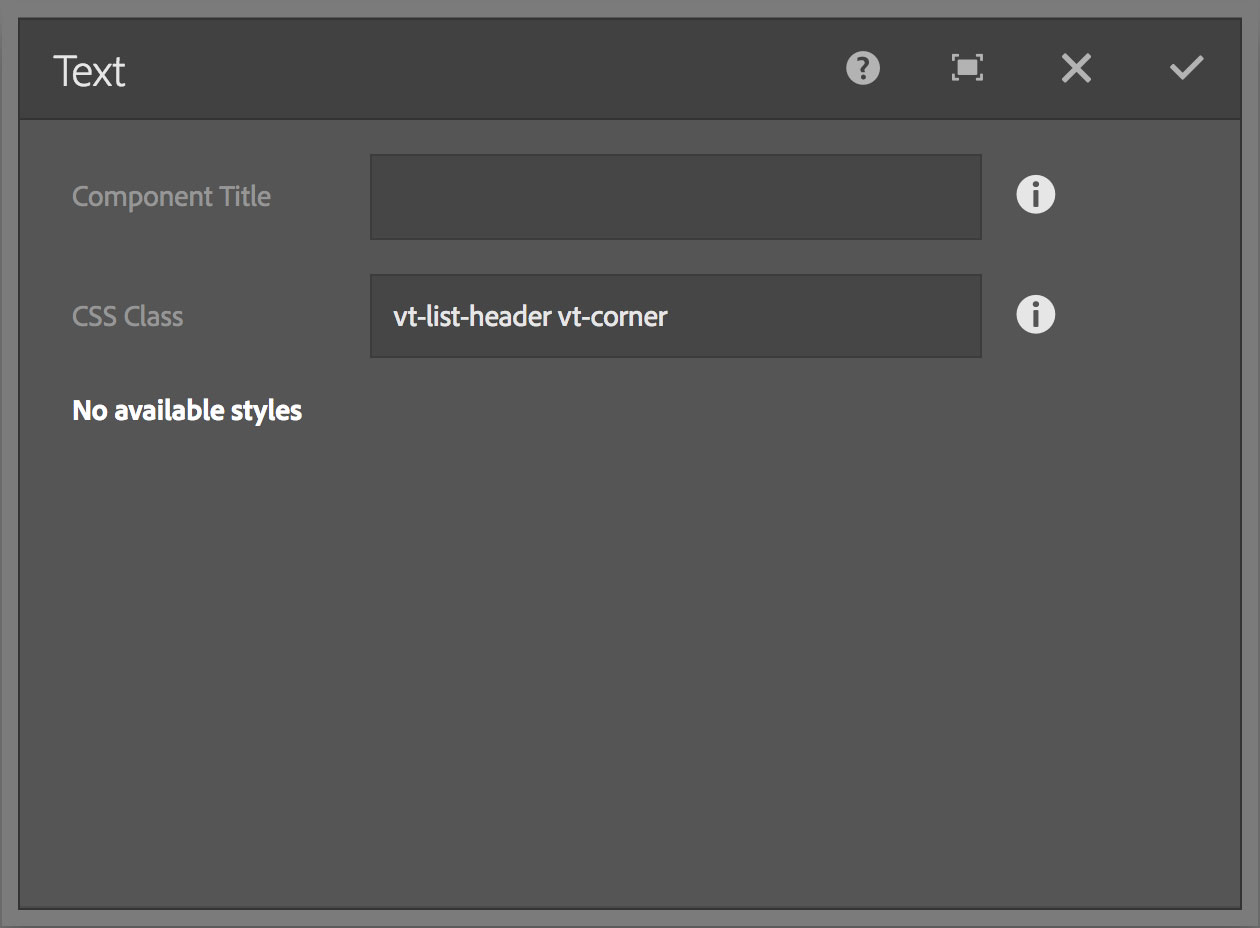
15. Click the wrench icon in the toolbar
16. Click in the "CSS Class" field and then type: vt-list-header vt-corner
17. Click the checkmark in the top-right of the dialog to accept the changes
18. Click on the Text component to open its toolbar
19. Click on the pencil icon in the toolbar to enter edit mode
20. Click the expand icon third from the right in the toolbar
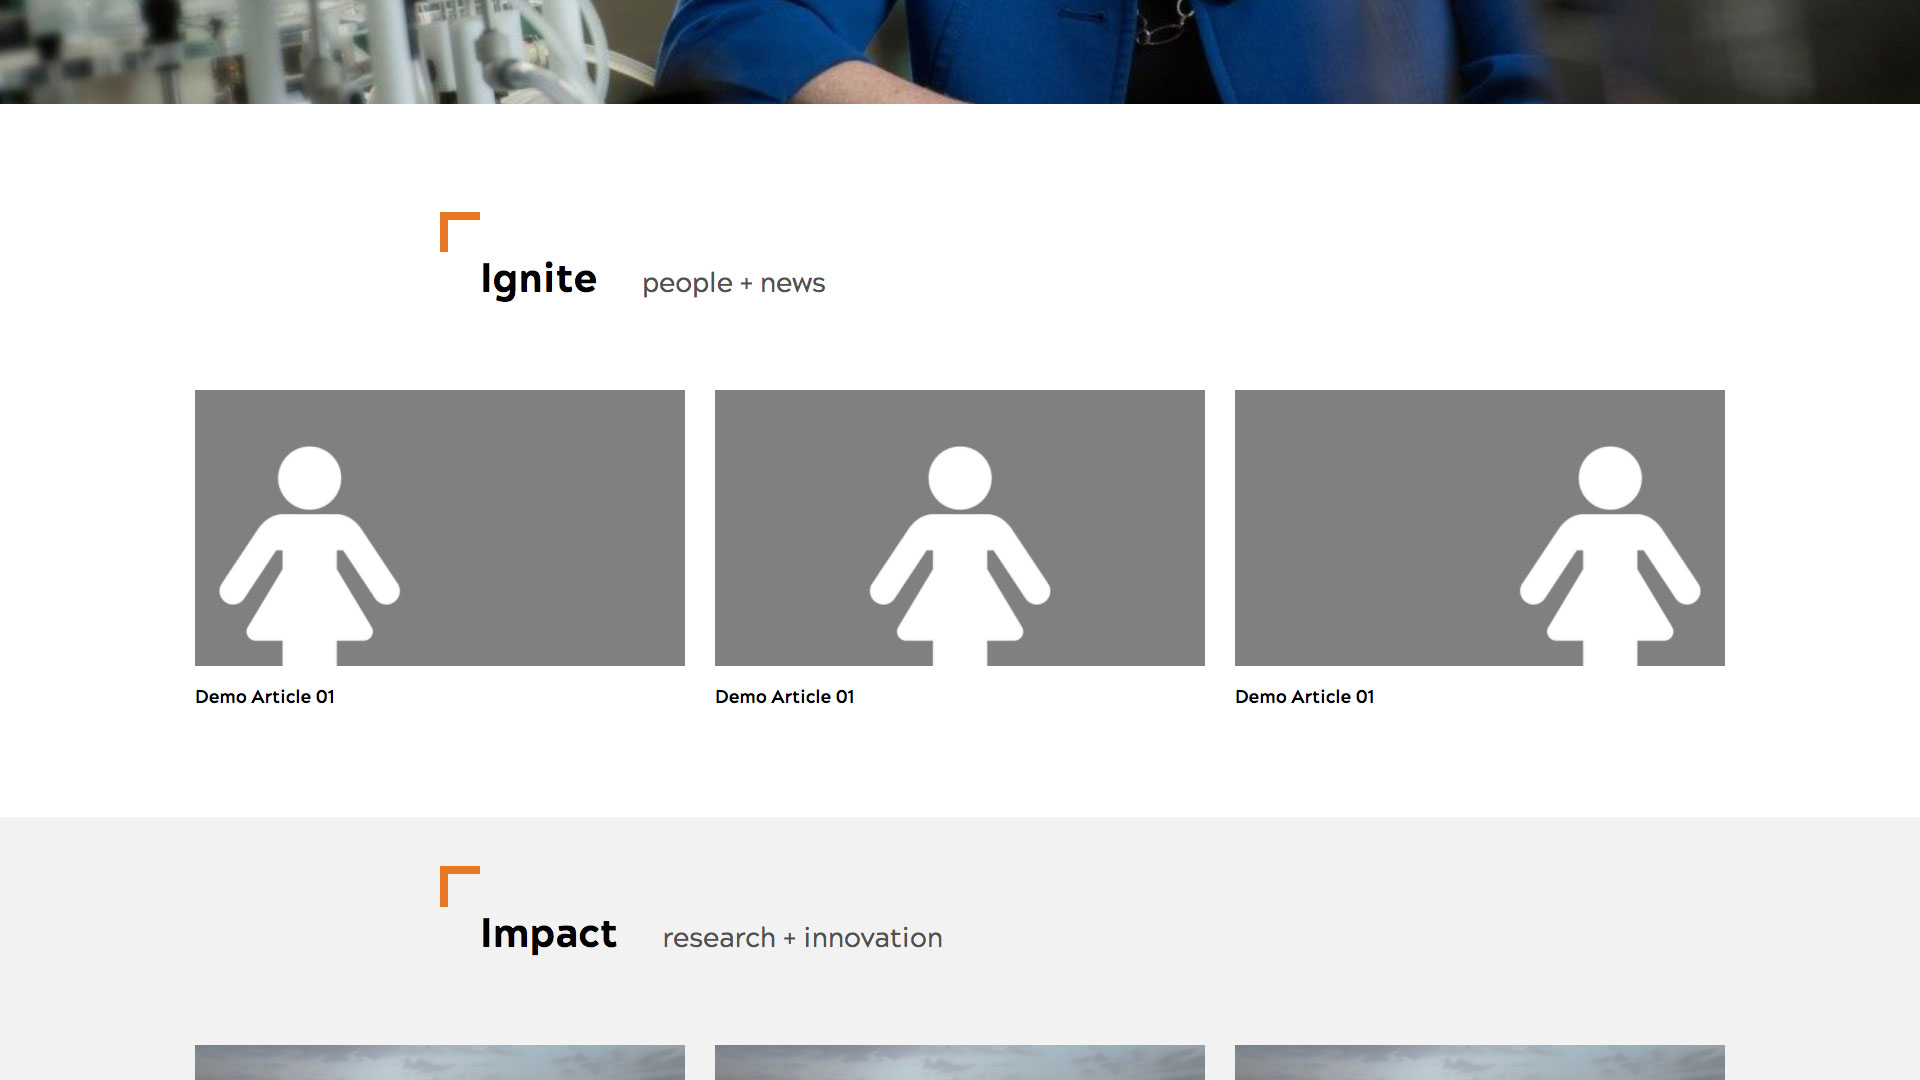
21. Click the text element type button, second from right in the toolbar and select: Heading 2
22. Type the section title matching the tag created for it
23. Click the collapse icon, far right in the toolbar
24. Click the checkmark far right in the toolbar
26. Drag and drop a "List" component under the text component in the inner-most container
27. Click the list component to display its toolbar
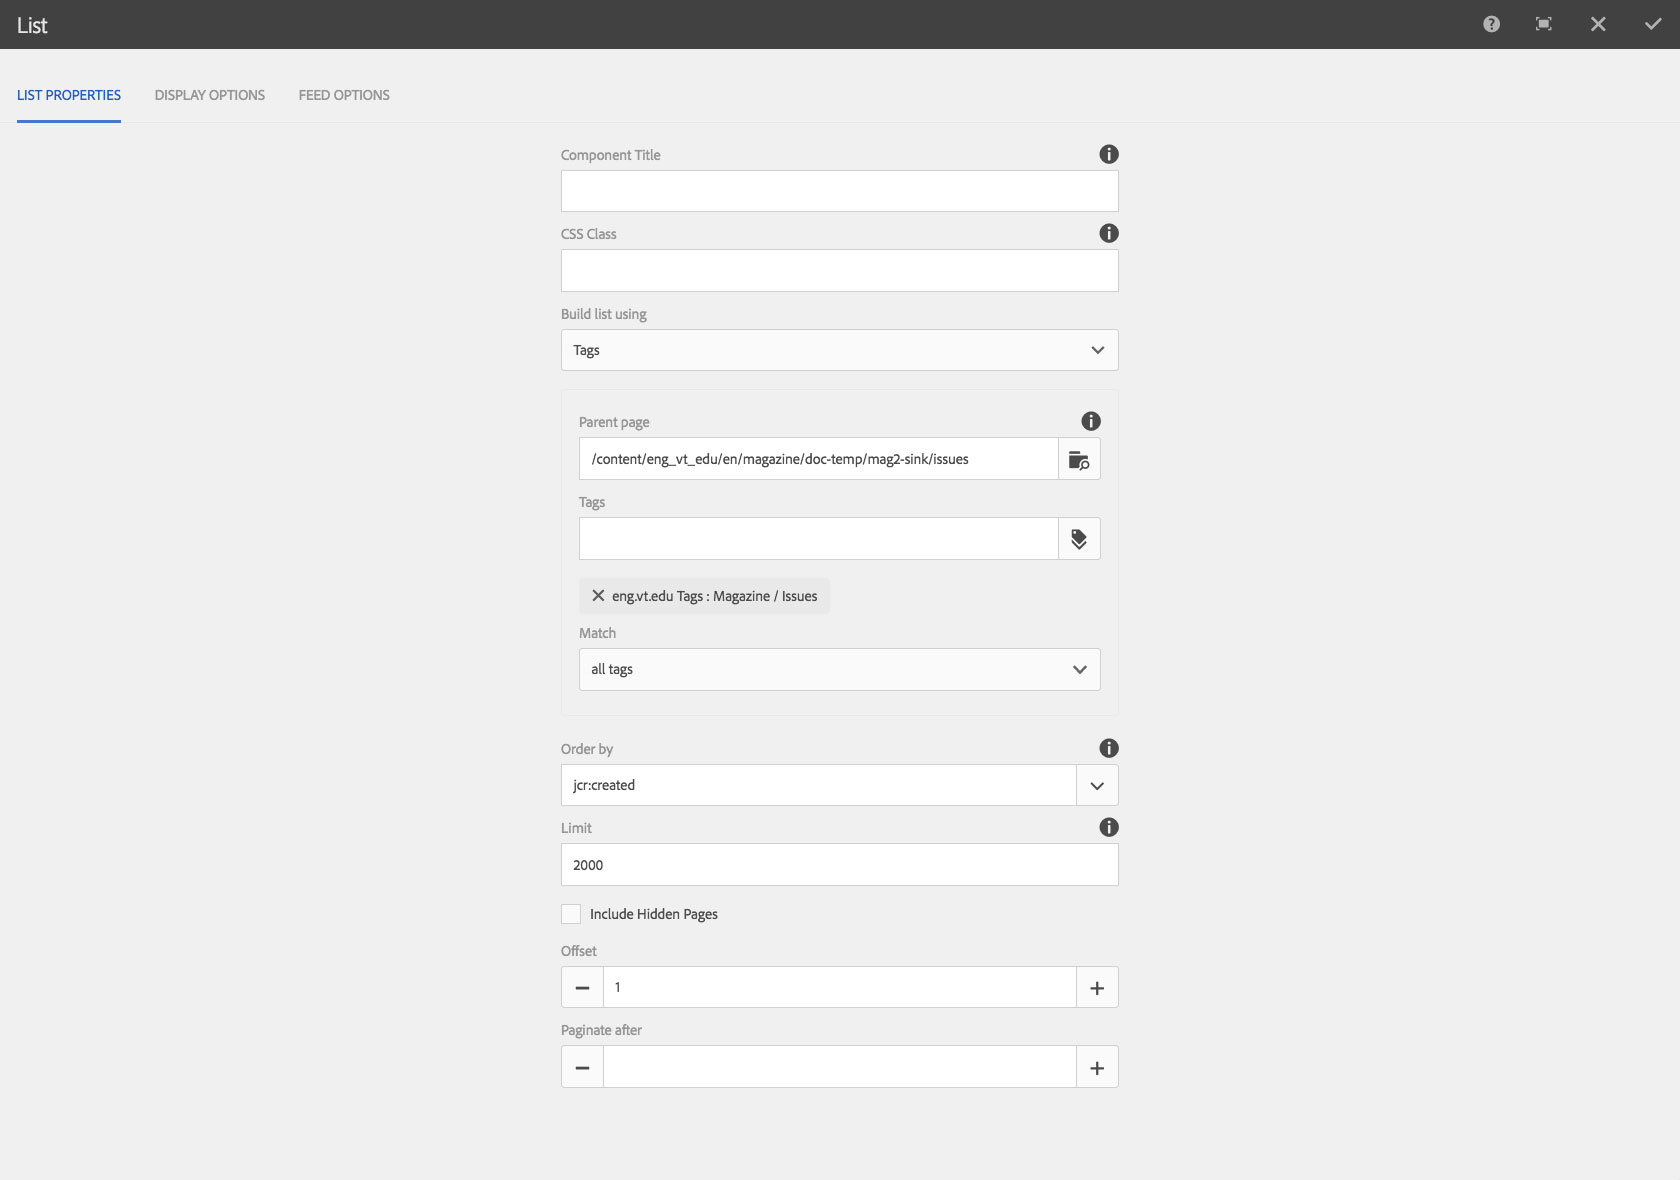
28. Click the wrench icon in the toolbar
29. Click the "CSS Class" field and type: vt-mag-sectionStoryList
30. Set the "Build list using" pulldown to: Tags
31. Click in the "Parent page" field and type: /content/sitename_vt_edu/en/magazine/stories/[issue folder]
32. Click in the "Tags" field and enter the tag name for this section
33. Set the "Match" pulldown to: all tags
34. Set the "Order by" pulldown to: onTime
35. Click the "Include Hidden Pages" checkbox
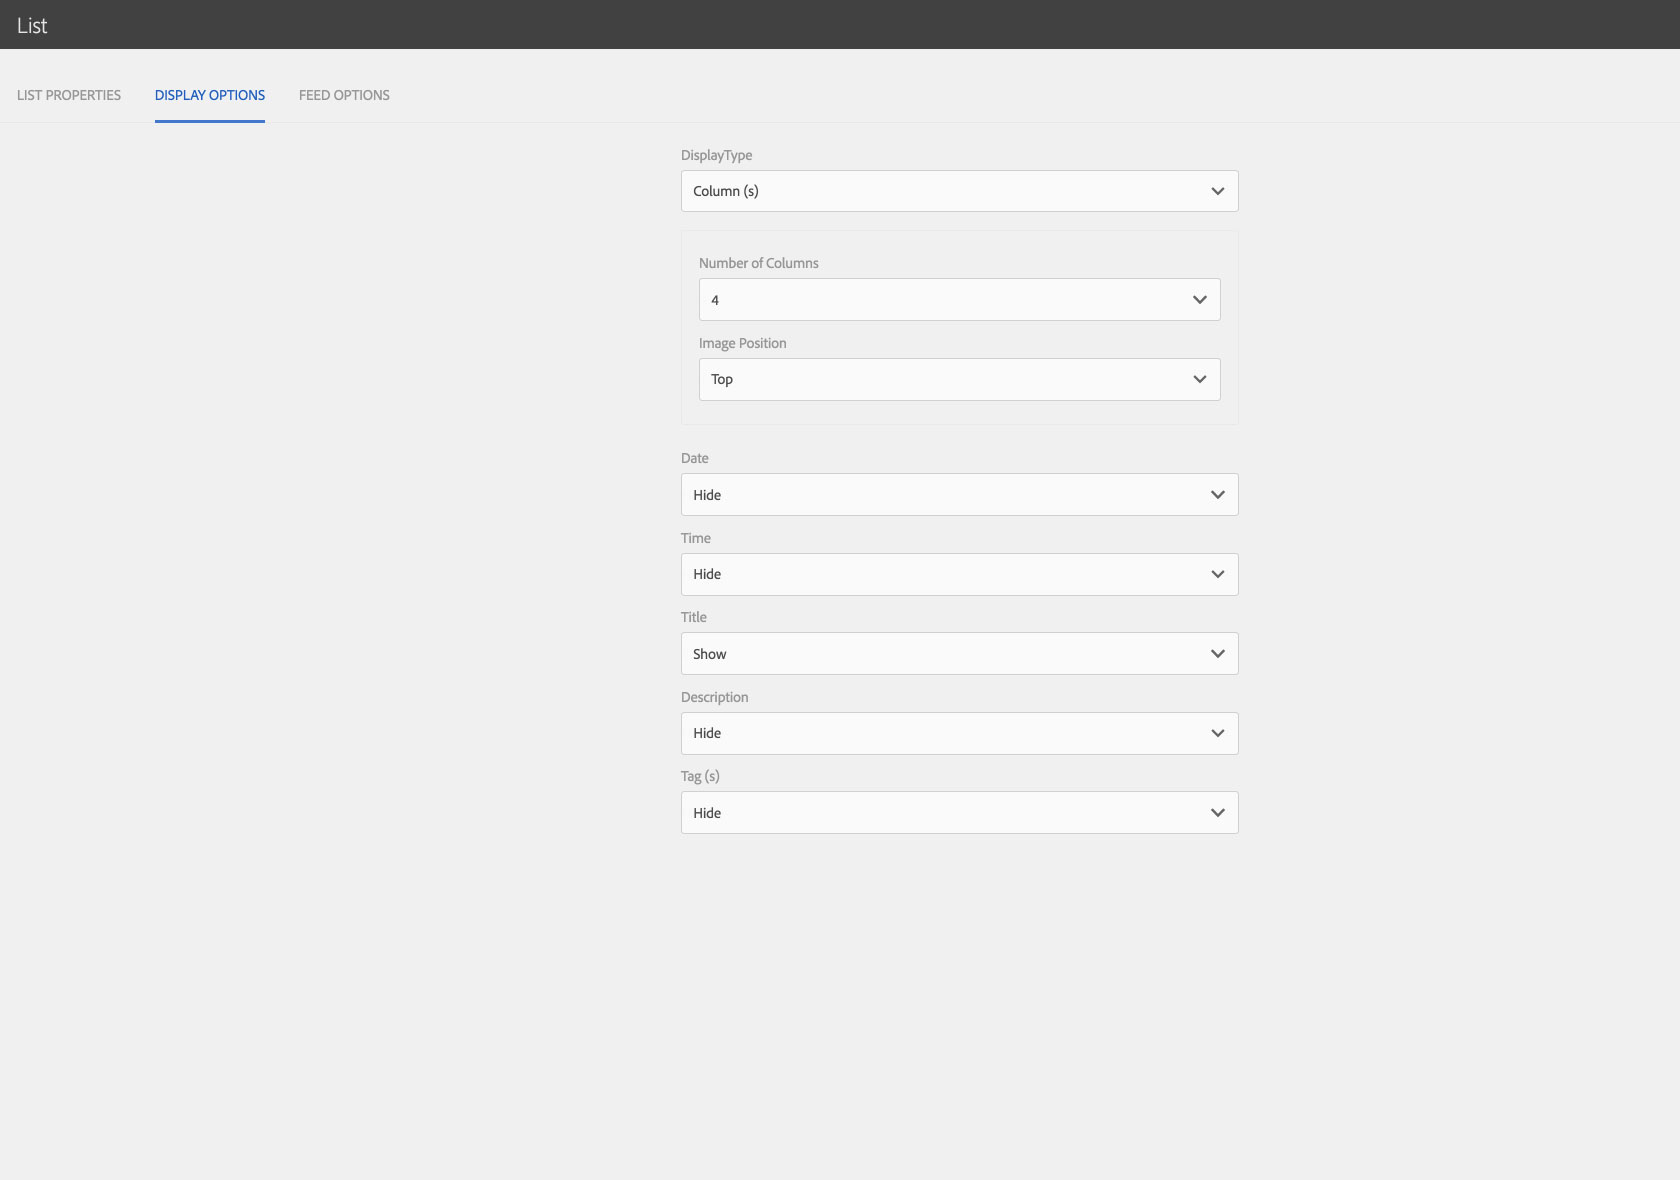
36. Click on the "Display Options" tab at the top of the dialog box
37. Set the "DisplayType" pulldown to: Column(s)
38. Set the "Number of Columns" pulldown to: 3
39. Set the "Image Position" pulldown to: Top
40. Set the "Title" pulldown to: Show
41. Set the "Description" pulldown to: Show
42. Click the checkmark in the top-right of the dialog to accept the changes
Repeat steps 12 - 42 for each section in your magazine, or copy and paste the inner container element and update the header text and list parent page path.
The inner container for each section list and list header does not require any additional configuration.


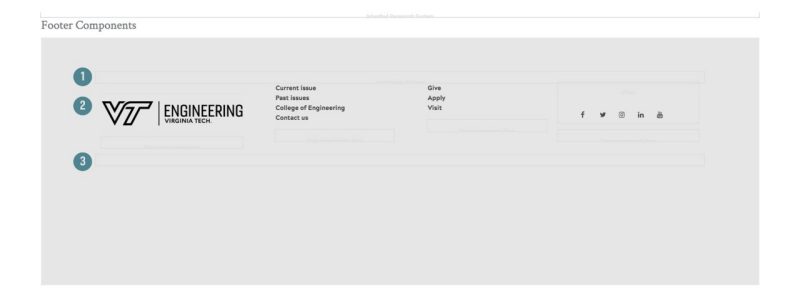
If you wish to have a custom footer for the magazine apart from your main site footer, you will need to follow the instructions below. The magazine footer should be minimal in content and be as close to the example as possible.
1. Log into https://author.ensemble.vt.edu
2. Click on the site name for the site you want to add a magazine to from the My Sites page
3. Click on the title for the "en" page to get to the parent page level of the site
4. Click on the checkmark next to the "Magazine" page title
5. Click the "Open" button in the toolbar
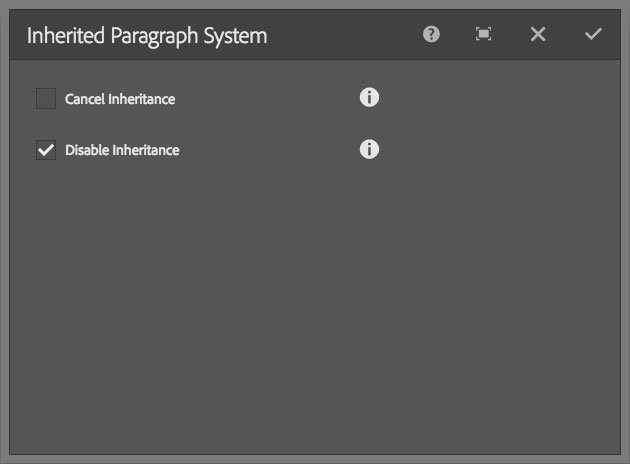
6. Click on the "Inherited Paragraph System" box in the Footer Components area to display its toolbar
7. Click the wrench icon in the toolbar
8. Click the checkbox for "Disable Inheritance"
9. Click the checkmark in the top-right of the dialog to accept the changes
You will need to add the Multi Columns component to the footer first. The subsections ( i - iv ) have the instructions for the content of each column.
1. Log into https://author.ensemble.vt.edu
2. Click on the site name for the site you want to add a magazine to from the My Sites page
3. Click on the title for the "en" page to get to the parent page level of the site
4. Click on the checkmark next to the "Magazine" page title
5. Click the "Open" button in the toolbar
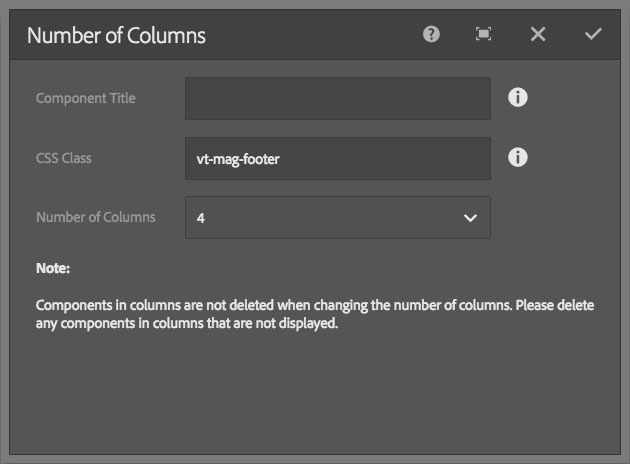
6. Drag and drop a "Multi Columns" component into the Footer Components area
7. Click on the Multi Columns component to display its toolbar
8. Click the wrench icon in the toolbar
9. Click in the "CSS Class" field and type: vt-mag-footer
10. Set the "Number of Columns" pulldown to: 4
11. Click the checkmark in the top-right of the dialog to accept the changes
This column contains the logo lockup for your organization. You will need to use an all black version with a transparent background. The instructions contain how to upload the lockup and then insert it into the first column of the footer Multi Columns coomponent.
1. Log into https://author.ensemble.vt.edu
2. Click on the "My Assets" link in the left-hand menu.
3. Click on the title for the site where you are adding the magaine content
4. If you have already created a folder for magazine assets click the title of that folder, if not click the "Create Folder" button in the tool bar and make a folder for the assets and then click the title for that folder
5. Click the "Upload Assets" button in the toolbar
6. Navigate to where you saved the black logo lockup for your organization and then click on the asset in the file dialog
7. Click the "Open" button in the bottom-right corner of the fiel dialog
8. Click the "Upload" button
9. Click the checkbox next to the title for the uploaded logo lockup
10. Click the "View Properties" button in the toolbar
11. Click the "Edit" button in the toolbar
12. Click in the "Title" field and type a title for the asset, e.g., Black Logo Lockup
13. Click in the "Alternative Text" field and enter a description for the logo lockup, e.g., College of Engineering logo
14. Click the "Done" button in the upper-right corner of the window
15. Click the "My Sites" button in the left-hand menu
16. Click on the site name for the site you want to add a magazine to from the My Sites page
17. Click on the title for the "en" page to get to the parent page level of the site
18. Click on the checkmark next to the "Magazine" page title
19. Click the "Open" button in the toolbar
20. Drag and drop an "Image" component from the Components side panel into the first column of the footer area Multi Columns component
21. Click on the "Assets" tab in the side panel
22. Drag and drop the uploaded logo lockup into the Image component in the first column of the Multi Columns component
1. Log into https://author.ensemble.vt.edu
2. Click on the site name for the site you want to add a magazine to from the My Sites page
3. Click on the title for the "en" page to get to the parent page level of the site
4. Click on the checkmark next to the "Magazine" page title
5. Click the "Open" button in the toolbar
6. Drag and drop a "Text" component into the second column of the Multi Columns component
7. Click on the Text component to display its toolbar
8. Click on the pencil icon in the component toolbar to enter edit mode
9. Click the expand icon third from the right in the toolbar
10. Click the bulleted list tool in the Text component toolbar, tenth from the left
11. Type the following items:
- Current issue
- Past issues
- [Main site title], e.g., College of Engineering
- Contact us
12. Select the "Current issue" text
13. Click the chain icon in the toolbar, fourth from the left
14. Type the link to the current issue: https://sitename.vt.edu/magazine
15. Select the "Past issues" text
16. Click the chain icon in the toolbar, fourth from the left
17. Type the link to the Past Issues page: https://sitename.vt.edu/magazine/issues.html
18. Select the text you entered for your main site title
19. Click the chain icon in the toolbar, fourth from the left
20. Type the link to the main site page: https://sitename.vt.edu
21. Select the "Contact us" text
22. Click the chain icon in the toolbar, fourth from the left
23. Type the link to either a page of contacts or an email address, e.g., mailto:sitename_contact@vt.edu
24. Click the collapse icon, far right in the toolbar
25. Click the checkmark far right in the toolbar
1. Log into https://author.ensemble.vt.edu
2. Click on the site name for the site you want to add a magazine to from the My Sites page
3. Click on the title for the "en" page to get to the parent page level of the site
4. Click on the checkmark next to the "Magazine" page title
5. Click the "Open" button in the toolbar
6. Drag and drop a "Text" component into the third column of the Multi Columns component
7. Click on the Text component to display its toolbar
8. Click on the pencil icon in the toolbar to enter edit mode
9. Click the expand icon third from the right in the toolbar
10. Click the bulleted list tool in the Text component toolbar, tenth from the left
11. Type the following items:
- Give
- Apply
- Visit
12. Select the "Give" text
13. Click the chain icon in the toolbar, fourth from the left
14. Type the link to the main giving page form: https://webapps.es.vt.edu/givingto/gift
15. Select the "Apply" text
16. Click the chain icon in the toolbar, fourth from the left
17. Type the link to the main application page: https://vt.edu/apply
18. Select the "Visit" text
19. Click the chain icon in the toolbar, fourth from the left
20. Type the link to the main visit page: https://vt.edu/visit
21. Click the collapse icon, far right in the toolbar
22. Click the checkmark far right in the toolbar
1. Log into https://author.ensemble.vt.edu
2. Click on the site name for the site you want to add a magazine to from the My Sites page
3. Click on the title for the "en" page to get to the parent page level of the site
4. Click on the checkmark next to the "Magazine" page title
5. Click the "Open" button in the toolbar
6. Drag and drop an "HTML" component into the right-most column in the Multi Columns component
7. Click on the HTML component to display its toolbar
8. Click the wrench icon in the toolbar
9. Click in the "HTML" text area field and paste social media code from this page [link needed]
10. Edit the links in the social media code to correspond with your social media site links
11. Click the checkmark in the top-right corner of the dialog to accept the changes
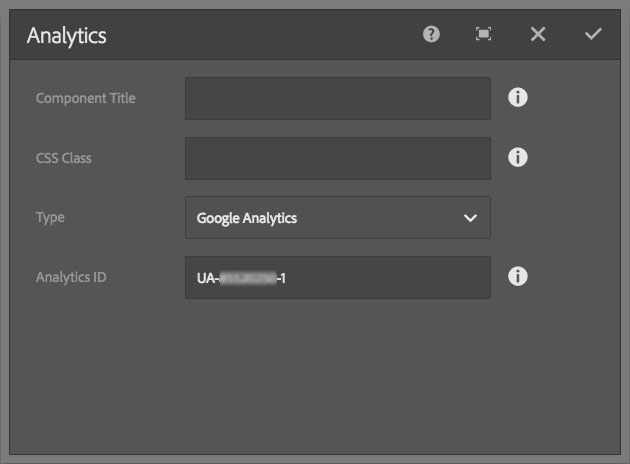
When the main site inheritance is disabled for the footer, your analytics get disabled as well. You will need to add a duplicate analytics component into the footer. This does not cause problems with Google Analytics, it just adds the magazine pages back to the data being sent to your account.
1. Log into https://author.ensemble.vt.edu
2. Click on the site name for the site you want to add a magazine to from the My Sites page
3. Click on the title for the "en" page to get to the parent page level of the site
4. Click on the checkmark next to the "Magazine" page title
5. Click the "Open" button in the toolbar
6. Drag and drop an "Analytics component" from the "Components" side panel into the "Footer Components" area of the page
7. Click on the analytics component to open its toolbar
8. Click the wrench icon in the toolbar
9. Set the "Type" pulldown to: Universal Analytics
10. Click in the "Analytics ID" field
11. Copy and paste your Google Analytics ID, e.g., UA-12345678-1
12. Click the checkmark in the top-right of the dialog to accept the changes
When creating the Article Page template files for your stories you will want to set the "On time" for each story so they sort properly in the home page lists. Typically, this is done by setting the on time for items you want to appear first in the lists to dates closer to today, or the expected publish date. For instance, if today is January 25, 2018, you would set the first article to appear January 25, 2018, 12:00 am and then subsequent articles would be set at ten minute intervals backwards in time, e.g., January 24, 2018 11:50 pm, January 24, 2018 11:40 pm, January 24, 2018 11:30 pm, and so on. This allows you to sort the stories by "onTime" in the List Properties for the home page section story lists, and gives you some flexibility for shuffling the order without having to change too many on times for existing story pages.
The following instructions will walk you through creating the articles for an issue:
1. Log into https://author.ensemble.vt.edu
2. Click on the site name for the site you want to add a magazine to from the My Sites page
3. Click on the title for the "en" page to get to the parent page level of the site
4. Click on the title for the "Magazine" page
5. Click on the title for the "Stories" page
6. Click on the title for the issue page/folder that you wish to add stories
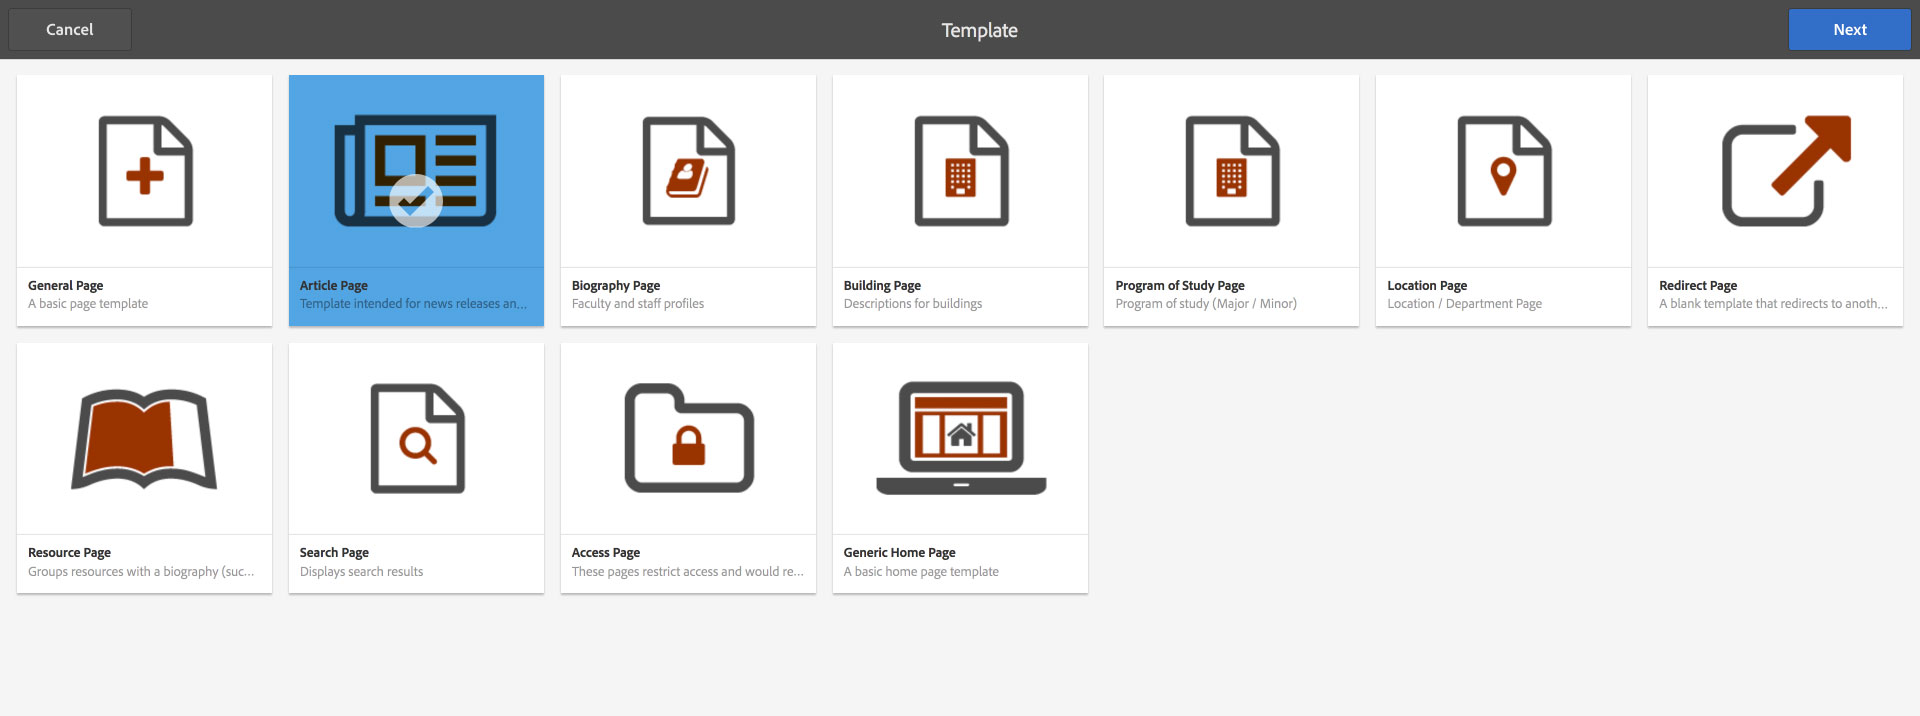
7. Click the "Create" button in the toolbar
8. Click on the "Article Page" template
9. Click the "Next" button in the top-right of the window
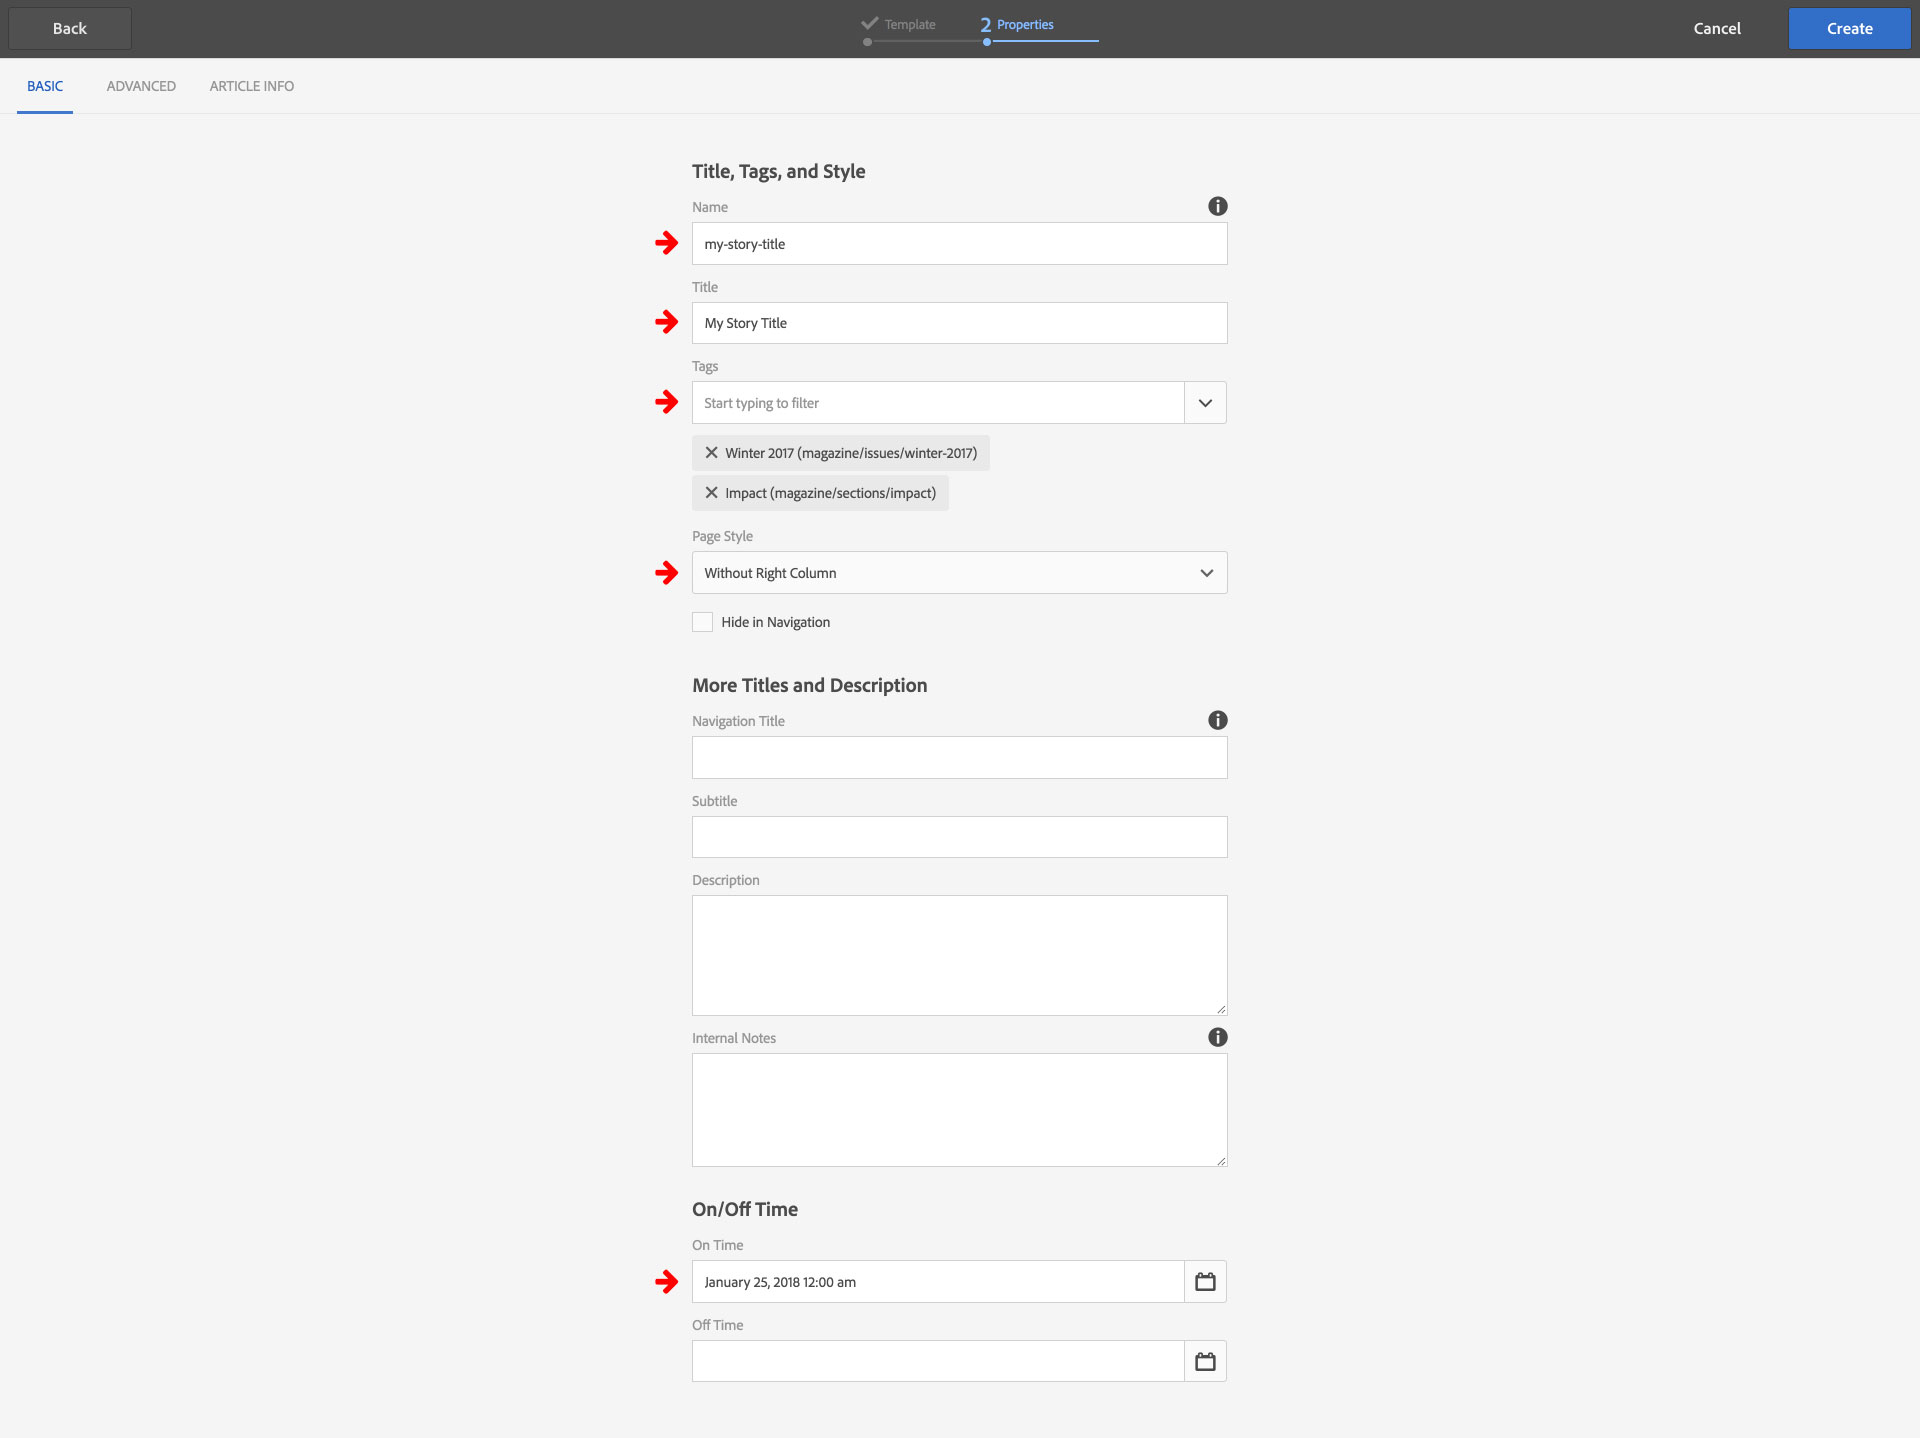
10. Click in the "Name" field and type the lowercase, dash seperated name for the story, e.g., my-story-name
11. Click in the "Title" field and type the mixed case, space seperated name for the story, e.g., My Story Name
12. Click in the "Tags" field and type the tag title for the issue this story belongs to
13. Click on the matching tag in the list below the "Tags" field
14. Click in the "Tags" field and type the tag title for the section the story belongs to
15. Click on the matching tag in the list below the "Tags" field
16. Set the "Page Style" pulldown to: Without Right Column
17. Scroll the window so you can see the "On / Off Time" section of the page
18. Click on the calendar icon to the right of the "On Time" field to set the article on time using the methodology explained above
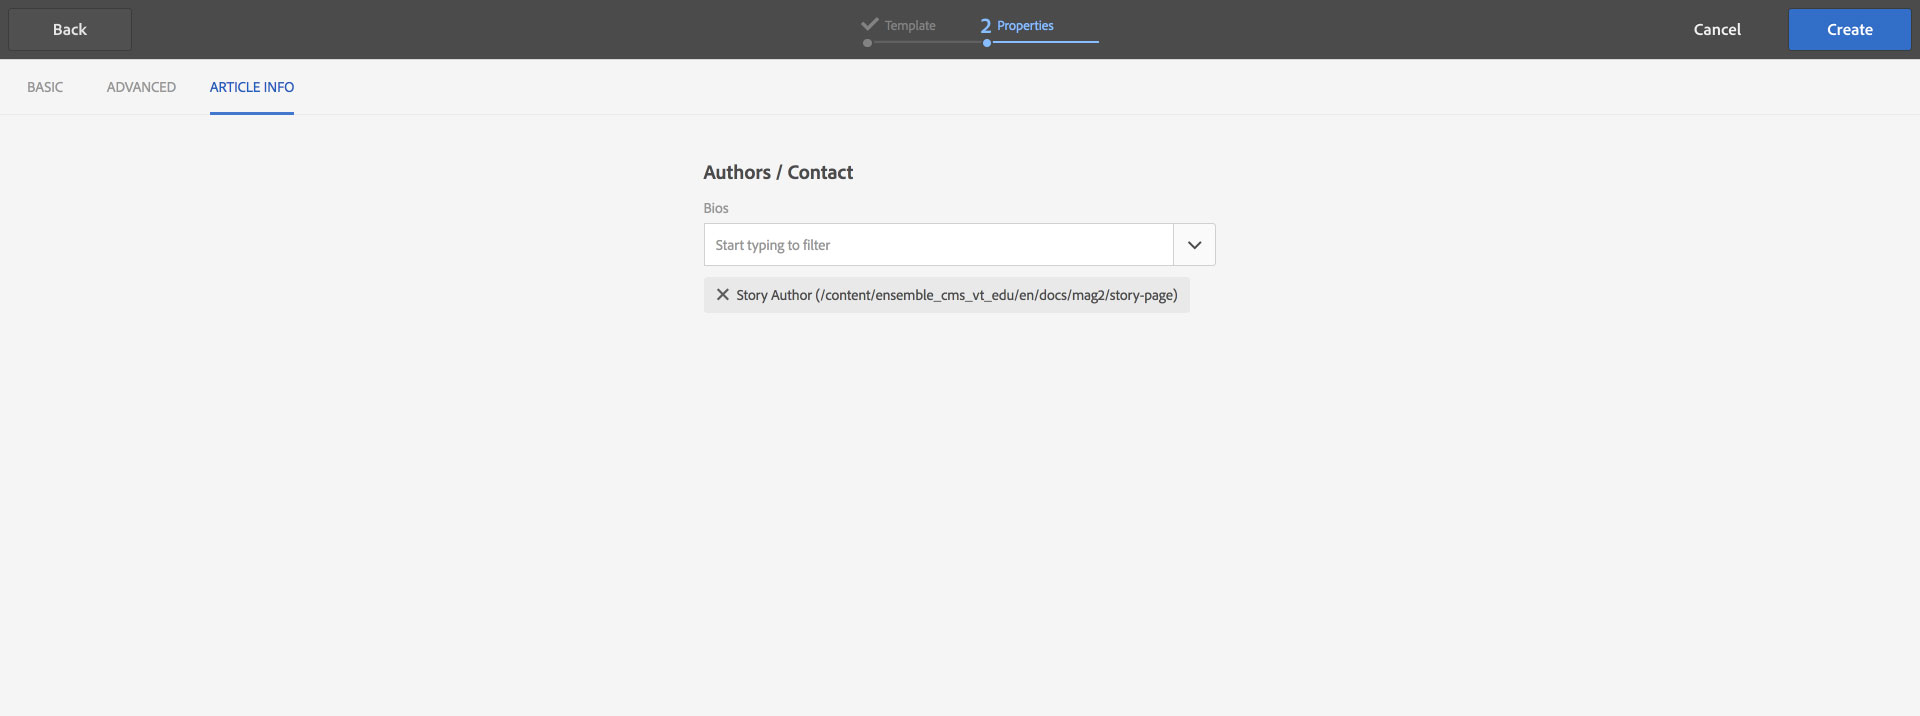
19. Click the "Article Info" tab
20. Click in the "Bios" field and start typing the author's name OR click the "Bios" pulldown button to list all authors with biography pages on this site
21. Click on the author's name that appears under the "Bios" field
22. Click the "Create" button in the top-right of the window
23. Click the "Done" button in the Page Created dialog
Repeat steps 7 - 23 for each story in your magazine issue. When you have created all the pages, proceed to open each and create content for them using the features described in the "Article page features" section of this document.
Publishing the magazine
Once all the required pages and content are created, you will need to publish everything. It is recommended that you start by publishing the stories for the given issue and then work your way up the structure publishing the site level parent pages (index, issues, sections, etc.) before publishing the /magazine page last.
1. Log into https://author.ensemble.vt.edu
2. Click on the site name for the site you want to add a magazine to from the My Sites page
3. Click on the title for the "en" page to get to the parent page level of the site
4. Click on the title for the "Magazine" page
5. Click on the title for the "Stories" page
6. Click on the title for the issue page, e.g., Winter 2017
7. Click on the view toggle button until you are in List view
8. Click on the checkbox in the list header row, just below the "Create" button in the toolbar to select all the pages
9. Click the "Publish" button in the toolbar
10. Click the "Publish" option in the menu
11. Click the back arrow in the black bar above the toolbar to step back through the page structure
12. Click the checkbox next to the issue title
13. Click the "Publish" button in the toolbar
14. Click the "Publish" option in the menu
15. Click the back arrow in the black bar above the toolbar to step back through the page structure
16. Click on the title for the "Sections" page
17. Click on the checkbox in the list header row, just below the Create button in the toolbar to select all the pages
18. Click the "Publish" button in the toolbar
19. Click the "Publish" option in the menu
20. Click the back arrow in the black bar above the toolbar to step back through the page structure
21. Click on the checkbox in the list header row, just below the Create button in the toolbar to select all the pages
22. Click the "Publish" button in the toolbar
23. Click the "Publish" option in the menu
24. Click the back arrow in the black bar above the toolbar to step back through the page structure
25. Click on the checkbox next to the title for the "Magazine" page
26. Click the "Publish" button in the toolbar
27. Click the "Publish" option in the menu

Archiving past issues
This is very important to know how to do correctly and is why this process appears before any other implementation options or features. Not doing this properly will cause major problems with this magazine template's functionality that will require one of the University Relations front-end developers to assist in fixing. There is a reminder below, but do not "MOVE" the /magazine/index page. You will be making a copy of it and then renaming the copy with the "MOVE" function with the instructions below. This will prevent anything bad from happening when archiving old issues.
Once you are ready to create a new issue:
1. Log into https://author.ensemble.vt.edu
2. Click on the site name for the site you want to add a magazine to from the My Sites page
3. Click on the title for the "en" page to get to the parent page level of the site
4. Click on the title for the "Magazine" page
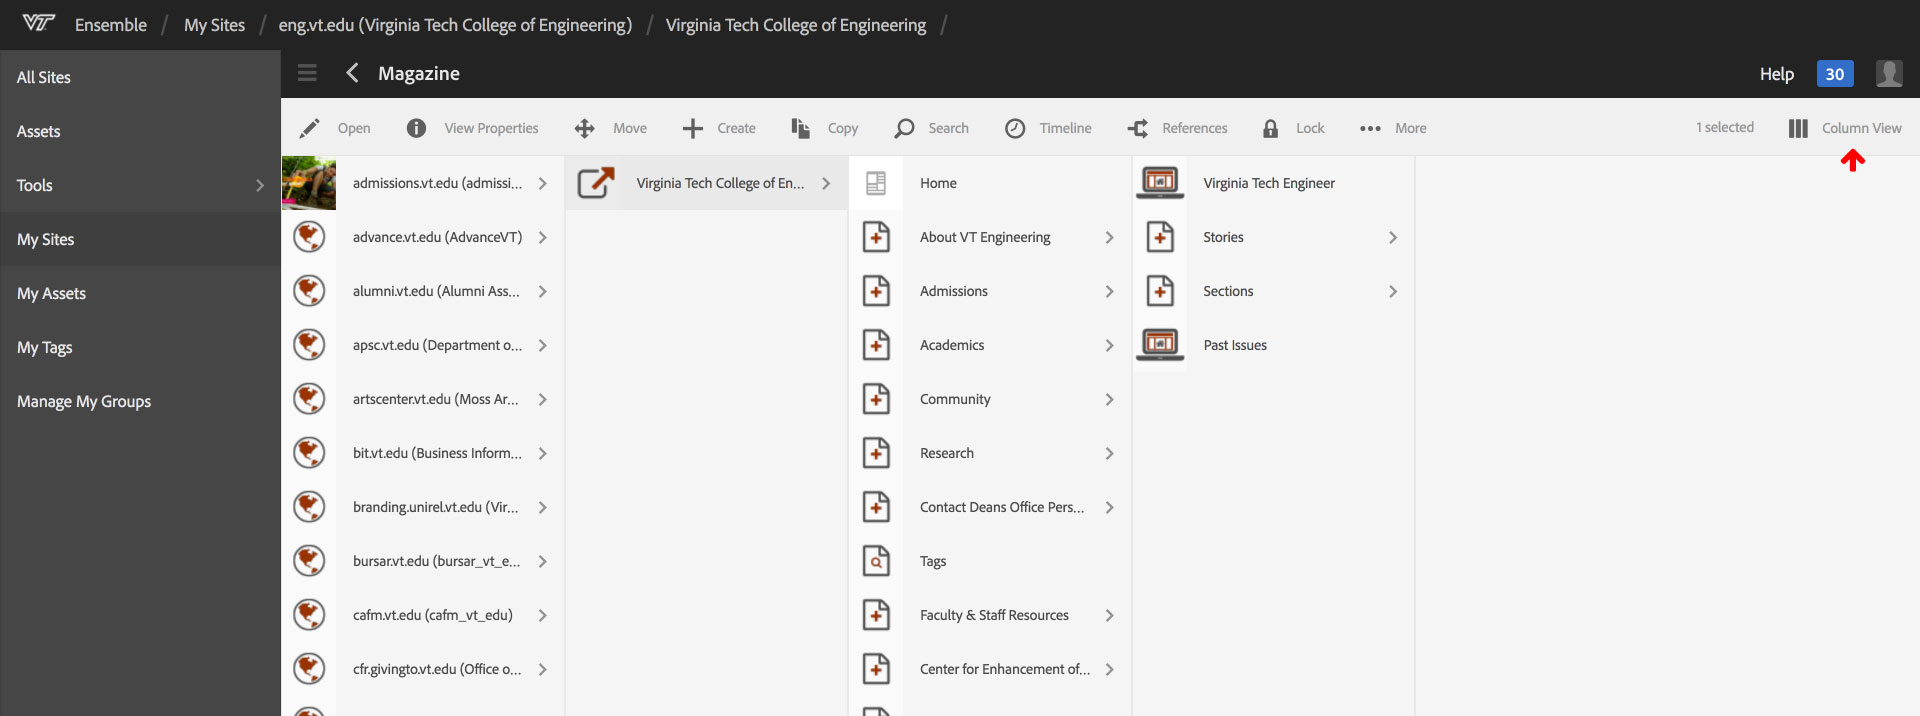
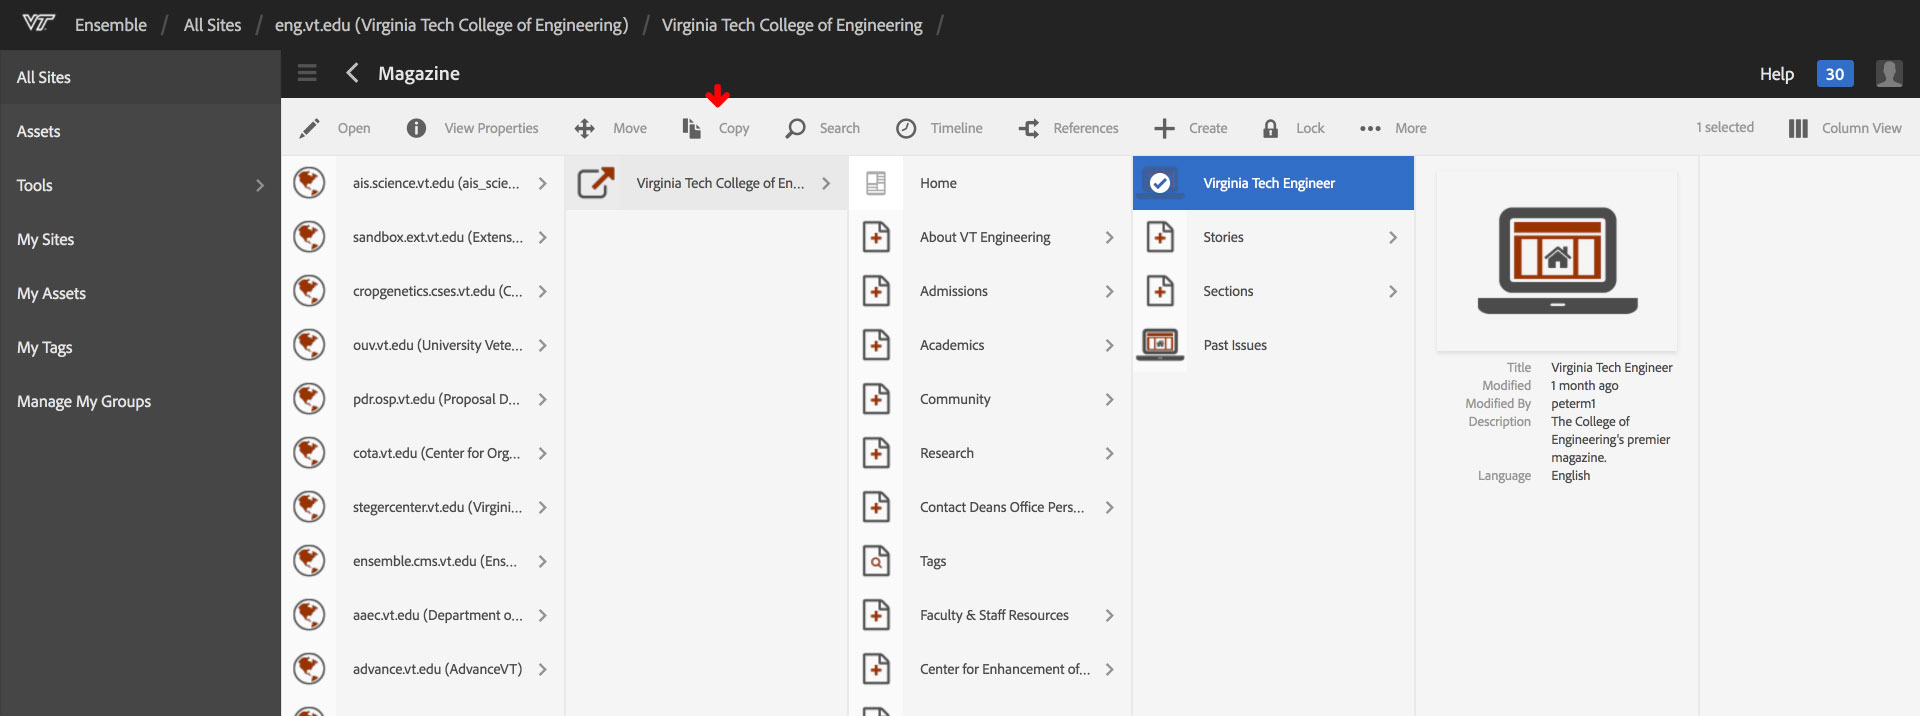
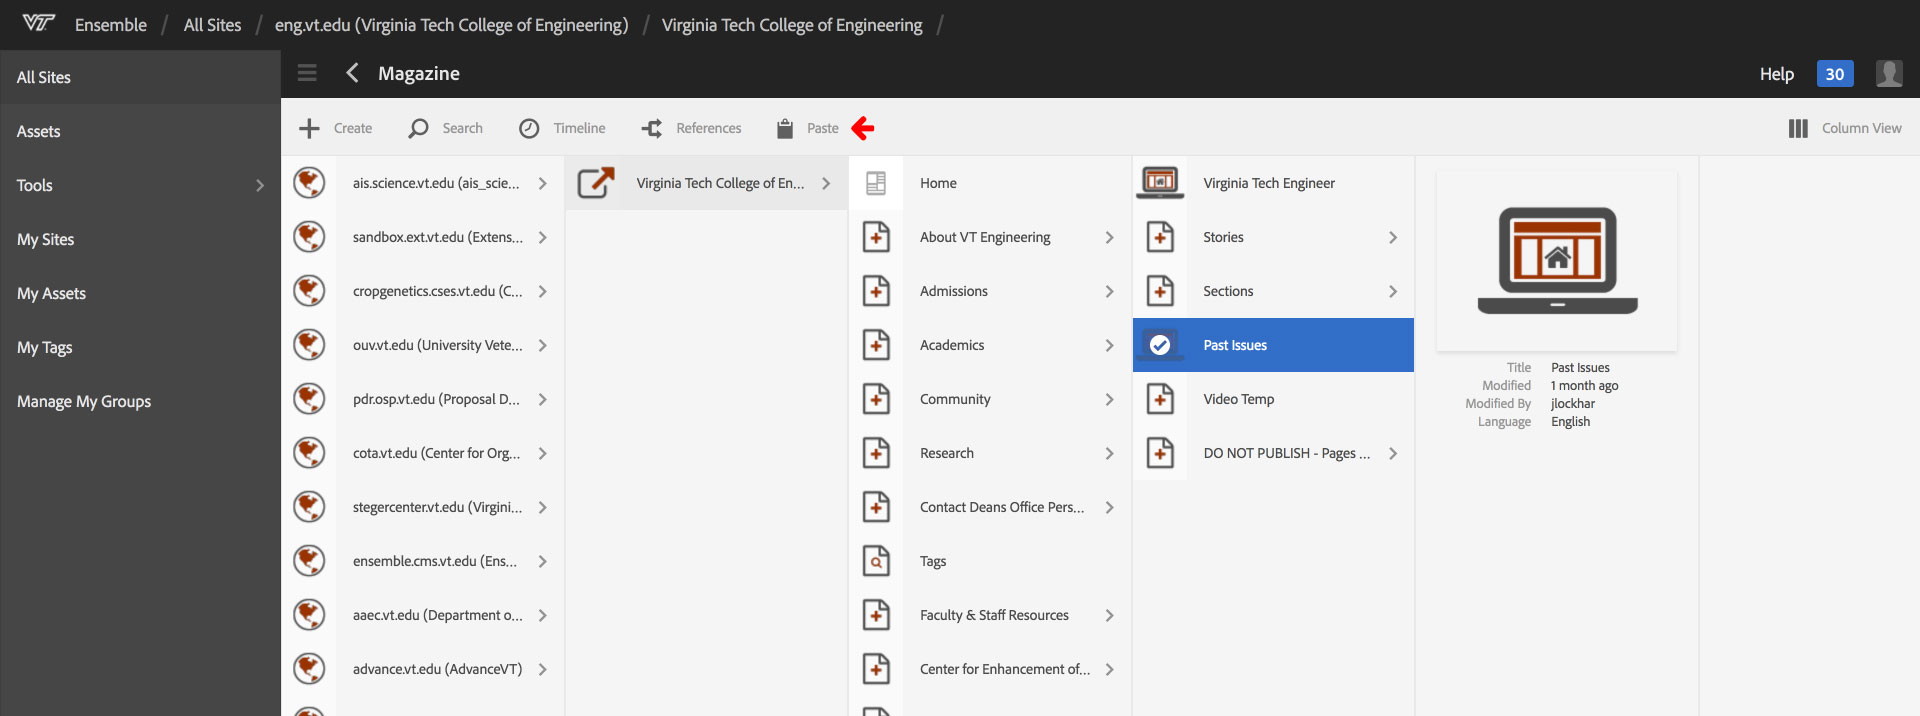
5. Click on the "List View" button in the top-right portion of the window to change to Column View
6. Click on the home page for the magazine
7. Click the "Copy" button in the toolbar
8. Click on the "Past Issues" page
9. Click the "Paste" button in the toolbar
10. Click on the "Column View" button to return to List View
1. Log into https://author.ensemble.vt.edu
2. Click on the site name for the site you want to add a magazine to from the My Sites page
3. Click on the title for the "en" page to get to the parent page level of the site
4. Click on the title for the "Magazine" page
5. Click on the title for the "Past Issues" page
6. Click the checkbox next to the issue you want to rename
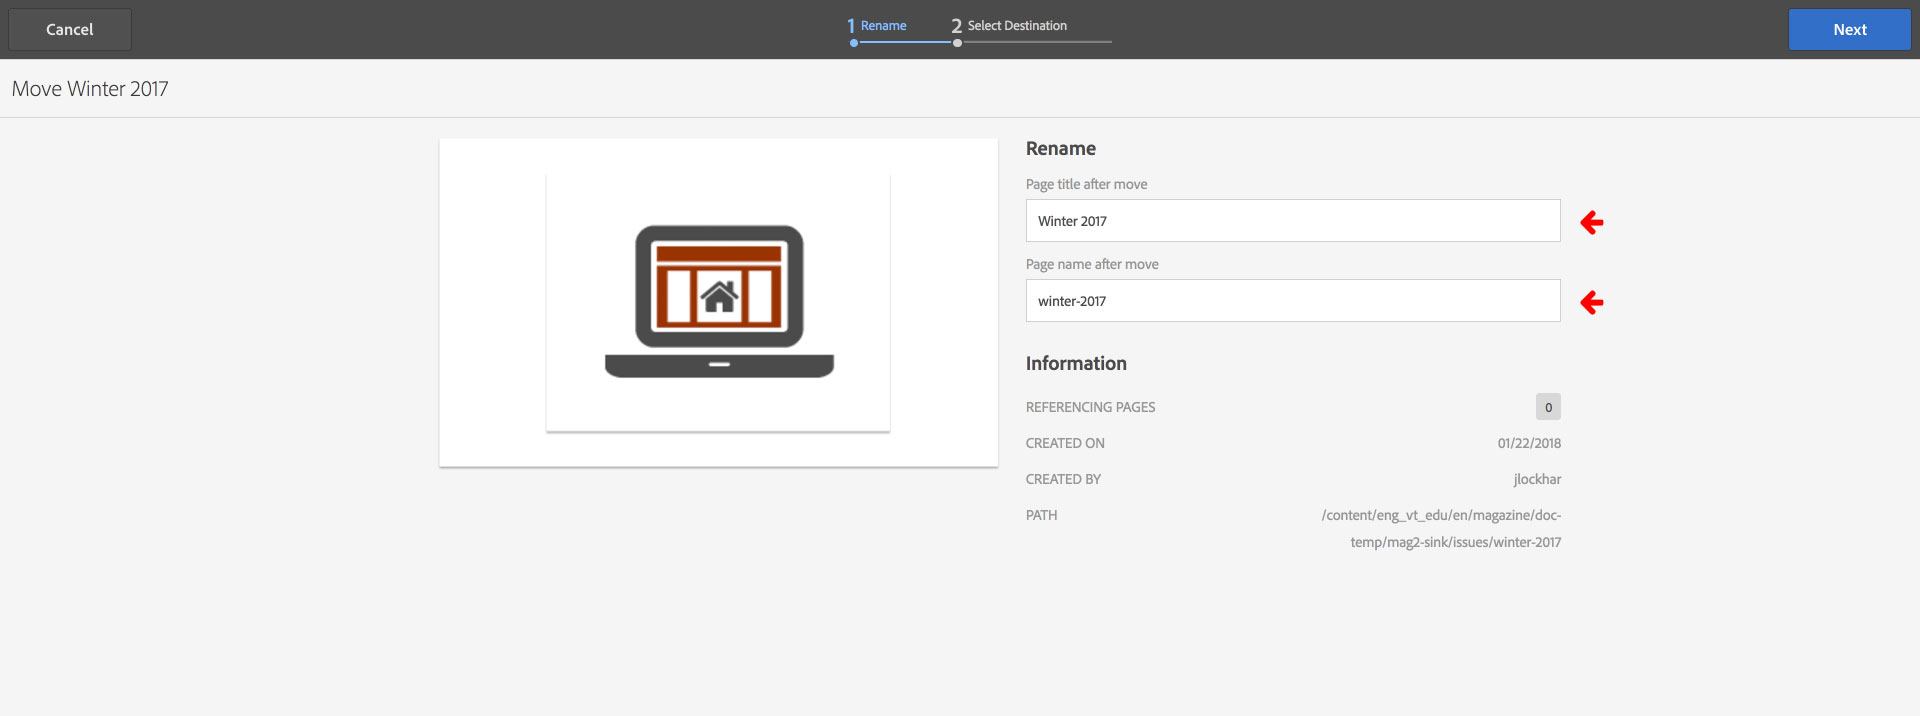
7. Click the "Move" button in the toolbar
8. In the "Title" field type the mixed case, space separated title for the magazine issue, e.g., Winter 2017
9. In the "Name" field type the lowercase, dash seperated name that corresponds to the tag name for the issue, e.g., winter-2017
10. Click "Next" in the top-right of the window
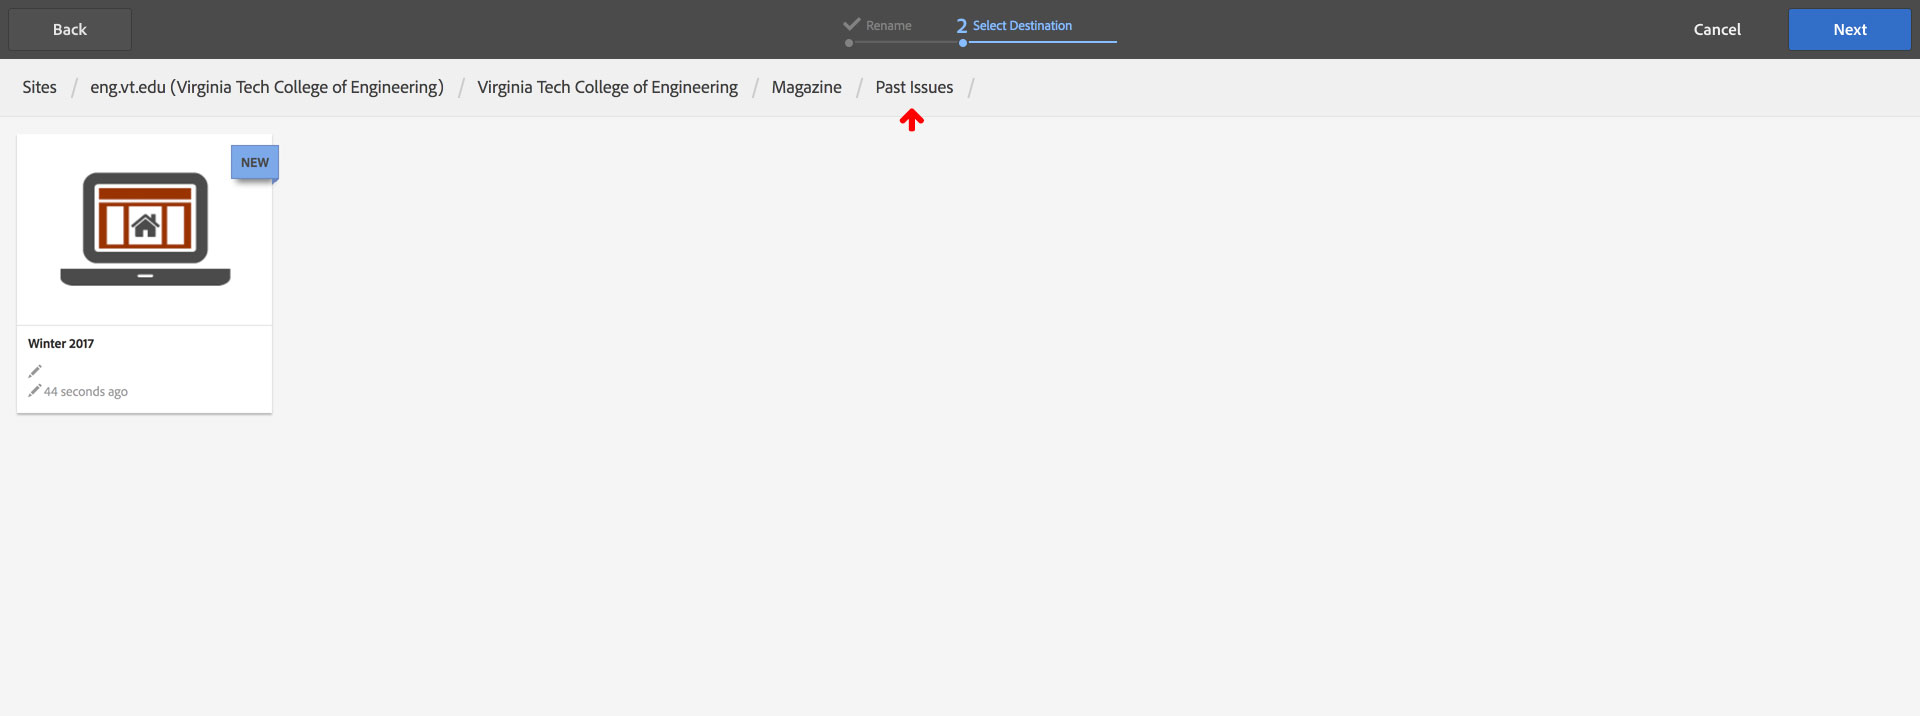
11. Click on "Past Issues" in the breadcrumb list above the page display window
NOTE: The destination for renaming will always be one level back from what is displayed by default
12. Click "Next" in the top-right of the window
13. Click "Next" or "Move" in the top-right of the window

Because the main issue page uses the Home Page template you will need to create a cover image and add it to the Page Properties for the page under the Page Image tab. Create the image with an 8.5 x 11 width to height ratio in Photoshop or the image editing application of your choice and save it so it's no taller than 2000 pixels when exported to JPG format, then follow the next instructions.
1. Log into https://author.ensemble.vt.edu
2. Click on the "My Assets" link in the left-hand menu
3. Click on the site name for the site you want to add the cover image asset
4. Navigate to where you want to store this image or use the "Create Folder" button in the toolbar
5. Click the "Upload Asset(s)" button in the toolbar
6. Select the cover image from the open dialog
7. Click the "Open" button in the dialog after selecting the cover image JPG file
8. Once uploaded, click the checkbox next to the cover image title
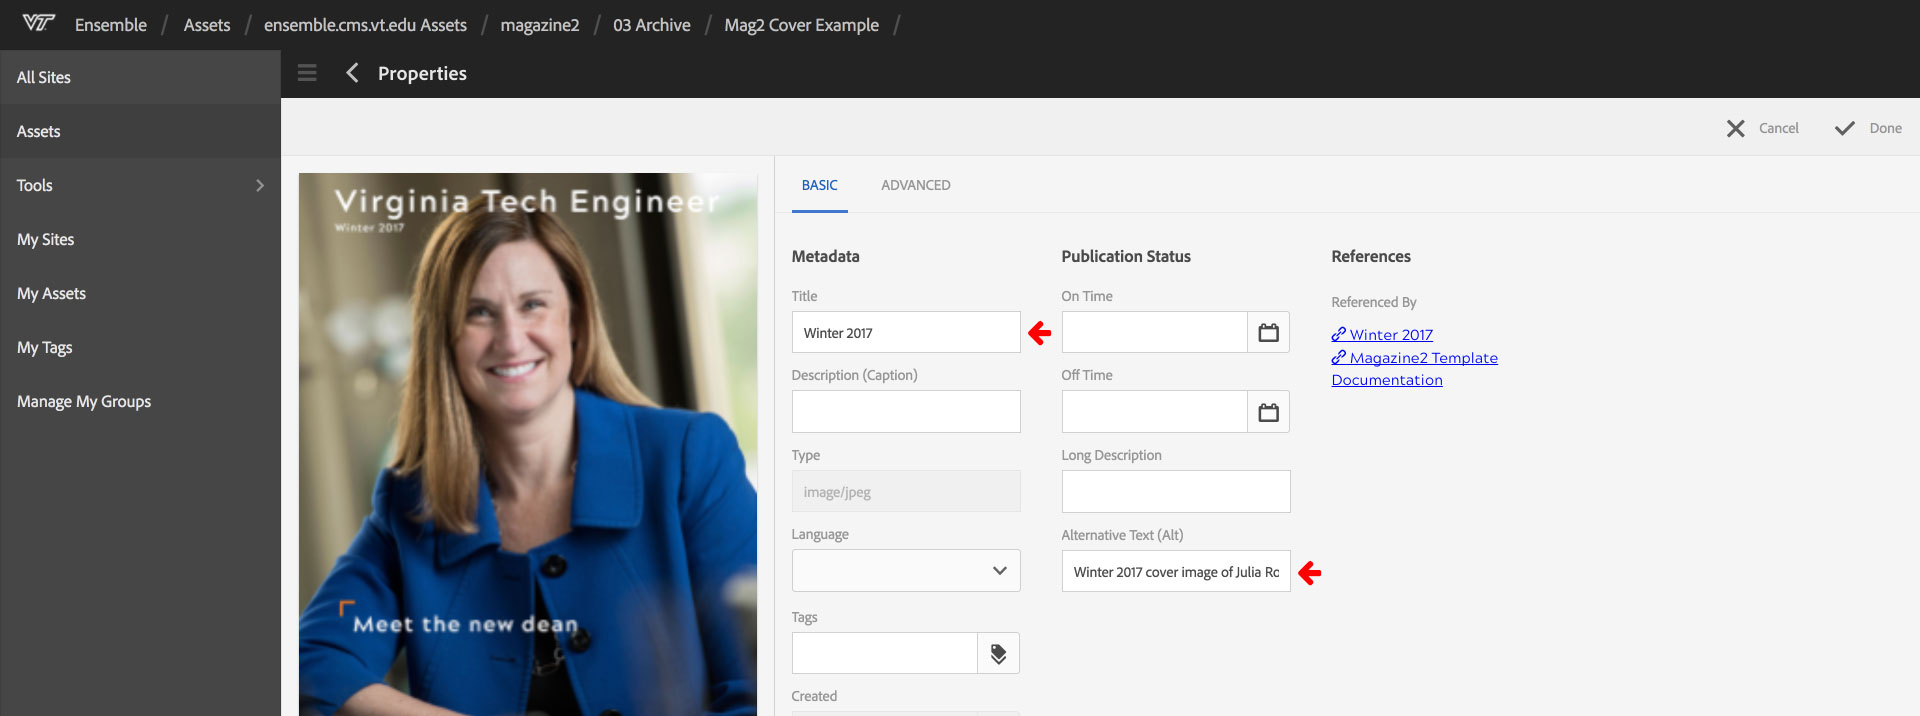
9. Click the "View Properties" button in the toolbar
10. Click the "Edit" button in the top-left of the window
11. Click in the "Title" field and add a title for the cover image, e.g., Winter 2017
12. Click in the "Alternative Text" field and add a text description for the cover image, e.g., Winter 2017 cover image of Julia Ross, dean of the College of Engineering
13. Click the "Done" button in the top-right of the window
1. Log into https://author.ensemble.vt.edu
2. Click on the site name for the site you want to add a magazine to from the My Sites page
3. Click on the title for the "en" page to get to the parent page level of the site
4. Click on the title for the "Magazine" page
5. Click on the title for the "Past Issues" page
6. Click the checkbox next to the issue you want to add the Page Image to
7. Click the "Open" button in the toolbar
8. Make sure the side panel is open and the Assets are visible
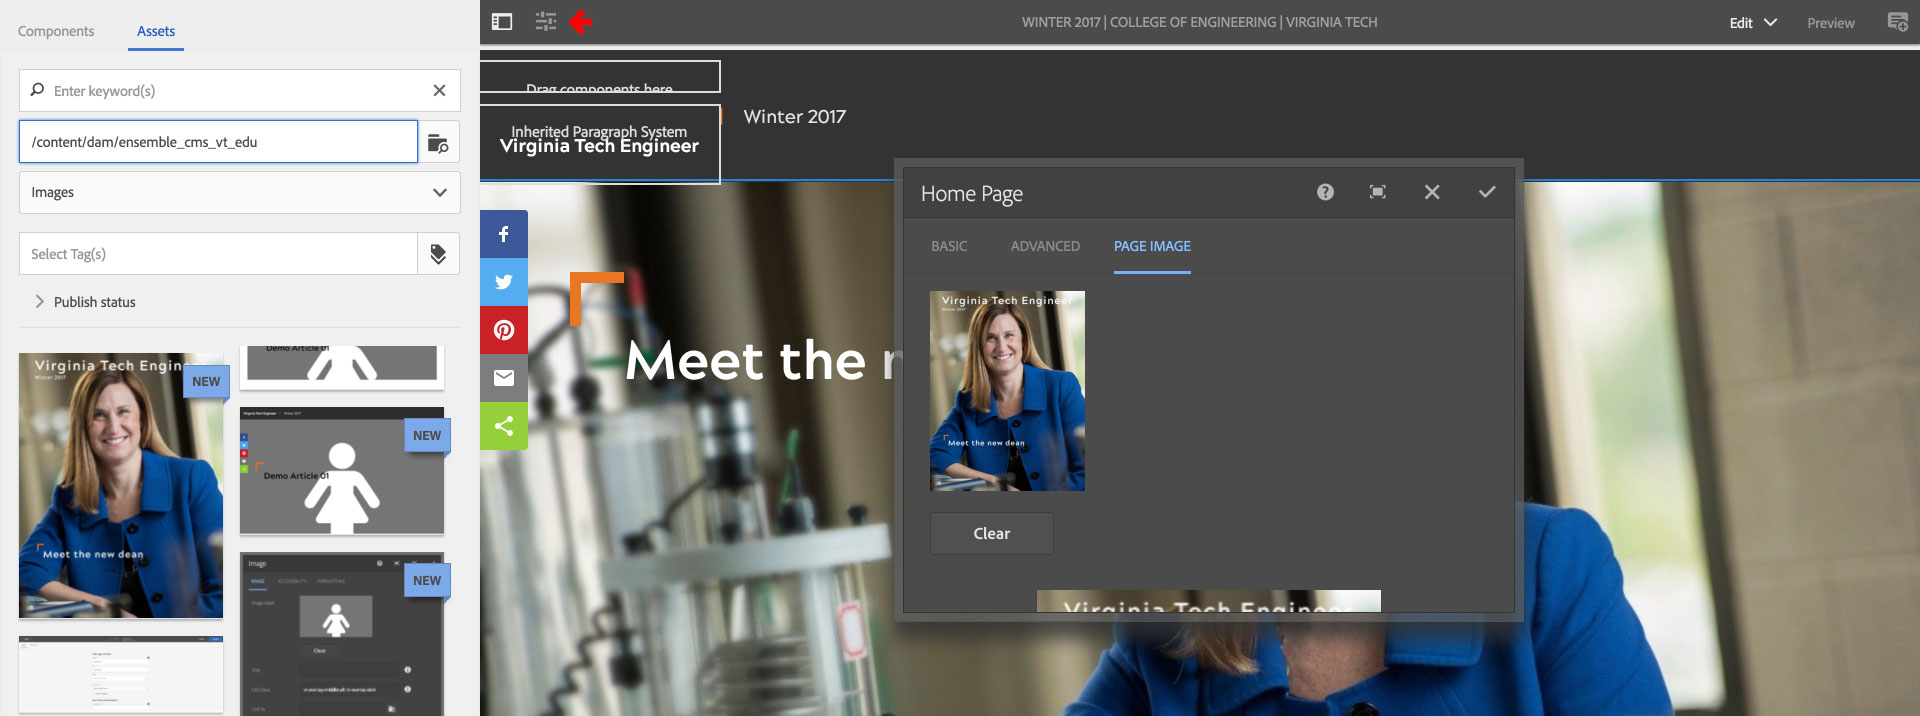
9. Click on the "Page Information" button in the top-left corner of the window
10. Click on "Open Properties" from the Page Information menu
11. Click on the "Page Image" tab
12. Drag and drop the cover image from Assets to the open Page Image tab
13. Click the check mark in the top-right of the dialog to accept the changes
1. Log into https://author.ensemble.vt.edu
2. Click on the site name for the site you want to add a magazine to from the My Sites page
3. Click on the title for the "en" page to get to the parent page level of the site
4. Click on the title for the "Magazine" page
5. Click on the checkbox next to the title for the "Past Issues" page
6. Click on the "Open" button in the toolbar
7. Drag and drop a "Container" component into the body from the Components side panel
8. Click the container component to open its toolbar
9. Click the wrench icon in the toolbar
10. Click in the "CSS Class" field and type: vt-mag-sections
11. Click the checkmark in the top-right of the dialog to accept the change
12. Drag and drop another "Container" component inside the first one
13. Drag and drop a "Text" component into the inner-most container
14. Click the text component to open its toolbar
15. Click the wrench icon in the toolbar
16. Click in the "CSS Class" field and type: vt-list-header vt-corner
17. Click the checkmark in the top-right of the dialog to accept the change
18. Click the text component again to open its toolbar
19. Click the pencil icon in the toolbar to enter edit mode
20. Click the expand icon third from the right in the toolbar
21. Click the text element type button, second from right in the toolbar and select: Heading 2
22. Type: Past Issues
23. Click the collapse icon, far right in the toolbar
24. Click the checkmark far right in the toolbar
26. Drag and drop a "List" component under the text component in the inner-most container
27. Click the list component to open its toolbar
28. Click the wrench icon in the toolbar
29. Click the "CSS Class" field and type: vt-mag-sectionStoryList
30. Set the "Build list using" pulldown to: Child pages
31. Click in the "Children of" field and type: /content/sitename_vt_edu/en/magazine/issues
32. Set the "Order by" pulldown to: Created Date
33. Click the "Include Hidden Pages" checkbox
34. Click on the "Display Options" tab at the top of the dialog box
35. Set the "DisplayType" pulldown to: Column(s)
36. Set the "Number of Columns" pulldown to: 3
37. Set the "Image Position" pulldown to: Top
38. Set the "Title" pulldown to: Show
39. Click the checkmark in the top-right of the dialog to accept the changes
Follow the instrucitons in the "Site Level Needs section", Create the magazine tags to create a new tag under "Issues".
1. Log into https://author.ensemble.vt.edu
2. Click on the site name for the site you want to add a magazine to from the My Sites page
3. Click on the title for the "en" page to get to the parent page level of the site
4. Click on the title for the "Magazine" page
5. Click the checkbox next to the "index" page title
6. Click the "View Properties" button in the toolbar at the top of the window
7. Click the "X" next to the tag name below the "Tags" field for the previous issue title to remove the tag
8. Click in the "Tags" field and type the issue tag title for the new magazine, e.g., Spring 2018
9. Click on the matching tag in the list below the "Tags" field
10. Click the "Done" button in the top-right of the window
Follow the instructions in the "Site level needs" section 4.d, Create the /magazine/stories/[current issue] page to create the new article folder.
You will need to update the List components on the /magazine/index page so that their "Parent page" path points at the new issue article folder. You can edit the path by clicking in the field and then using the arrow keys on the keyboard to scroll to the portion of the path that needs to be updated, e.g.,
FROM:
/content/sitename_vt_edu/en/magazine/stories/winter-2017
TO:
/content/sitename_vt_edu/en/magazine/stories/spring-2018
You can now create new Article Page template pages under the /magazine/stories/[current issue] page for the new issue.
Article page features
Article pages within this magazine template have many features that are comprised of components and CSS classes that are added to them. The following section of the document outlines what these features are and how to implement them within your article pages.
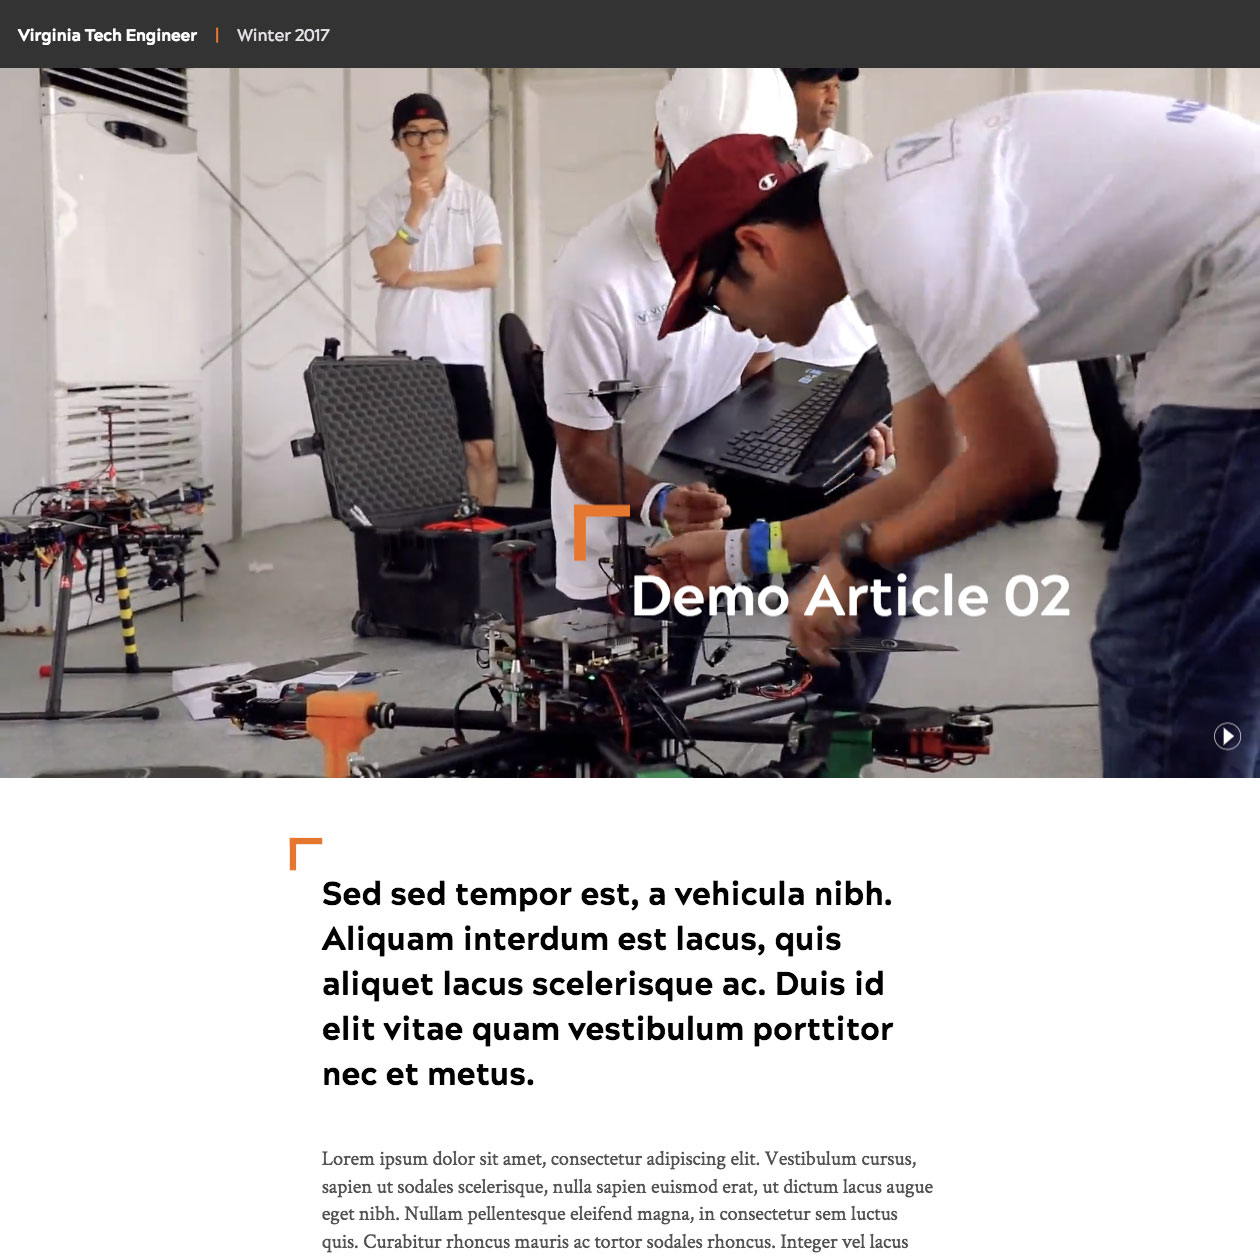
Article image hero/Parallax hero

This is the image that resides at the top of the article, and is pulled from to populate the list on the home page.
- Click on the image component at the top of the page to open its toolbar
- Click the wrench icon in the toolbar
- Click on the "Assets" tab in the side panel
- Drag and drop an image into the open image component dialog
- If parallax feature is desired, click in the "CSS Field" and type: vt-mag-parallaxHeader
- Click the checkmark in the top-right of the dialog to accept the changes
- Give the image alternative text in the "Accessibility" tab if prompted and repeat step 6


Video hero

If wish to use a video hero in place of the embedded image component on an story page:
- Drag and drop a "HTML" component below the empty embedded image component
- Click on the html component to open its toolbar
- Click the wrench icon in the toolbar
- Click in the “CSS Class” field and type: vt-mag-vidHeader
- Click In the “HTML” field and paste the code snippet below
- Select the "videoSource" link text between the quotes and replace with the path to your video in the site's assets folder, e.g., /content/dam/sitename_vt_edu/video.mp4
- Select the "videoHeader" text between the quotes and replace with your text header
NOTE - If this option is skipped the video will appear without a heading overlay - Select the "videoCaption" text between the quotes and replace with your text caption
NOTE - If this option is skipped the video will appear without a caption below the heading overlay - Check to make sure the items above are contained in quotes ("") and add if necessary
- If parallax feature is desired, click in the "CSS Field" and type: vt-mag-parallaxHeader
- Click the checkmark in the top-right of the dialog to accept the changes
Video hero code
<!-- copy everything below -->
<script>
var videoSource = "/content/dam/path/to/your/video.mp4",
videoPoster = "/content/dam/alumni_vt_edu/video/helmet-research-poster.jpg",
videoHeader = "",
videoCaption = "";
</script>
<video playsinline="" autoplay="" loop="" id="vt_bgVid" muted="">
</video>
<div class="vt-vidPlayPause" onclick="javascript:playPause();"></div>
<div class="vt-vid-overlay-column">
<div class="vt-vid-overlay-row">
<div class="vt-vid-overlay">
<span class="vt-vid-header"></span>
<p class="vt-vid-subhead"></p>
</div>
</div>
</div>
<!-- copy everything above -->


Article image overlay

This is the page title, which is pulled from the page properties. Its positioning and color are controlled by a CSS class on the article image.
- Click on the embedded image component at the top of the article page to open its toolbar
- Click the wrench icon in the toolbar
- Click in the “CSS Class” field and type: vt-overlay-[title position] vt-overlay-[shade]
- Note - These classes are variable, and are used to control the display of the title over the image
- Title position options:
- vt-overlay-topLeft
- vt-overlay-topRight
- vt-overlay-bottomLeft
- vt-overlay-bottomRight
- vt-overlay-middleLeft
- vt-overlay-middleRight
- Shade options:
- vt-overlay-light
- vt-overlay-dark
- Click the checkmark in the top-right of the dialog to accept the changes


The subtitle is populated from the page properties. To enter a subtitle on an open page:
- Click on the "Page Information" button
- Click on "Open Properties" from the Page Information menu
- Click in the “Subtitle” field and type or paste your subtitle
- Click the checkmark in the top-right of the dialog to accept the changes


The byline is populated by the Ensemble Biography pages and page properties.
To establish the byline of an article page that is open:
- Click on the "Page Information" button in the top-left corner of the window</li>
- Click on "Open Properties" from the Page Information menu
- Click the “Article Info” tab
- Click in the "Bios" field and start typing the author's name OR click the "Bios" pulldown button to list all authors with biography pages on this site
- Click on the author's name that appears under the "Bios" field
- Click the checkmark in the top-right corner of the dialog to accept the changes


These are images that break up the text and span the full-width of the page.
- Scroll the page to a break between two components
- Drag and drop a "Container" component between the two components.
- Click the container component to display its toolbar
- Click the wrench icon in the toolbar
- Click the “Full Browser Width” checkbox
- Click the checkmark in the top right of the dialog to accept the changes
- Drag and drop an "Image" component into the container
- Click the container component to display its toolbar
- Click the wrench icon in the toolbar
- Click on the "Assets" tab in the side panel
- Drag and drop an image into the open image component dialog
- Click the checkmark in the top-right corner of the dialog to accept the changes
- Give the image alternative text in the "Accessibility" tab if prompted


These are elements that break outside of the width of the body text. This is done to add interest to the layout when needed.
- Scroll the page to a break between two components
- Drag and drop a "Container" component between the two components.
- Click the container component to display its toolbar
- Click the wrench icon in the toolbar
- Click in the “CSS Class” field and type: vt-mag-outdent
- Click the checkmark in the top-right of the dialog to accept the changes
- Drag and drop desired component(s) into the container and configure as needed


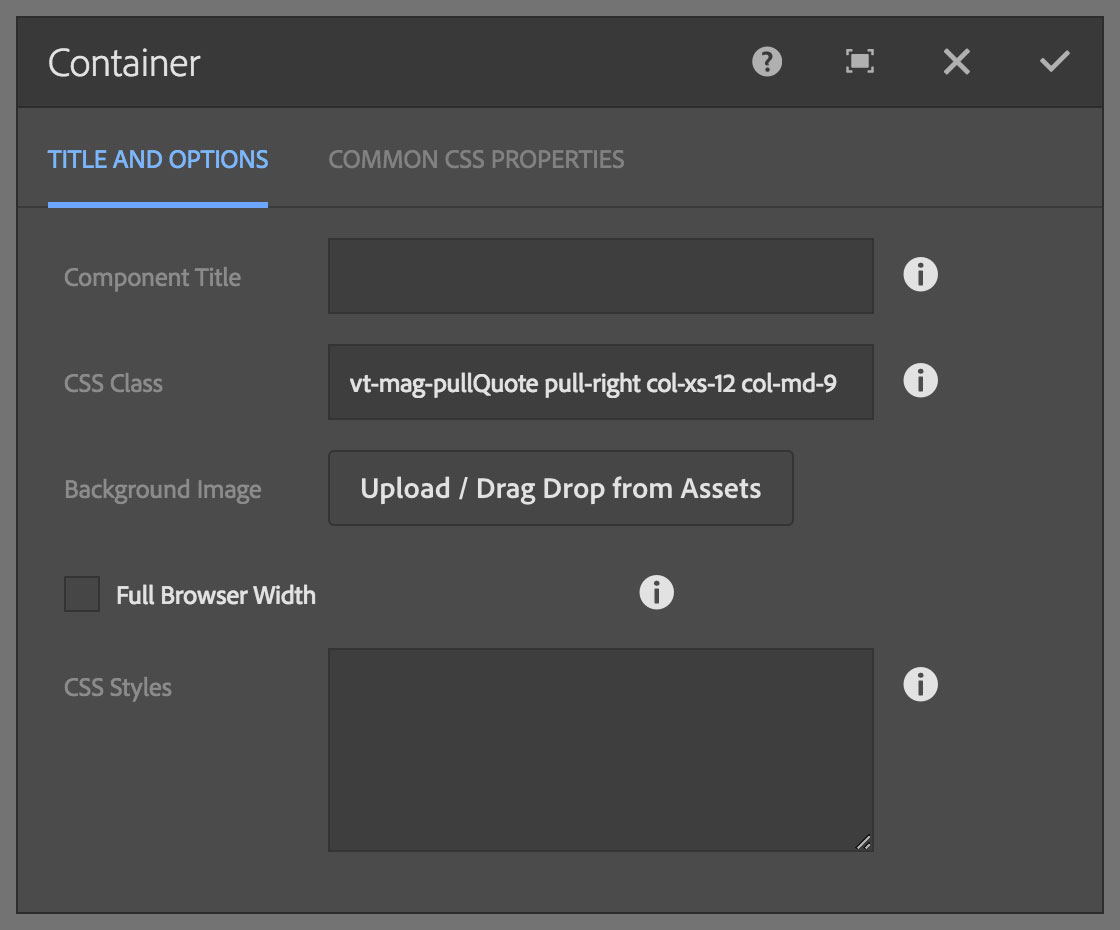
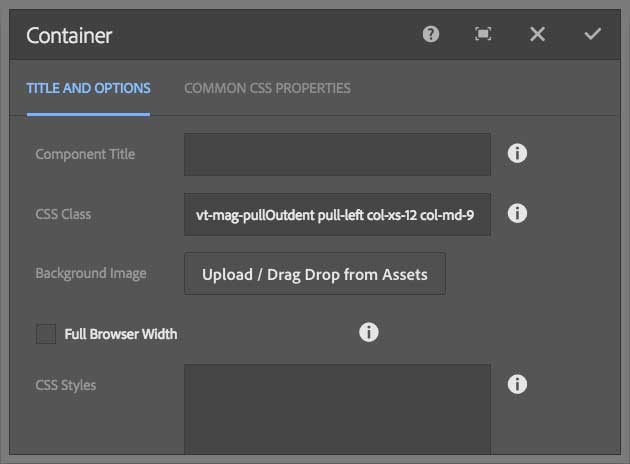
Pulled items have two different style types. There’s the vt-mag-pullQuote class that will add the corner decorations to the container and a vt-mag-pullOutdent class that does not have decorations. In order to style the quote or general text in the pulled item, that component will need two classes, quote-item quote-text, if it is a quote with attribution a second text component with the classes quote-item attribution assigned to it is needed. If creating a side bar using the vt-mag-pullOutdent class on the container you can place any other components into the container to be pulled left or right. To use the same text treatment, simply add the quote-item quote-text classes to the text component you want styled similarly.
The position and size of the pulled item is determined by Bootstrap classes:
- pull-right OR pull-left -- position of pulled item
- col-xs-12 col-md-9 -- width of pulled item at mobile and desktop sizes, respectively
To start a pulled item:
- Drag and drop a "Container" component on the page where desired
- Click on the container component to open its toolbar
- Click the wrench icon in the toolbar
- Click in the "CSS Class" field and type: vt-mag-pullQuote OR vt-mag-pullOutdent
- Type the position and size classes into the Container CSS Class field, e.g., pull-right col-xs-12 col-md-9
- Click the checkmark in the top-right of the dialog to accept the changes
If creating a decorated pull quote:
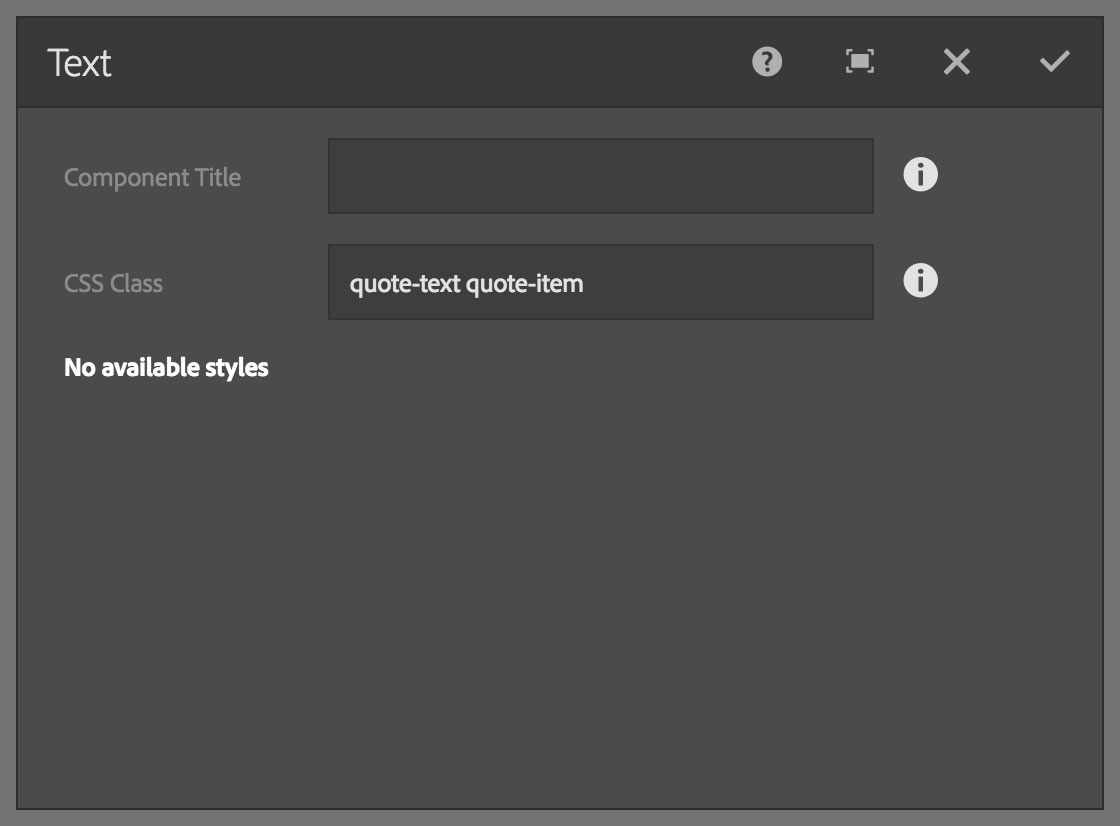
- Drag and drop two "Text" components into the Container component
- Click on the first text component to open its toolbar
- Click the wrench icon in the toolbar
- Click in the "CSS Class" field and type: quote-item quote-text
- Click the checkmark in the top-right of the dialog to accept the changes
- Click on the first text component to open its toolbar
- Click on the pencil icon in the component toolbar to enter edit mode
- Type the quote text
- Click the checkmark far right in the toolbar
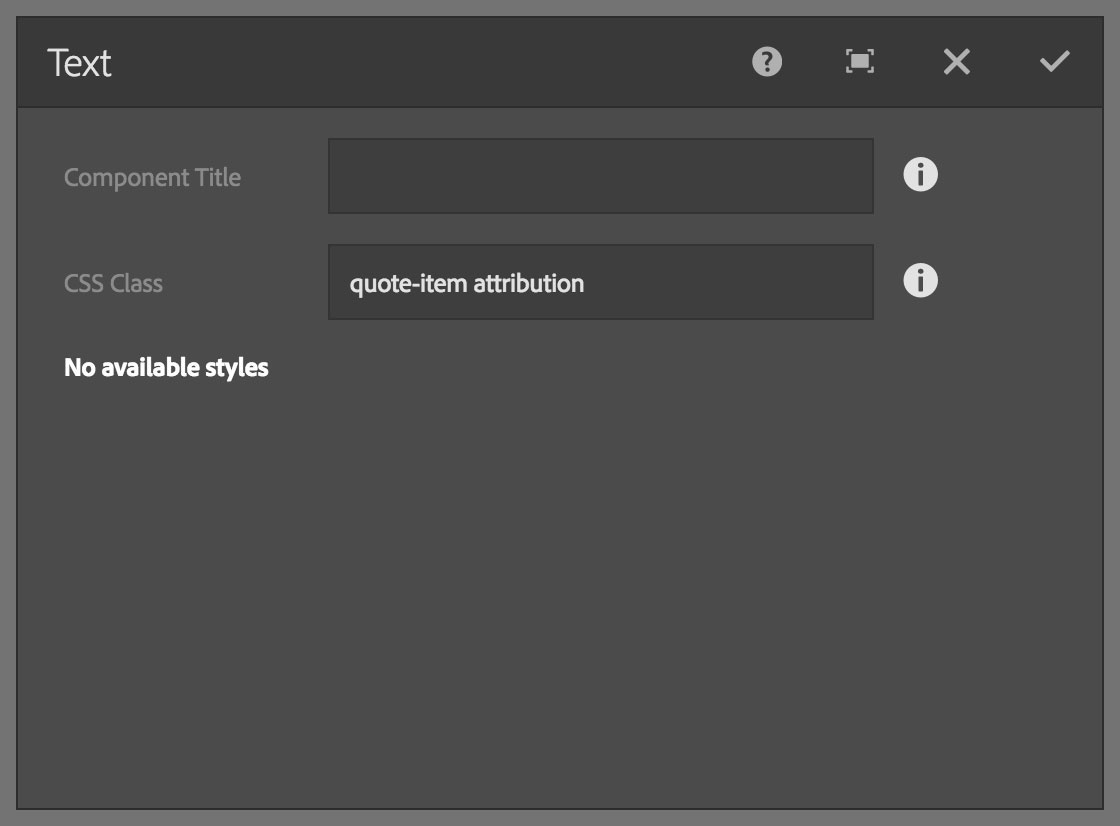
- Click on the second text component to open its toolbar
- Click the wrench icon in the toolbar
- Click in the "CSS Class" field and type: quote-item attribution
- Click the checkmark in the top-right of the dialog to accept the changes
- Click on the first text component to open its toolbar
- Click on the pencil icon in the component toolbar to enter edit mode
- Type the attribution text
- Click the checkmark far right in the toolbar
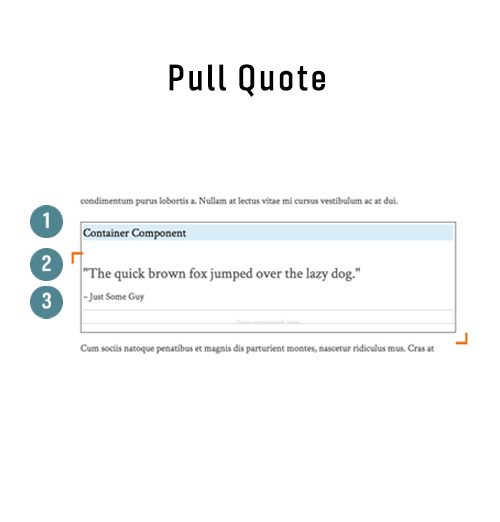
Pull Quote Config Dialogs

Pull Outdent (side bar) Config Dialogs
The image component does not need an additional class.

This is the decoration on the last paragraph of the article, signifying the end of the piece.
- Scroll to the last text component on the page
- Click the last text component to open its toolbar
- Click the wrench icon in the toolbar
- Click in the “CSS Class” field and type: vt-mag-articleClose
- Click the checkmark in the top-right of the dialog to accept the changes


At the end of your piece, you may want to have a section that tells the reader to do something. This is the call-to-action text.
- Scroll the page to the last component
- Drag and drop a "Text" component below the last component on the page
- Click the text component to display its toolbar
- Click on the wrench icon in the toolbar
- Click in the “CSS Class” field and type: vt-mag-callToAction
- Click the checkmark in the top right of the dialog to accept the changes
- Click the text component to display its toolbar
- Click on the pencil icon in the toolbar
- Type the call to action text
- Click the checkmark in the text component toolbar to accept the changes


The last content in an article is a list of related articles. This helps the user to continue exploring the magazine without returning to the home page to select a new story.
- Scroll the page to the last component at the bottom of the page.
- Drag and drop a "Container" component underneath the last text component.
- Click on the container component to open its toolbar
- Click the wrench icon in the toolbar
- Click in the “CSS Class” field and type: vt-mag-articleEnd
- Click the "Full Browser Width" checkbox
- Click the checkmark in the top-right of the dialog to accept the changes
- Drag and drop another "Container" component inside the first container.
- Click on the container component to open its toolbar
- Click the wrench icon in the toolbar
- Click in the “CSS Class” field and type vt-mag-horizontalRule
- Click the checkmark in the top-right of the dialog to accept the changes
- Drag and drop a "List" component inside the inner container
- Click the wrench icon to open the list component’s edit properties window
- Click in the “CSS Field” and type: vt-mag-sectionStoryList
- Set the “Build list using” pulldown to: Tags
- Click the “Parent Page” file browser button, and select the parent page to use.
- Click in the "Limit" field and type: 3
- Click the checkmark in the top-right of the dialog to accept the changes


Image and gallery components can have a parallax effect, whereby the image moves at a different speed than the scrolling of the page.
Gallery parallax
- Drag and drop a "Gallery" component into the body
- Click the gallery component to open its toolbar
- Click on the wrench icon in the toolbar
- Click in the “CSS Class” field and type: vt-parallax
- Set the “Gallery Type” pulldown to: Carousel
- Set “Play Speed” to: 0
- Set the “Controls Type” pulldown to: Hidden
- Click the checkmark in the top-right of the dialog to accept the changes


Image parallax
- Drag and drop an "Image" component into the body
- Click on the image component to open its toolbar
- Click on the wrench icon in the toolbar
- Click the "Assets" tab in the side panel
- Drag and drop an image into the open image component dialog
- Click in the “CSS Class” field and type: vt-parallax
- Click the checkmark in the top-right corner of the dialog to accept the changes
- Give the image alternative text in the "Accessibility" tab if prompted and repeat step 7


Multicolumn components are normally evenly spaced. If you need different sized columns in your layout, you have more options. These are applied using CSS classes on the multicolumn component.
- Drag and drop a "Multi Columns" component into the body
- Click the multi columns component to open its toolbar
- Click on the wrench icon in the toolbar
- Click in the “CSS Class” field and type: vt-mag-[custom column name]
- Custom column names vary. Here are all the options:
vt-mag-2col-md-6-only
vt-mag-2col-7-4-offset-1
vt-mag-2col-4-7-offset-1
vt-mag-2col-7-5
vt-mag-2col-5-7
vt-mag-2col-8-4
vt-mag-2col-4-8
vt-mag-2col-9-3
vt-mag-2col-3-9
- Custom column names vary. Here are all the options:
- Click the checkmark in the top-right of the dialog to accept the changes


You can insert a video that autoplays and is full-width.
- Scroll the page to a break between two components
- Drag and drop a "Container" component in-between the two text components in the body
- Click the container component to open its toolbar
- Click on the wrench icon in the toolbar
- Click the "Full Browser Width" checkbox
- Click the checkmark in the top-right of the dialog to accept the changes
If using a looped local video uploaded to assets:
- Drag and drop a "HTML" component inside the container
- Click the container component to open its toolbar
- Click on the wrench icon in the toolbar
- In the “HTML” field, enter the HTML source code (listed below). Note - replace the path to the video file with the path to your video.
- Click the checkmark in the top-right of the dialog to accept the changes
If using YouTube or other externally hosted video:
- Drag and drop a "Media - External" component into the full width container
- Click on the media external component to open its toolbar
- Click on the wrench icon in the toolbar
- [Need more screenshots and steps for this component]
Full width looped video code
<!-- copy everything below -->
<video src="/content/dam/sitename_vt_edu/video.mp4" playsinline="" autoplay="" loop="" class="vt-bgVid" id="vid01" muted=""></video>
<div class="vt-vidPlayPause" onclick="javascript:playPause('vid01');"></div>
<!-- copy everything above -->

